background image


User Manual 

for Azooga 10 in 1 Multi-game table 


Summary of Contents for 10 in 1

Page 1: ...1 User Manual for Azooga 10 in 1 Multi game table...

Page 2: ...ore assembling WARNING CHOKING HAZARD Small parts Not for children under 5 yrs Directions A Begin with the assembly of the pool table 1 Remove all of the pieces from the packaging Separate and identif...

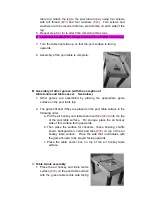
Page 3: ...re assembled by placing the appropriate game surface on the pool table top 2 The games fit best if they are placed on the pool table surface in the following order a Put the air hockey and table tenni...

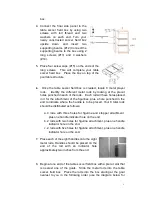
Page 4: ...ead 23 e 8 washers 24 f 8 metal player figurine rods 4 7 g 11 red player figurines 21 h 11 blue player figurines 21 i 8 handle pieces 8 j 8 metal rod end caps 9 k 16 foam stoppers 16 l 32 plastic wash...

Page 5: ...tachment of the figurines plus a hole punched in the end to indicate where the handle is to be placed Your 8 total rods should be distributed as follows a 4 rods with three holes for figurine and stop...

Page 6: ...ch of the rods Locate the goalie rod or the rod next to the goal that you began the rod insertion process with three figurine hole rod handle on the right side 10 Slide the rod partially back out of t...

Page 7: ...ach the goalie rod stopper by using one of the threaded screws 17 Attach the red figurine to the center hole using a small metal screw 18 Attach the remaining goalie rod stopper in the third hole usin...

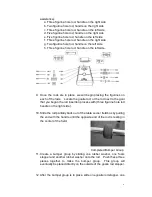
Page 8: ...ut holes 27 Attach the red figurines to the two precut holes in the rod using two small metal screws Bumper Group Placement 28 Slide both bumper groups so that they are positioned on the rod directly...

Page 9: ...side see photo to the right Bumper Group Placement 38 Place an end cap on the unfinished end of the rod 39 40 Locate the next rod Five figurine hole rod handle on the right side Slide this rod partial...

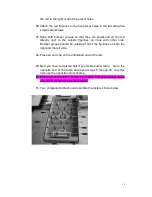
Page 10: ...umper groups should be outside of all of the figurines on both the right and the left side 48 Place an end cap on the unfinished end of the rod 49 Now you have completed half of your table soccer tabl...

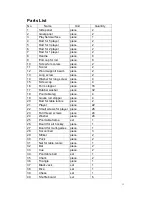
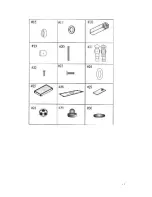
Page 11: ...ap piece 4 16 Form stopper piece 16 17 Rubber washer piece 32 18 Pool table leg piece 4 19 Goalie rod stopper piece 4 20 Rod for table tennis piece 2 21 Player piece 22 22 Small screws for player piec...

Page 12: ...2 Spanner piece 2 43 Spanner with inner hexagon piece 1 44 Leveler piece 4 45 Table tennis ball piece 2 46 Screw driver piece 2 47 Dice cup piece 1 48 Bowling ball piece 1 49 Bowling bottle piece 6 Gr...

Page 13: ...13...

Page 14: ...14...

Reviews: