www.aztectent.com
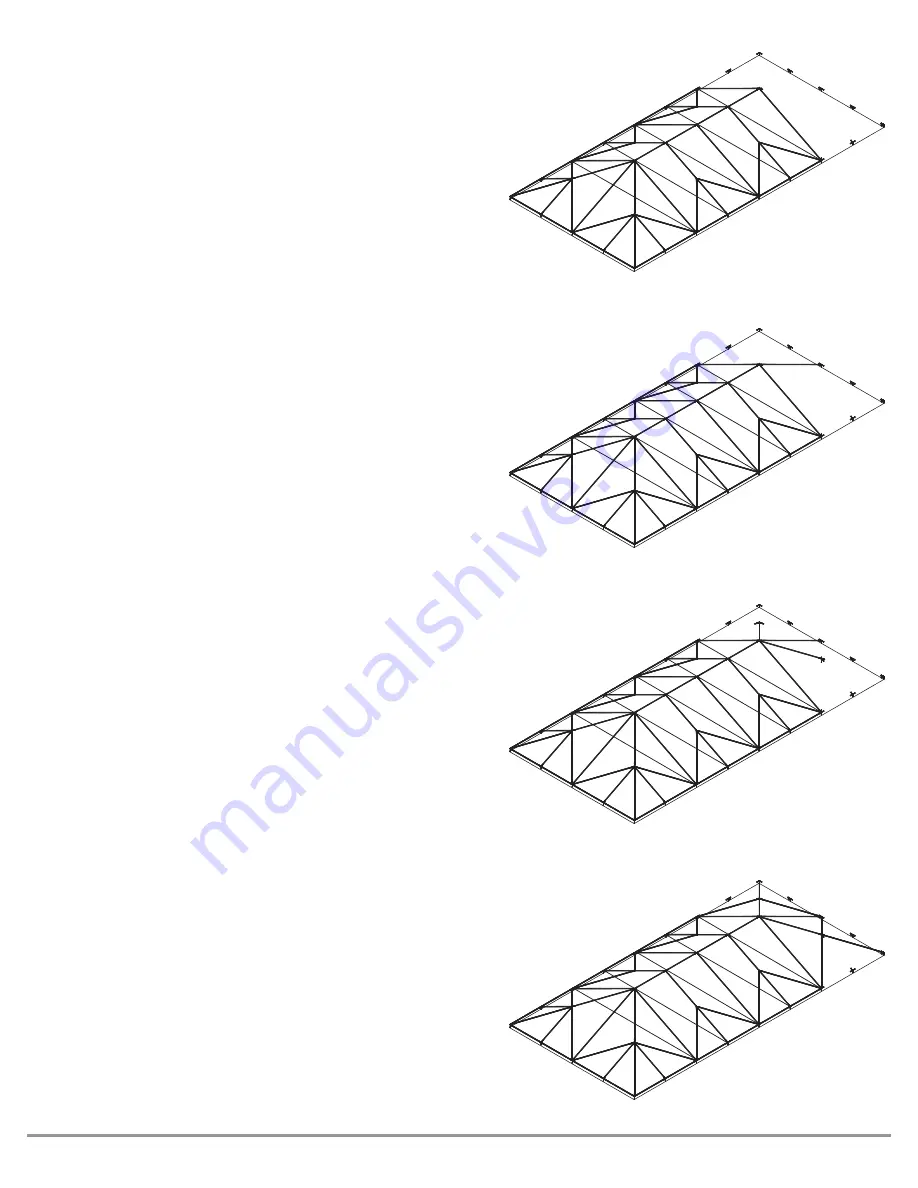
Step 13:
Continue building additional extensions in the same manner until you
reach your last main beam arch. This arch will utilize a 6 way crown to
allow connection of the opposing hip end framing for the remaining
portion of the tent frame.
Step 14:
Start building the hip end frame by connecting and pinning the end
rafter pipe to the 6pt Crown fi tting.
Step 15:
Begin assembling the hip end of one side of the tent. Connect and pin
the hip rafter pipe to the crown fi tting. For 20’ wide and smaller units
this pipe will extend to the corner of the frame. For 30’ wide tents the
hip rafter will also extend to the corner but you will also need to slide
the 30’ Slide Hip Intermediate fi tting to the midpoint of this frame
pipe. This fi tting can lock into place by turning the thumb screw under
the bottom of the fi tting. For the 40’ wide system the hip rafter is
constructed with two 14’4” pipe with the 40’ Hip Intermediate fi tting as
a connector in the center of this span.
Step 16:
Connect and pin the hip brace pipes. These are only used on 30’ wide
and 40’ wide units. Connect fi rst at the hip intermediate fi tting, then
connect and pin to the special side tee at the bottom of your primary
beam arch.
Summary of Contents for QWIK-TOP FRAME
Page 1: ...QWIK TOP FRAME PRODUCT MANUAL If YOU can IMAGINE it WE can BUILD it...
Page 17: ...www aztectent com...
Page 18: ...www aztectent com...
Page 20: ...www aztectent com...
Page 21: ...www aztectent com...
Page 31: ...www aztectent com...
Page 32: ......


