SOLID SURFACE TUB INSTALLATION INSTRUCTION
60 Shorncliffe Rd., Toronto, Ontario M8Z 5K1
Telephone: (416) 231-9030 - Fax: (416) 231-0929
Customer Service:
(416) 231-5790
1-800-
(647-6546)
Fax, Canada: 1-800-463-2236
MIROLIN
08 Feb. 2012
After the level has been set, tighten the nut in a new position.
This will secure the feet in a place so that they do not move.
Connect the bathtub drain to the floor drain. Check and
water test all connections.
Take special care when putting the bathtub over the drain
hole, not to scratch the floor surface.
Mirolin Industries does not warrant leaks related to improper
installation of drain assembly.
This tub does not have leveling feet. Place the tub the
designated area making sure the floor surface is level prior
to placing the tub over the drain.
This tub goes against the wall. Place the tub up against the
wall tight and seal with a bead of mildew resistant silicone.
Note for the Nerissa (FSW 104) model
Note for the Melody (FSM 106) model
Note:
The floor must be leveled prior to setting the tub
in final position.
Using a clear mildew resistant silicone, apply a silicone
bead to seal between the base of the bathtub and the floor.
This will ensure that no water seeps underneath the
bathtub.
Mirolin Solid Surface products are easy to clean: after each
use, simply wipe with a soft cloth to remove any surface
dirt.
For day to day cleaning of both glossy and matte finishes,
we recommend using of widely available mild soap
cleaning products.
Never use petroleum-based products when cleaning, such
as paint thinners or other solvents as they may damage the
solid surface.
Note: Personal hygiene products and cosmetics will Not
damage the surface.
For Gloss surface
products only:
To repair scratched or damaged surfaces, sand the area
using 600 -, 800 - and 1200 - grit sandpaper, beginning
with the lower number (coarser) grit and then following with
the higher number ( finer) grit in ascending order. Finish by
polishing the surface using a cloth and white polishing
compound for automobiles.
CLEANING AND MAINTENANCE
Scratched or Damaged Surfaces -
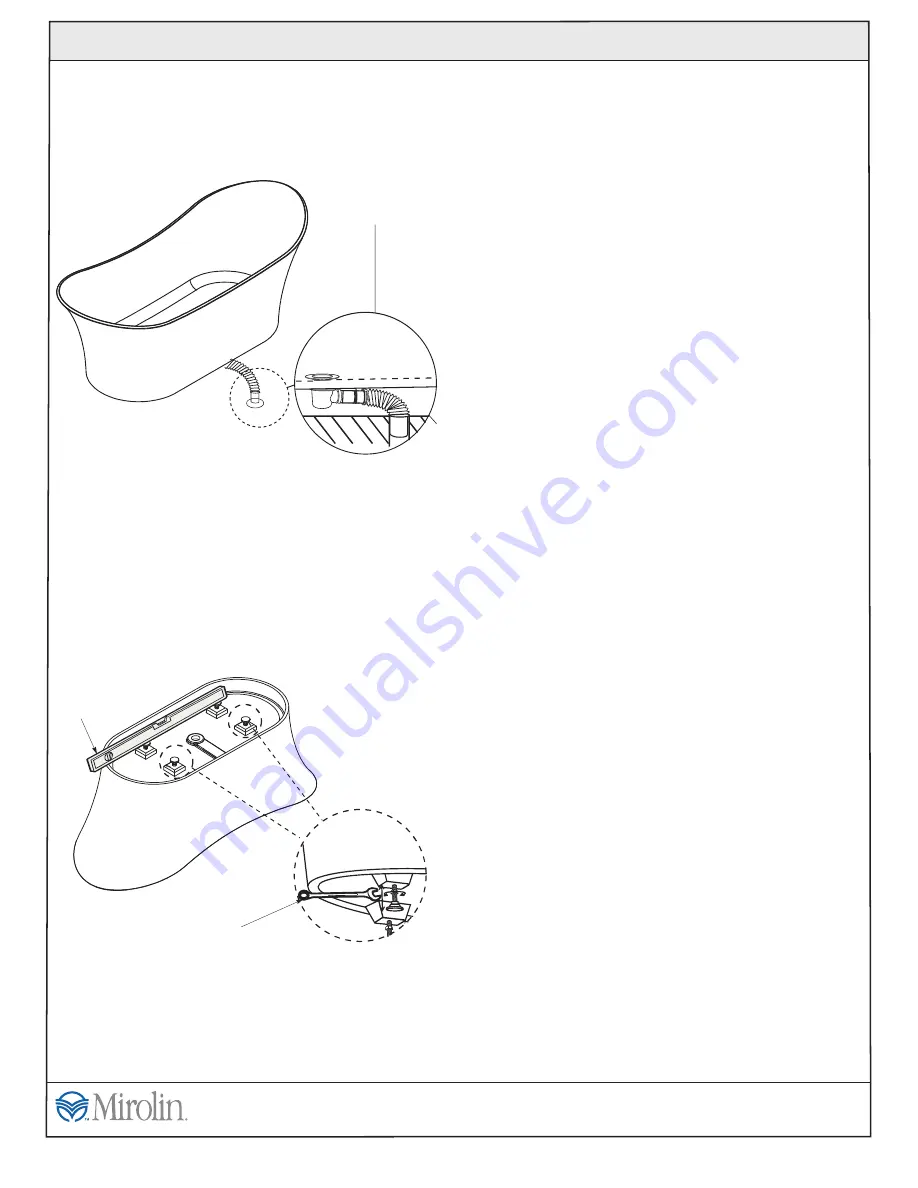
LEVEL
WRENCH 3/4”
(19 mm)
FIGURE 3
Note:
Use a level to ensure accuracy.
BATHTUB INSTALLATION
For bathtubs with adjustable feet
Lay bathtub upside down on a blanket or cardboard to
protect the solid surface finish.
Use the 4 levelers supplied to ensure the tub is level. All four
levelers must touch the ground to ensure the tub will not shift
or move. When adjusting the levelers, allow for a slight
clearance (1/16”) between the floor and the apron.
Reference figure 3.
We want you to be completely satisfied with our products and service. If you have any comments or
suggestions, please call
toll free.
1-800-MIROLIN
2
Attention:
The
drain on the bathtub model
Nerissa
(FSW104) and Lorelie (FSW107) are positioned lower
than the tub base. To avoid damaging the pipes: plan for the
necessary free space underneath
the floor before
installing the bathtub, reference figure 2.
FIGURE 2
The bath must be level along the top edges in both
directions to ensure proper drainage.


