background image

Avant stérilisation, essuyer l’extérieur de la pièce à main.

•  Lubrifier l’instrument et l’essayer pendant quelques secondes.

•  Mettre l’instrument dans un sachet de stérilisation lorsque vous uti-

lisez un stérilisateur à air vide, ne pas mettre plusieurs instruments 

dans le même sachet.

•  Stériliser l’instrument à une température de 121degrés C pendant 20 

minutes ou à 135 degrés C pendant 15 minutes.

Déconnexion

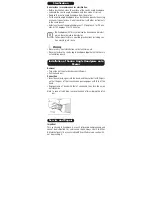
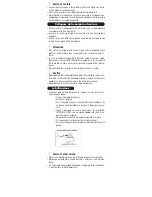
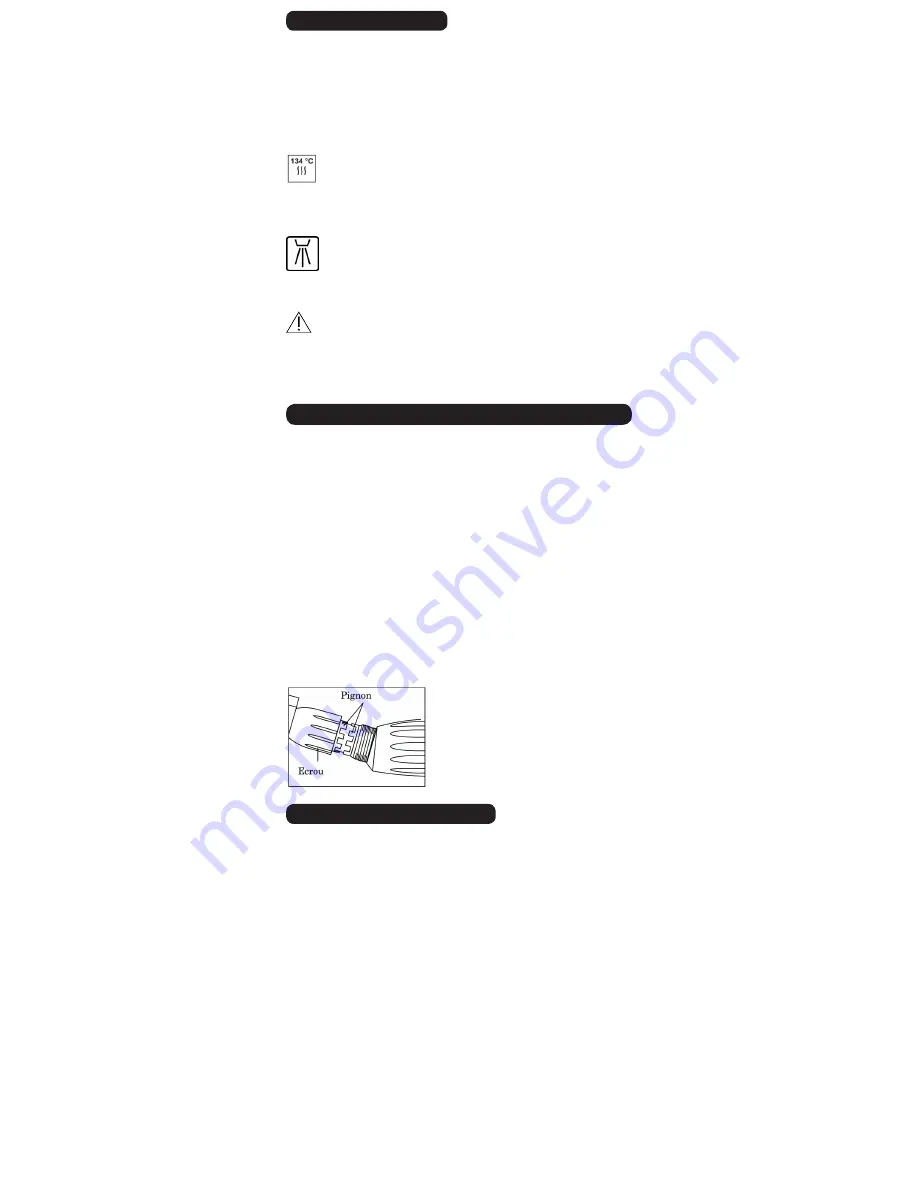
•  Desserrer l’écrou de la tête (voir schéma ci-dessous) en tournant 

dans le sens contraire des aiguilles d’une montre à l’aide de vos 

doigts.

• Retirer la tête

Connexion

• Insérer l’arbre de transmission dans la tête et faite le tourner man-

uellement de façon que l’arbre de transmission et le pignon de tête 

soient engage proprement.

•  Assembler la tête avec le pignon inferieur de l’arbre de transmission 

et le pignon du corps et ensuite resserrer l’écrou en tournant dans le 

sens des aiguilles d’une montre à l’aide de vos doigts.

Note:  Dans le cas d’une tête à baïonnette, desserrer la tête après avoir 

ouvert la pince à l’aide de la baïonnette (vers l’extérieur).

Important

Le contre-angle Ultimate de BA International est un instrument de pré-

cision et ne peut pas être démonté/réparé par un tiers. Pour la répara-

tion ou maintenance de votre instrument retourner votre instrument à 

BA International, une filiale BA ou un centre de réparation certifié par 

B.A. International. 

•  Les Instruments BA avec ce symbole sont nettoyable et de-

sinfectable avec un thermodésinfecteur.

•  Suivez attentivement les instructions données dans votre 

manuel d’utilisation incluant les remarques et les mises en 

garde etc... 

•  Les Instruments BA avec ce symbole sont stérilisable à 134 

degrés C dans un autoclave. 

•  Un autoclave est recommande pour la stérilisation de vos 

instrument

Stérilisation

 Attention

•  Ne jamais utiliser un stérilisateur à air sec, stérilisateur à froid etc…

•  Ne jamais stériliser plusieurs instruments dans la même poche de 

stérilisation. 

Connexion / Déconnexion de la tête 

Réparation et Maintenance

Summary of Contents for Ultimate BA101

Page 1: ...l the way until the end of bur shank touches the back of the chuck Swing the latch plate back until it is fixed with a snap at the centre position of the collar of the contra angle head Push the pushbutton with thumb to open chuck and then remove the existing bur blank Push the pushbutton with thumb and then insert a bur into the chuck hole Release the pushbutton with thumb when the end of the bur...

Page 2: ...hol soaked soft tissue or cotton swab Keep the contra angle handpiece in a horizontal position and inject BA ULTIMATE SPRAY for three seconds through the back end of the contra angle handpiece using the ap propriate E Type nozzle Install the contra angle handpiece onto the motor after the spray injection Make a trial run for five seconds Wipe down the excess lubricant on the surface of the con tra...

Page 3: ...f the transmission gear engages with that of the head Engage crown of head with that of shank and then turn the union nut clockwise Note In case of latch type remove the head after swinging the latch out Important This contra angle handpiece is a result pf precision engineering and cannot be dismantled For service and repair always sent it to either BA International Ltd or an accredited BA certifi...

Page 4: ...asta que toque el final del eje Centre la palanca de nuevo para que quede en su posición original Pulse el botón con el dedo entonces extraiga la fresa Pulse el botón con el dedo e inserte la fresa en el agujero del chuck girando la fresa levemente mientras mantiene el botón pulsado si es necesario para que entre hasta el final del eje Suelte el dedo del botón cuando la fresa toque el final del ch...

Page 5: ... mojado en alcohol Mantenga la piza de mano en posició horizaontal e inyectela BA ULTIMATE SPRAY durante 3 segundos por la parte de atrás de la pieza de mano usando el conector apropiado Tipo E Coloque el contra ángulo en el motor después de engrasar la hágalo girar como prueba durante 5 segundos Limpie el exceso de aceite con un paño Nunca utilice el contra ángulo en un motor que gire más rápido ...

Page 6: ...ientes de la corona junto con los engranajes y gire la rosca hasta que quede bien sujeto Importante Este contra ángulo es el resultado de un proceso de ingeniería pre ciso y no puede ser desmontado En caso de necesidad de servicio o reparación siempre envíelo a BA International Ltd o a un servicio certificado BA sin desmontarlo La pieza de mano B A con este simbolo puede ser limpiada y desinfectad...

Page 7: ...a pince de serrage Refermer la pince à l aide de la baïonnette vers l intérieur de façon à revenir en position initiale parallèle au corps du contre angle Ouvrir la pince en appuyant sur le bouton poussoir du contre angle avec votre pouce et retirer la fraise guide Ouvrir à nouveau la pince en appuyant sur le bouton poussoir et insérer votre fraise Relâcher le bouton poussoir une fois que la frais...

Page 8: ...e à l aide d un essuie tout ou d un coton tige imbibé d alcool Garder votre contre angle dans une position horizontale et injecter le B A ULTIMATE SPRAY pendant 3 secondes dans la base de l instrument en utilisant l insert de type Intra approprié Remettre le contre angle sur le moteur après la lubrifica tion et le faire tourner pendant 5 secondes afin d évacuer le surplus de graisse Essuyer l excè...

Page 9: ...es d une montre à l aide de vos doigts Note Dans le cas d une tête à baïonnette desserrer la tête après avoir ouvert la pince à l aide de la baïonnette vers l extérieur Important Le contre angle Ultimate de BA International est un instrument de pré cision et ne peut pas être démonté réparé par un tiers Pour la répara tion ou maintenance de votre instrument retourner votre instrument à BA Internati...

Page 10: ...futter ein bis sie die Rückseite des Bohrfutters berührt Schwenken Sie die Drückstiftplatte wieder zurück bis sie in Mittel stellung in der Manschette des Gegenwinkel Handstücks einrastet Drücken Sie mit dem Daumen auf den Druckknopf um das Bohrfut ter zu öffnen dann entnehmen Sie die vorhandene Fräse Drücken Sie mit dem Daumen auf den Druckknopf und setzen eine neue Fräse ins Bohrfutter ein Lösen...

Page 11: ... weichen in Alkohol getränkten Tuch oder Ohrenstäbchen ab Halten Sie das Gegenwinkel Handstück aufrecht und sprü hen drei Sekunden lang BA ULTIMATE SPRAY mit Hilfe einer geeigneten Düse E Typ in das hintere Ende des Ge genwinkel Handstücks Nach dem Einsprühen des Sprays schließen Sie das Gegen winkel Handstück an den Motor an F ühren Sie für fünf Sekunden einen Probelauf durch Wischen Sie überschü...

Page 12: ...ift Lassen Sie die Krone des Kopfes mit der des Schafts ineinander greifen und drehen die Überwurfmutter dann im Uhrzeigersinn Hinweis Im Falle der Schnapp Version entfernen Sie den Kopf nach dem Sie die Drückstiftplatte ausgeschwenkt haben Wichtig Das gerade Handstück ist ein feinmechanisches Produkt und kann nicht auseinandergeschraubt werden Für Service und Reparaturar beiten schicken Sie es bi...

Page 13: ...nserisca la fresa completamente fine si tocca il sotto del mandrino Blocca il catenaccio finché si chiude il mandrino Premi il tasto con il pollice per aprire e rimuova il trapano Premi il tasto con il pollice e inserisca il trapano nel mandrino Molla il tasto se la fine del trapano tocca il fondo del mandrino Avviso La velocità massima dipende dal tipo del tubo e dal motore Trapano applicabile In...

Page 14: ...rbido imbevuto di alcool o tappo per le orec chie Tenga il manipolo verticale e sprizza per tre secondi BA ULTIMATE SPRAY con un ugello appropriato tipo E nel posteriore del manipolo Dopo sprizzare annetta il manipolo angolato al motore Fa una prova di funzionamento di cinque secondi Lavi eccesso di grasso sulla superficie del manipolo con un panno Never operate the contra angle hand piece by inst...

Page 15: ...sta con quello dall asta e giri il dispositivo di aggancio in senso orario Nota In caso di tipo tasto rimuova la testa dopo sfermare il catenac cio Avviso Importante Il manipolo retto è un prodotto meccanico di precisione Per manuten zione e riparazione per favore manda l agganciamento non smontato à B A International Ltd o un servizio cliente omologato Non prova a decomporre riparare il prodotto ...

Page 16: ...ip achter op het hoekstuk opzij verwijder de boor Plaats een boor in de schacht totdat deze niet meer verder kan Schuif de clip terug zodat de boor vast in het hoekstuk zit Druk de drukknop in om de spantang te openen verwijder de boor Druk de drukknop in om de spantang te openen plaats de boor Zodra de boor niet verder in het kopje gestoken kan worden de drukknop loslaten Let op De maximum snelhe...

Page 17: ...f wattenstaaf het speeksel vuil etc van het oppervlak van het hoekstuk Houdt het hoekstuk in een horizontale positie en injecteer BA ULTIMATE SPRAY drie seconden door het uiteinde van het hoekstuk gebruikmakend van het juiste E type mond stuk adapter Bevestig het hoekstuk op de motor na de spray injectie Laat voor 5 seconden proefdraaien Veeg overtollig olie op het hoekstuk weg met een tissue Plaa...

Page 18: ...latch type verwijder het kopje nadat de clip opzij geschoven is Belangrijk Het BA hoekstuk is het resultaat van precisie engineering In geen ge val kan er door een derde aan gesleuteld of gerepareerd worden Voor service en reparatie altijd sturen naar BA International Ltd of aan een door BA aangewezen gecertificeerde service center zonder alvorens te demonteren BA hoekstuk met dit symbool kan gere...

Reviews: