REPROCESSING & ACCESSORIES
Reprocess the product immediately after use
The product can be sterilized either in
disassembled or in assembled condition
For advice on cleaning, disinfection and sterili-
zation, please follow the instructions for use
For the latest information on reprocessing,
please also refer to the Aesculap Extranet via
www.aesculap-extra.net
For accessories and spare parts, please refer
to brochure C28011 and C28511 or visit
www.endoscopy-catalog.com
REPAIRS
In order to ensure the preservation of full guarantee
and warranty rights, only persons authorized by
Aesculap may carry out repairs.
Please send products for repair to:
Aesculap Technical Service, Am Aesculap-Platz,
78532 Tuttlingen, Germany.
Additional service addresses may be obtained from
the same address or via ats@aesculap.de
Aesculap
®
AdTec
®
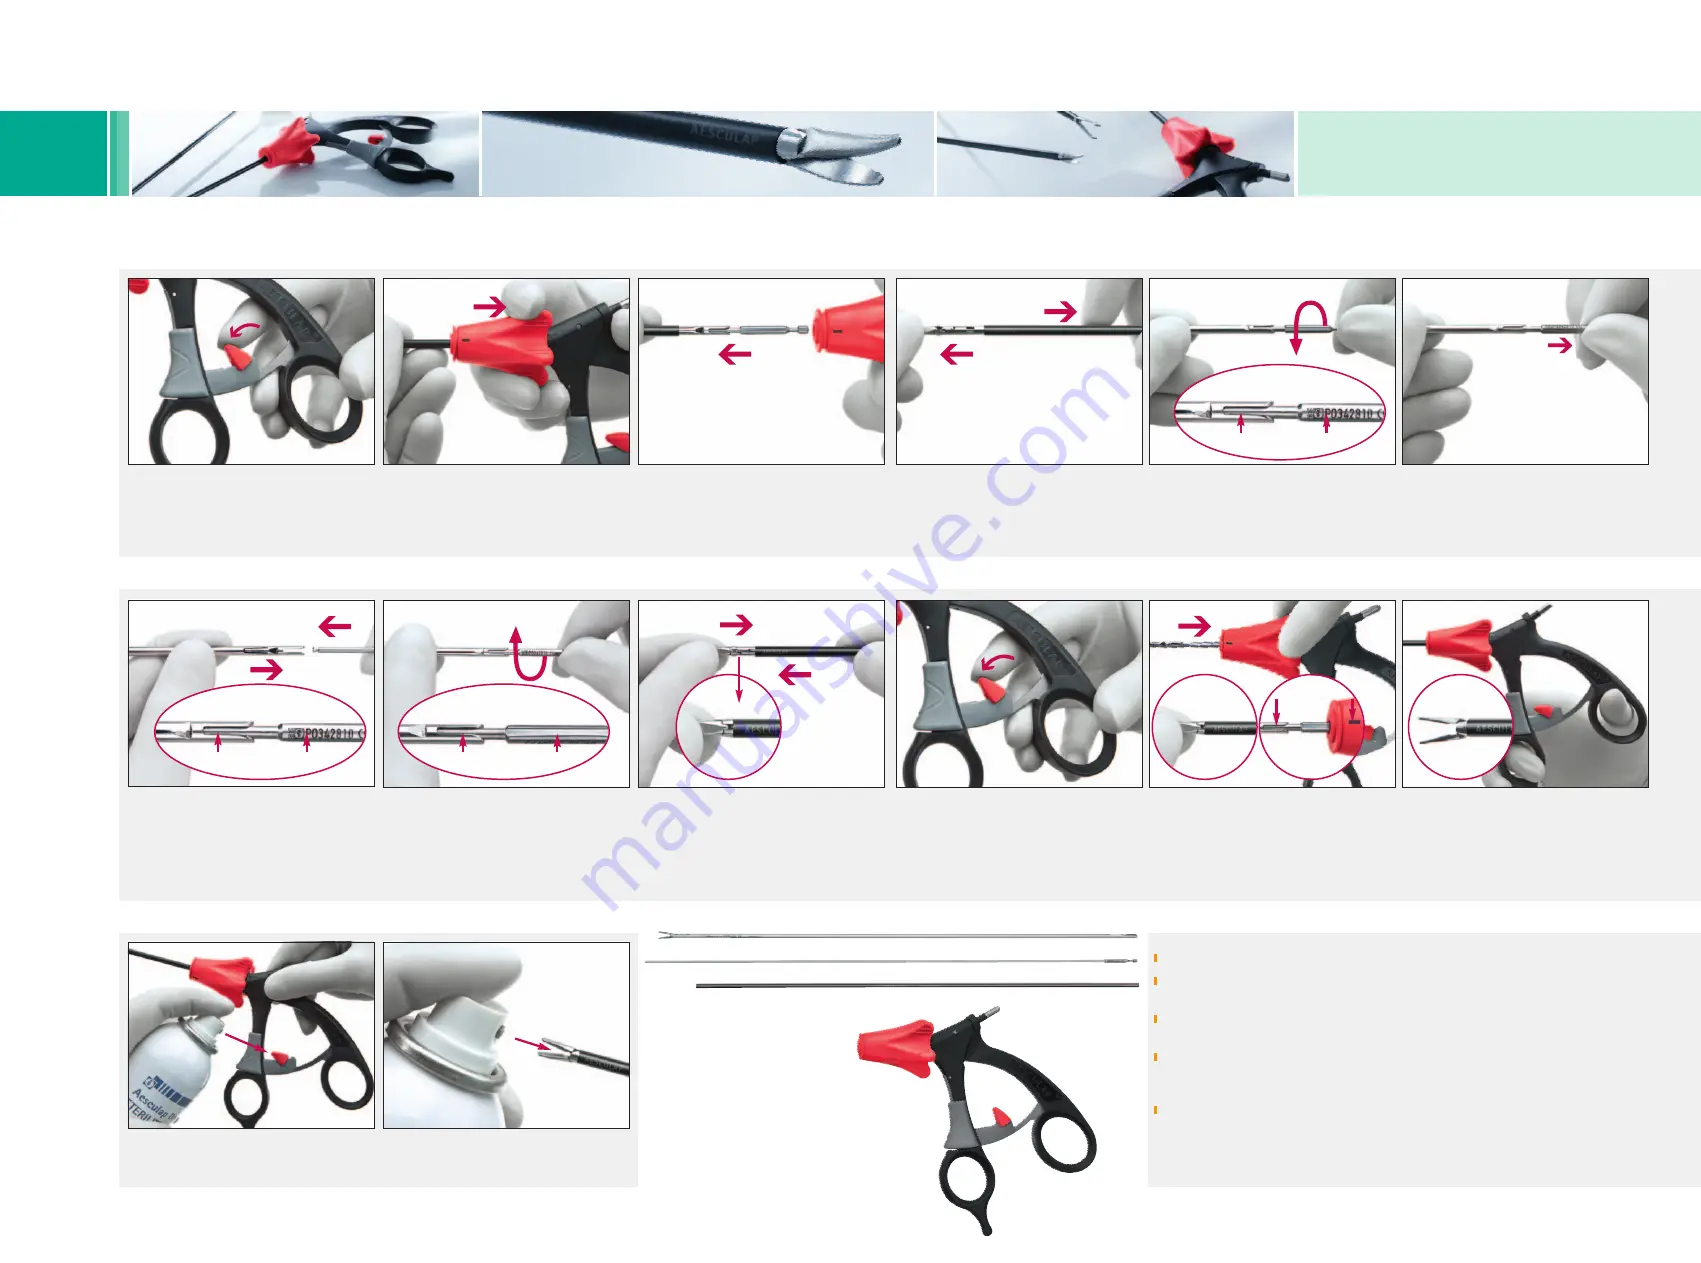
mini Assembly / Disassembly Instructions
1. Deactivate ratchet on ratchet
handle
Flip down red toggle switch.
N.B.: for PO381R only
2. Disconnect shaft and handle
Pull rotation knob back and let movable part of the
handle move downwards.
3. Remove shaft from handle
Remove the shaft by pulling the instrument shaft
out of the handle.
4. Disassemble shaft
Hold the jaw insert at the tip and remove the outer
tube.
5. Disassemble shaft
Rotate the push rod 90° counterclockwise until the
labelling is in line with the notch of the jaw part.
6. Disassemble shaft
Remove the push rod.
DISASSEMBLY
MAINTENANCE
Lubricate the parts of the instrument specified (jaws and red toggle
switch) with Aesculap Sterilit Oil after each cleaning cycle.
Jaw insert
Push rod
Outer tube
���
���
���
ASSEMBLY
2. Assemble shaft
Rotate the push rod 90° clockwise until it locks into
place. The groove is then in line with the notch.
3. Assemble shaft
Slide the black outer tube as far as it will go over
the jaw insert.
4. Prepare handle
Deacitvate the ratchet by flipping down the red
toggle switch.
N.B.: for PO381R only
6. Function test
Test the assembly of the instrument by opening and
closing the handle to ensure the jaw is openinig and
closing.
1. Assemble shaft
Slide the push rod into the jaw insert as far as it
will go making sure that the labelling on the push
rod is in line with the notch of the jaw part.
5. Connect shaft and handle
Hold the tip of the shaft and the rotation knob of the
handle firmly. Slide the shaft into the handle until
it locks into place, making sure that the push rod
notch is in line with the mark on the rotating knob.
Important: Do not touch the movable part of the handle.
Notch
Groove
Notch
Labelling
Aesculap Endoscopic Technology
Notch
Labelling
���
Toggle switch
���
Rotation knob
���
Movable part of handle


