RELEASE DATE
6-28-13
REFERENCE
NUMBER
INS001129
40429 Brickyard Drive • Madera, CA 93636 • USA
559.438.5800 • FAX 559.438.5900
www.bklighting.com • info@bklighting.com
B-K LIGHTING
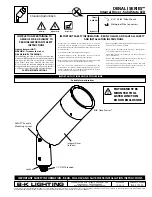
Fixture Installation (cont.)
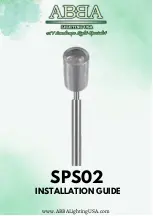
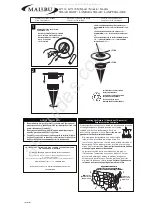
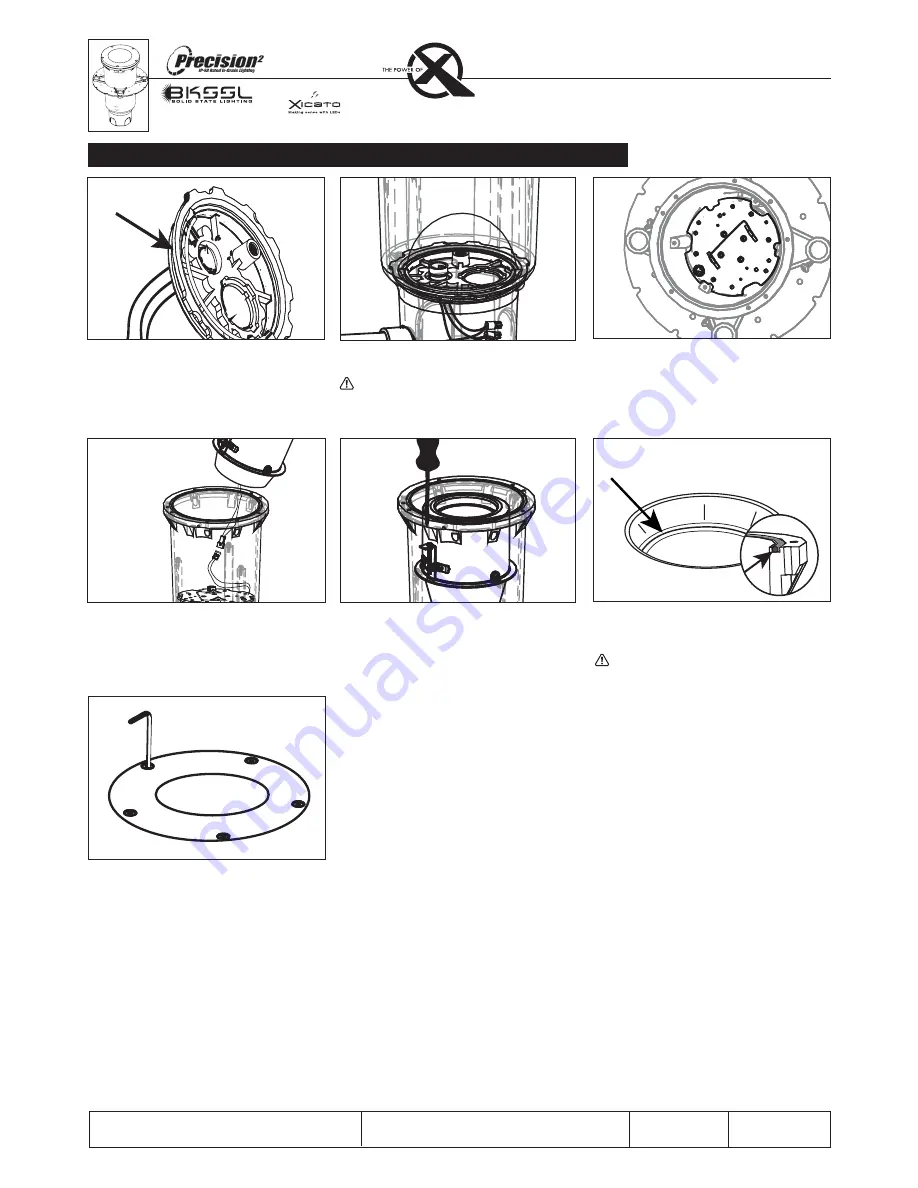
3. Wipe O-ring clean of debris on Patented Hydro-
Lock™ Barrier Plate. Install Patented Hydro-Lock™
Barrier Plate by aligning keyholes with dome-
topped fasteners at the bottom of the housing
and while grasping handle; push down on
Patented Hydro-Lock™ Barrier Plate until firmly
seated.
4. Turn
Hydro-Lock™
Barrier Plate clockwise ¼” to
lock.
Patented
Hydro-Lock™ Barrier Plate must be
completely seated to ensure proper seal or
water may intrude. This step must be done
as stated or you will void your warranty.
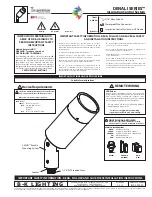
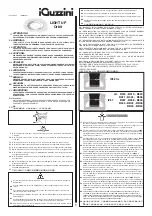
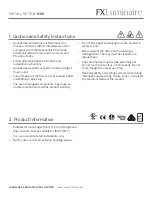
5. Connect transformer assembly to Patented
Hydro-Lock™ Barrier Plate with quick
disconnect.
6. Attach driver assembly to housing by aligning
keyhole notch under one (1) of three (3) #8
screw heads. Tighten screw heads with Philips
screw driver.
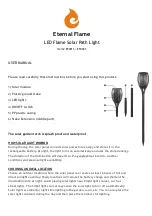
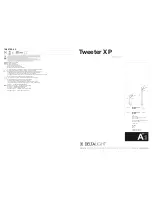
8.
Place optical assembly in housing, resting
the optilock on the pins provided inside the
housing. Aim fixture by adjusting optilock with
Philips screw driver.
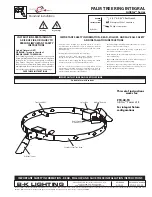
9. Carefully place O-ring into the groove on top of
housing, keep free of dirt and debris. Dirt and
debris may allow water entry into fixture.
This step must be done as stated or you will
void your warranty.
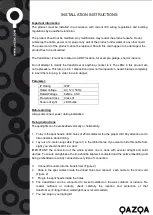
10. Secure faceplate assembly to housing with (5)
#10 socket head screws as provided on faceplate
with 3/32” Allen wrench. Hand tighten screws in
a cross pattern to 25 in-lbs. to create proper seal.
7. Attach optical assembly to installed driver
assembly with quick disconnect.
HP2
powered by