10
3
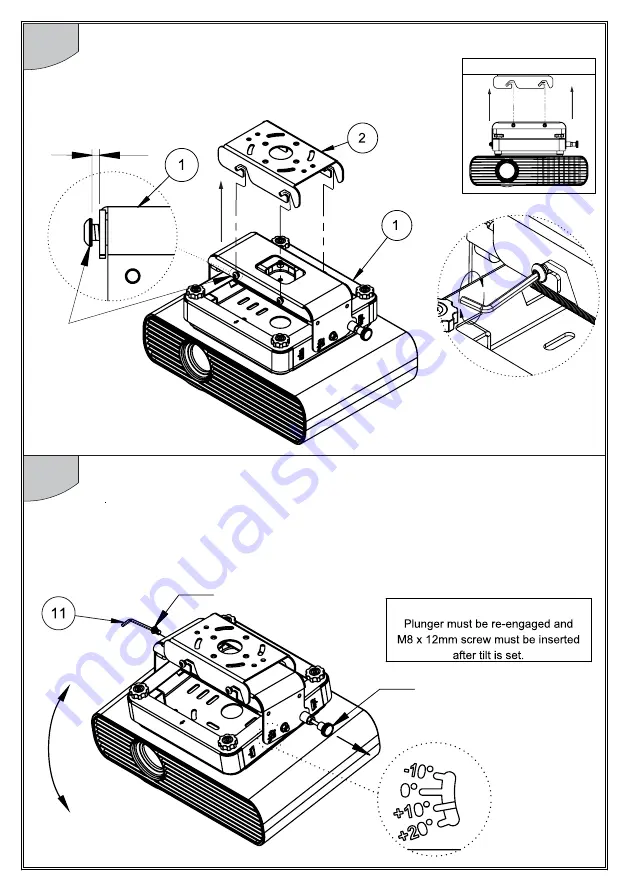
Hook Projector Mount onto Ceiling Mount
Hook the 4 M8 x 12mm screws (attached to item 1) into
the 4 hook-in slots on item 2.
Fully tighten all 4 screws once hooked on.
Use gap to
hook onto item 2.
M8 x 12mm
SCREW
(Do not
remove
these screws).
IMPORTANT
All 4 M8 x 12mm screws
must be fully tightened
once hooked on.
CEILING
Set Adjustments
4
A.
Set main tilt angle adjustment (-10° / +20°)*.
*An +/-5° additional tilt is available when the micro-adjustment is used.
Remove M8 x 12mm screw.
Hold projector steady, pull plunger to disengage and change tilt. When desired tilt is
reached, ensure plunger is fully engaged and replace M8 x 12mm screw.
WARNING
M8 x 12mm SCREW
PLUNGER
Main tilt angle
guidelines are
located on the
side of the
projector mount.
Summary of Contents for BT893
Page 2: ......
Page 3: ......
Page 4: ...BT893 PARTS LIST 4 Suitable for loads up to 70kg 3 2 1 5 4 9 8 7 6 ...


