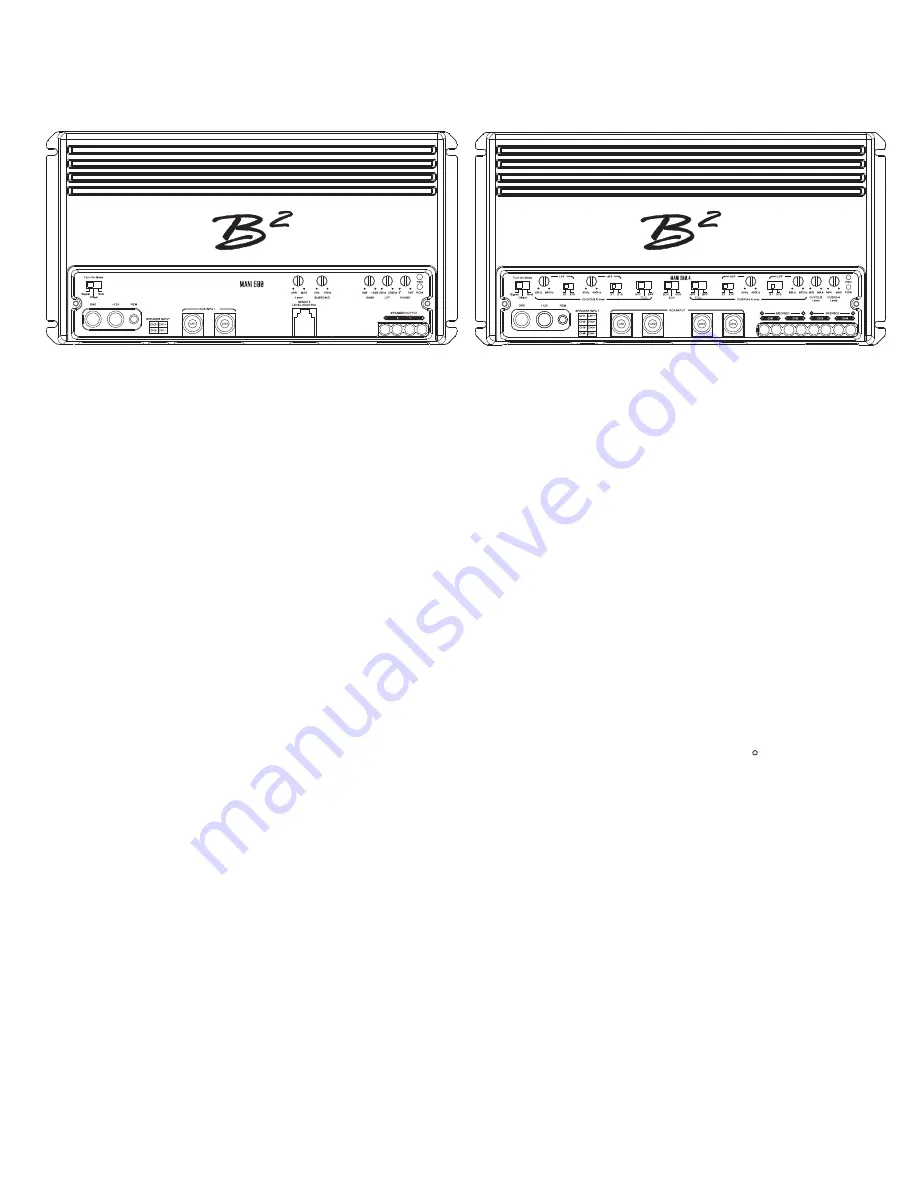
4
Panel layout
turn on mode
subsonic
The amplifiers can be powered up by using either of:
Variable subsonic setting from 5 Hz to 40 Hz
1. Signal input from RCA, 2. Offset voltage from speaker inputs,
It is highly recommended to set it according to
3. Ordinary switched (12V) remote.
the tuning of your subwoofer enclosure to avoid
unnecessary strain to your sound system.
power inputs
GND (GROUND CONNECTION) 6 GA
bass (0 db ~15 db)
Connects to vehicle’s chassis. Keep as short as possible (<20” / 50 cm). Adjustable bass level at 45 Hz with up to 15 dB.
Use
with
caution,
as
it
can
easily
introduce
+12V (P OWER CONNECTION) 6 GA
clipping into the signal, which can damage your
Connects to the positive terminal of the battery. Fuses shall be speakers.
placed within 8” / 20 cm of the battery.
lpf (50 - 500 Hz / 5 KHz) low pass filter
REM (REMOTE CONNECTION)
Adjustable crossover point for lpf with a 24 dB slope.
Run a remote turn on cable from a sw12V source.
Frequencies below set level will be attenuated in
accordance
with
the
crossover
configuration.
speaker input
High level input from the vehicle’s loudspeaker wires. This
phase
option is preferred in OEM installs where no RCA inputs are available. Adjustable phase with 0 ~180 . Use it to align your
subwoofer output with your front stage.
rca
input
RCA signal input for L+R (Mani 600) or CH 1 ~ CH 4 (Mani 600.4).
HPF (20 - 4 KHZ) High pass filter
0.35 V ~ 5 V is the operational input voltage. Voltages beyond
Adjustable crossover point for hpf with a 24 dB slope.
may cause errors or damages to the input selection.
The x10 multiplier present on the 600.4 applies to
both LFP & HPF. The BPF switch enables both LPF
remote level control port
& HPF filters, creating a band pass filter.
Connection of external signal level control.
Use with caution, it is not a volume knob and shall be adjusted
Channel switch
in accordance with the amplifiers gain level.
The 600.4 can be used in a 2ch, 3ch or 4 ch config.
The channel switch will make the amplifer
gain
functional on all channels using 2, 3 or 4 RCA inputs.
Adjusts signal input voltage from the input source to
match the amplifiers input stage. 0.35V ~ 5V is the operational
speaker output
voltage.
Connection of loudspeakers, the min ohm load is
2 ohm on the Mani 600 and 2 ohm in stereo mode
on
the
Mani
600.4
MANI 600
MANI 600.4
n
Summary of Contents for MANI Series
Page 1: ...mani series USER MANUAL PRODUCT ID mani 6004df21 PRODUCT ID mani 600d21...
Page 11: ...10 11 16 V...
Page 12: ......


