14
NARROW AND ROLLED HEMMING
By changing the needle plate to “Rolled Hem Needle Plate” and using right needle only, the machine trims fabric,
folds back the edge and sews a narrow hem (overedge). The width of the narrow overedge is 1.5 mm (about
1/16") and is used for overedging light and medium weight fabrics.
Two variations of the rolled overedge hem can be sewn with this machine by changing the thread tension.
Both methods are used with light and medium weight fabrics.
Method B gives a softer finish by pulling the interlocking threads to the wrong side.
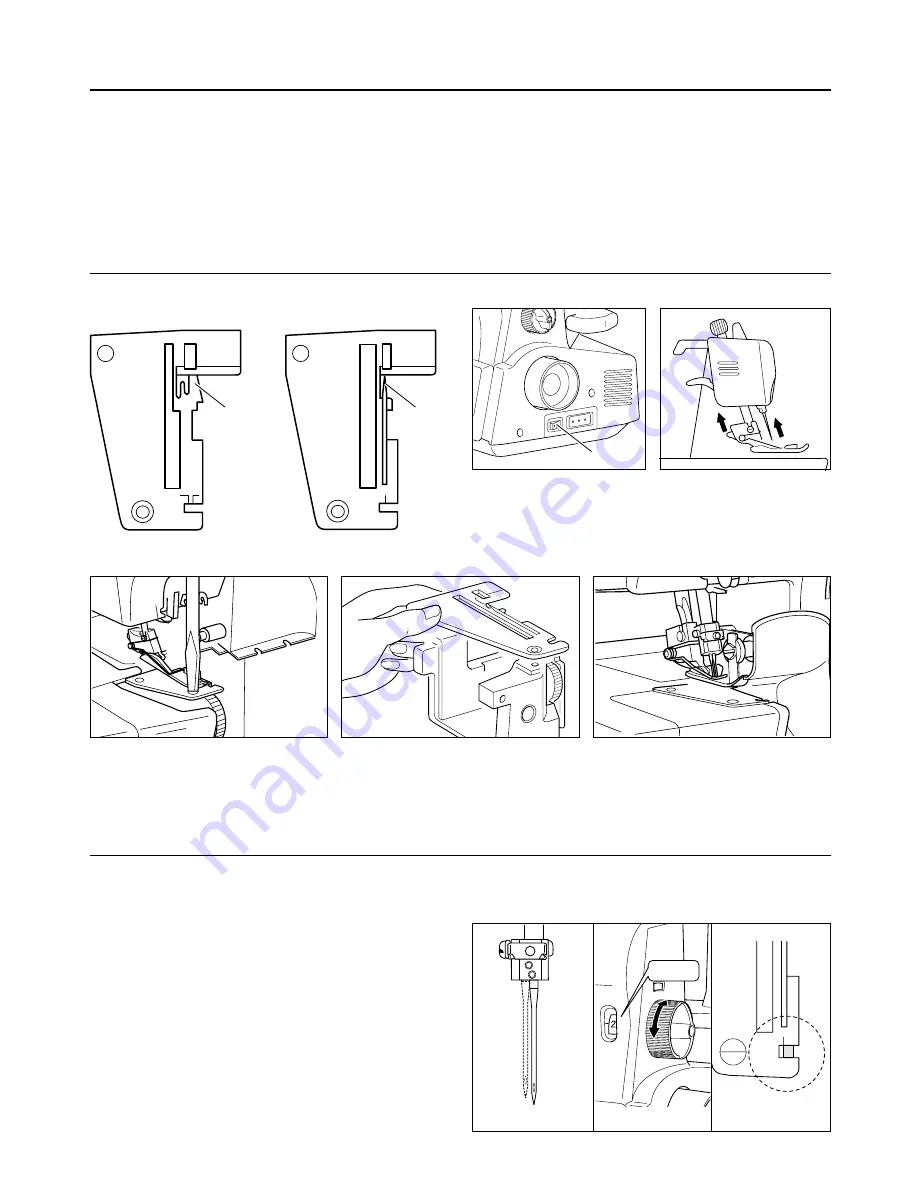
changing the needle plate
The machine comes with a standard overedge needle plate set to the machine.
Change the needle plate when sewing rolled overedge.
5. Open Extension Table and Free
Arm Cover (See page 3).
6. Loosen the front side screw.
7. Lift the Needle Plate off and
replace with Rolled Hemming
Plate. (Be sure that thread is not
caught under plate.)
8. Retighten the screw and replace
Free Arm Cover.
1. Turn power switch off.
2. Turn handwheel toward you until needle is at its
highest point.
3. Lift presser foot lifter.
4. Clear stitches off the stitch fingers.
Right Needle Stitch Length
Seam Width
Standard Overedge
Needle Plate
Rolled Hem
Needle Plate
OFF
setting controls
Set the controls as follows.
1. Use right needle only. (Remove the left needle.)
2. Fabric, Thread & Needle Size
Refer to Page 5 “NEEDLE, THREAD & FABRIC
CHART”, for selecting suitable thread and needle
sizes for sewing on light and medium weight fabrics.
3. Stitch Length Regulator
Set stitch length between 1 and 2 mm.
4. Width Indicator Knob
The seam width for sewing rolled overedge is normally
1.5 mm (about 1/16").
Turn width indicator knob and adjust so that the left
side of Lower Blade Width Indicator is aligned with the
mark of the Rolled Hem Needle Plate. (See page 12).
4 - 5
1 - 2
Stitch
fingers
Stitch
fingers
Summary of Contents for A-LINE Lauren BL450A
Page 1: ......
Page 28: ...62180 BL450A B8...