CARE AND MAINTENANCE
A-4
g
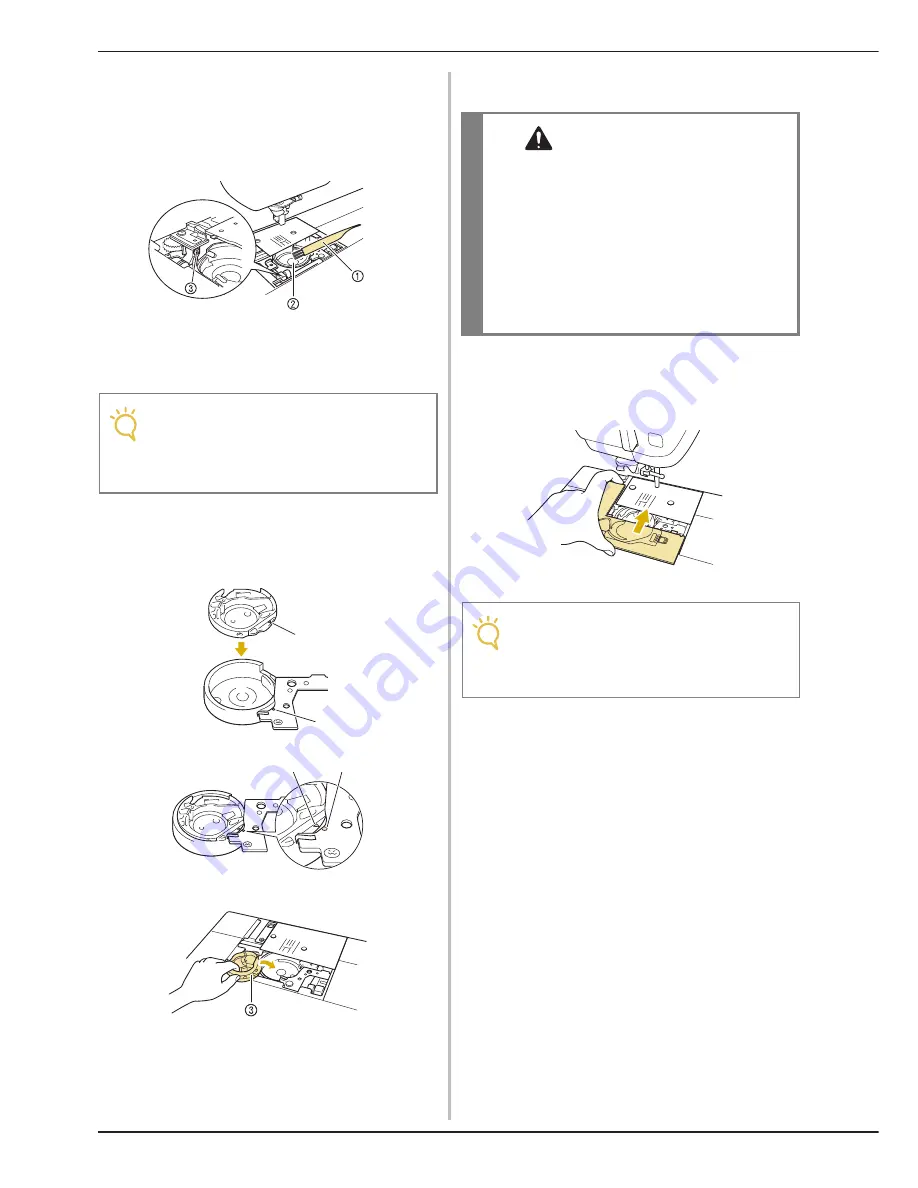
Use the cleaning brush or a vacuum cleaner
to remove any lint and dust from the race
and bobbin thread sensor and the
surrounding area.
a
Cleaning brush
b
Race
c
Bobbin thread sensor
h
Insert the bobbin case so that the
S
mark
on the bobbin case aligns with the
●
mark
on the machine.
*
Align the
S
and
●
marks.
a
S
mark on the bobbin case
b
●
mark on the machine
c
Bobbin case
*
Make sure that the indicated points are aligned
before installing the bobbin case.
i
Insert the tabs on the needle plate cover
into the needle plate, and then slide the
cover back on.
Note
• Do not apply oil to the bobbin case.
• If lint or dust collects on the bobbin thread
sensor, the sensor may not operate
correctly.
a
b
b
a
CAUTION
• Never use a bobbin case that is scratched;
otherwise, the upper thread may become
tangled, the needle may break, or sewing
performance may suffer. For a new bobbin
case (part code: XE5342-101 (green marking
on the screw), XE8298-001 (gray, for bobbin
work)), contact your nearest authorized
retailer.
• Make sure that you fit the bobbin case
properly, otherwise the needle may break.
Note
• If the needle plate has been removed it is
especially important to reinstall the needle
plate and tighten the screws prior to
installing the bobbin case.
Summary of Contents for Aria BLAR
Page 1: ......
Page 75: ...USEFUL FUNCTIONS Sewing Basics Sewing S 19 S 1...
Page 159: ...USING THE MEMORY FUNCTION Character Decorative Stitches Sewing S 103 S 3...
Page 172: ...TROUBLESHOOTING S 116...
Page 196: ...INDEX A 24 W Walking foot B 45 Z Zigzag stitches S 31 Zipper insertion centered S 64 side S 65...
Page 197: ......
Page 198: ......
Page 199: ......
Page 200: ...English 882 D11 Printed in Taiwan XF6507 001...


