Pg. 9
Fig. 3-A
Fig. 3-B
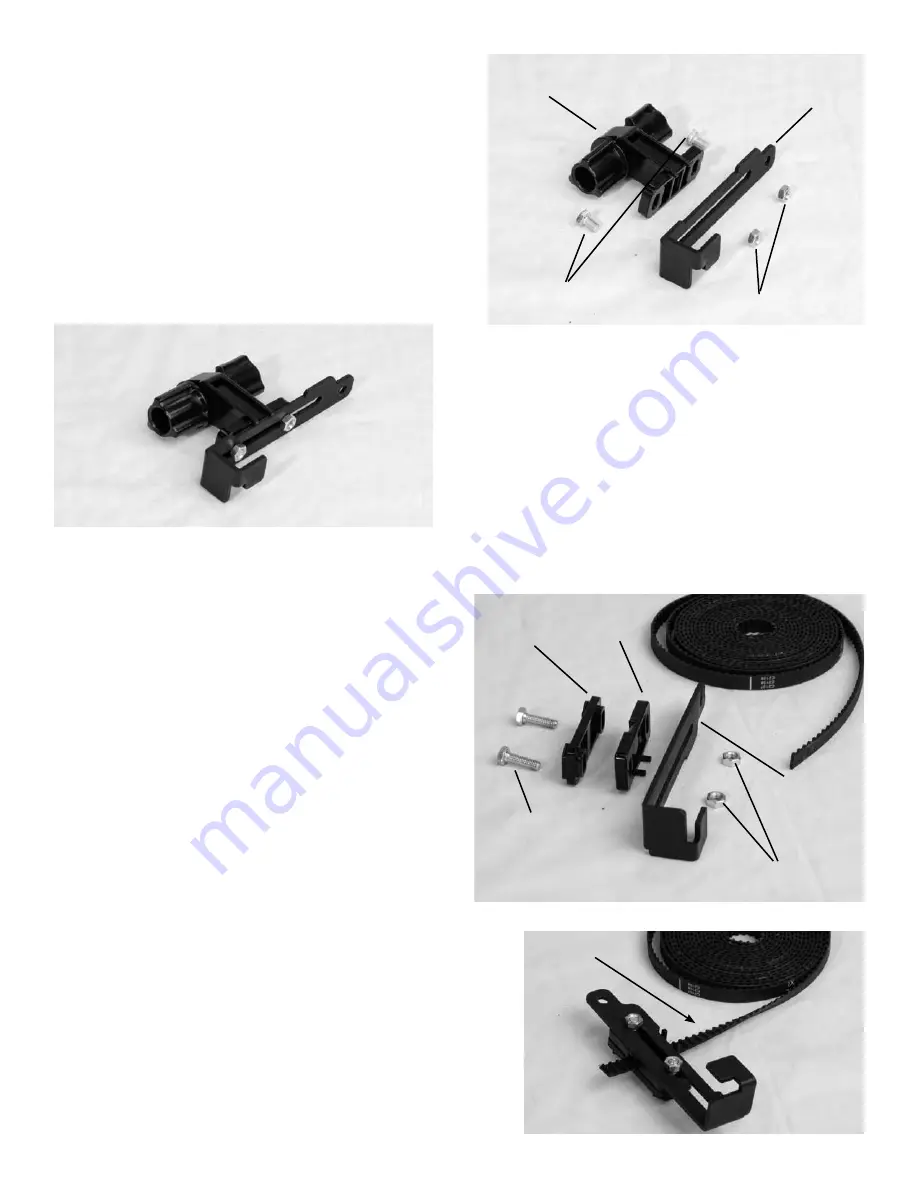
3-1 .
Attach one (1) Belt Tensioner Housing to one
(1) Mounting Clamp using two (2) M6 x 12mm Hex
Head Bolts and two (2) M6 Hex Nuts, as shown in
Fig. 3-A and 3-B.
Step 3: Mounting Clamp Assembly
Parts Needed:
2- Mounting Clamp
1- Belt Clamp Front
1- Belt Clamp Back
1- Belt Tensioner Housing
1- Short Belt
2- M6 x 12mm Hex Bolt
2- M6 x 24mm Hex Bolt
4- M6 Hex Nut
Fig. 3-C
Fig. 3-D
3-2 .
Attach one (1) Belt Clamp Front and one (1)
Belt Clamp Back to one (1) Mounting Clamp using
two (2) M6 x 24mm Hex Bolts and two (2) M6 Hex
Nuts, as shown in Fig. 3-C. Thread the bolts into
the nuts only until they grab the first thread, so
that the front and back clamps remain loose.
3-3 .
Slide the belt between the back and front
Belt Clamps, as show in Fig. 3-D (make careful
note of the direction of the belt teeth), and then
tighten the hex bolts.
Belt Tensioner
Housing
M6 x 12mm
Hex Bolt
M6 Hex Nut
Mounting
Clamp
M6 x 24mm
Hex Bolt
M6 Hex Nut
Mounting
Clamp
Short Belt
Belt Clamp
Back
Belt Clamp
Front
Belt Teeth


