SEWING THE STITCHES
U
tili
ty
S
tit
ch
es
103
3
■
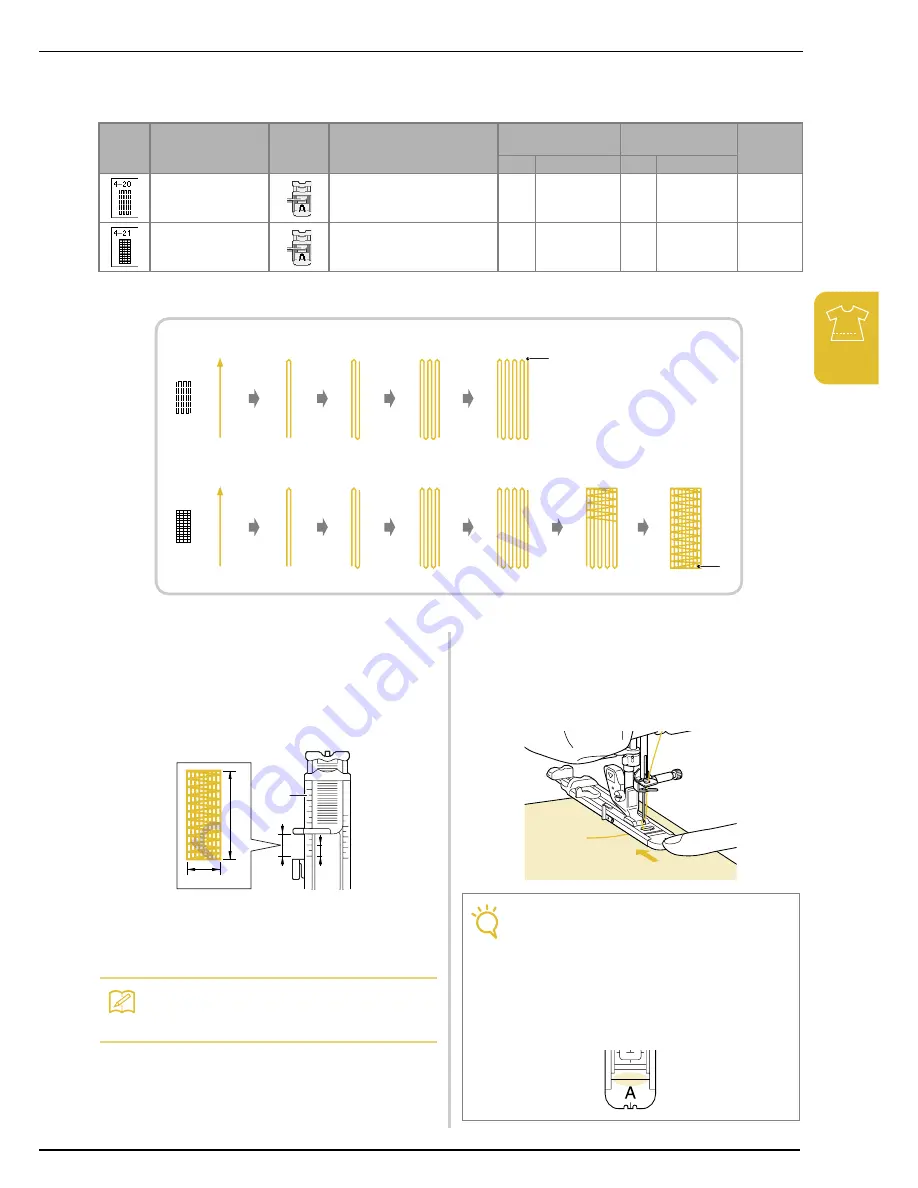
Darning
Use darning stitches for mending and other applications.
Darning is performed by sewing from the front of the presser foot to the back as shown below.
a
Reinforcement stitches
a
Select a stitch, and attach buttonhole foot
“A”.
b
Set the scale to the desired length of the
darning.
a
Presser foot scale
b
Completed length measurement
c
Width 7 mm (approx. 1/4 inch)
d
5 mm (approx. 3/16 inch)
c
Check that the needle drops at the desired
position and lower the presser foot, making
sure the upper thread passes underneath
the buttonhole foot.
Stitch
Stitch name
Presser
foot
Applications
Stitch width
[mm (inch.)]
Stitch length
[mm (inch.)]
Twin
needle
Auto.
Manual
Auto.
Manual
Darning
Darning of medium weight fabric
7.0
(1/4)
2.5 - 7.0
(3/32 - 1/4)
2.0
(1/16)
0.4 - 2.5
(1/64 - 1/16)
NO
Darning
Darning of heavyweight fabric
7.0
(1/4)
2.5 - 7.0
(3/32 - 1/4)
2.0
(1/16)
0.4 - 2.5
(1/64 - 1/16)
NO
a
a
Memo
The maximum length for darning is 28 mm
(approx. 1-1/16 inches).
a
b
c
d
Note
• Pass the thread underneath the presser
foot.
• Set the presser foot so that there is no gap
behind the section marked with an “A” (the
shaded area in the illustration below). If
there is a gap, the size of the darning will not
be correct.
Summary of Contents for Ellegante2 BLG2-NZ
Page 1: ......
Page 2: ......
Page 7: ...v...
Page 12: ...Contents x...
Page 54: ...CHANGING THE NEEDLE 42...
Page 68: ...USEFUL FUNCTIONS 56...
Page 126: ...SEWING THE STITCHES 114...
Page 208: ...EMBROIDERY APPLICATIONS 196...
Page 236: ...USING THE MEMORY FUNCTION 224...
Page 254: ...UPGRADING YOUR MACHINE S SOFTWARE 242...
Page 265: ...Index 253...
Page 266: ......
Page 267: ......
Page 268: ...English 882 S95 XE2638 001 Printed in Taiwan...


