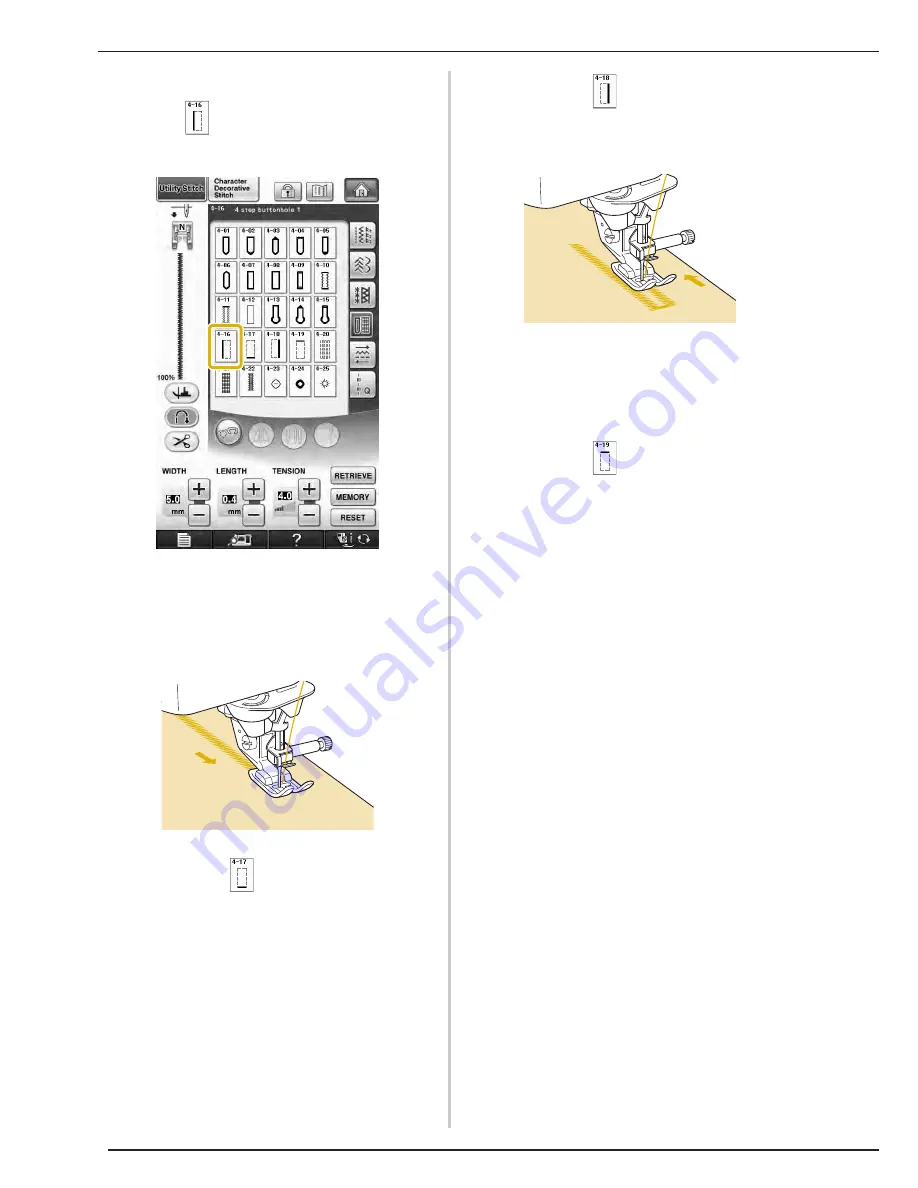
SEWING THE STITCHES
126
b
Attach monogramming foot “N”, and select
stitch
to sew the left side of the
buttonhole.
c
Press the “Start/Stop” button to start
sewing.
d
Sew the desired length for the buttonhole
and press the “Start/Stop” button again.
e
Select stitch
to sew the bar tack and
press the “Start/Stop” button.
o
The machine will automatically stop after sewing
the bar tack.
f
Select stitch
to sew the right side of
the buttonhole, and press the “Start/Stop”
button to begin sewing.
g
Sew the right side of the buttonhole and
press the “Start/Stop” button again.
*
Sew the right side of the buttonhole the same length
as the left.
h
Select stitch
to sew the bar tack and
then press the “Start/Stop” button.
o
The machine will automatically sew off the bar tack
tie and stop when the bar tack is complete.
i
Raise the presser foot and remove the
fabric.
j
Refer to page 123 to open the buttonhole.
Summary of Contents for Ellisimo BLSO
Page 1: ......
Page 7: ...IMPORTANT SAFETY INSTRUCTIONS v...
Page 14: ...CONTENTS xii...
Page 35: ...LCD SCREEN Getting Ready 21 1...
Page 90: ...USEFUL FUNCTIONS 76...
Page 194: ...USING THE MEMORY FUNCTION 180...
Page 267: ...USING THE MEMORY FUNCTION Embroidery 253 5 f Press o The sewing screen is displayed...
Page 300: ...EDITING PATTERNS 286...
Page 324: ...PRINT AND STITCH COMBINING EMBROIDERY PATTERNS AND PRINTED DESIGNS 310...
Page 348: ...UPGRADING YOUR MACHINE S SOFTWARE 334...
Page 361: ......
Page 362: ......
Page 363: ......
Page 364: ...X1_TaconeyE_OM_cover C M Y K...


