MAKING EMBROIDERY ADJUSTMENTS
226
■
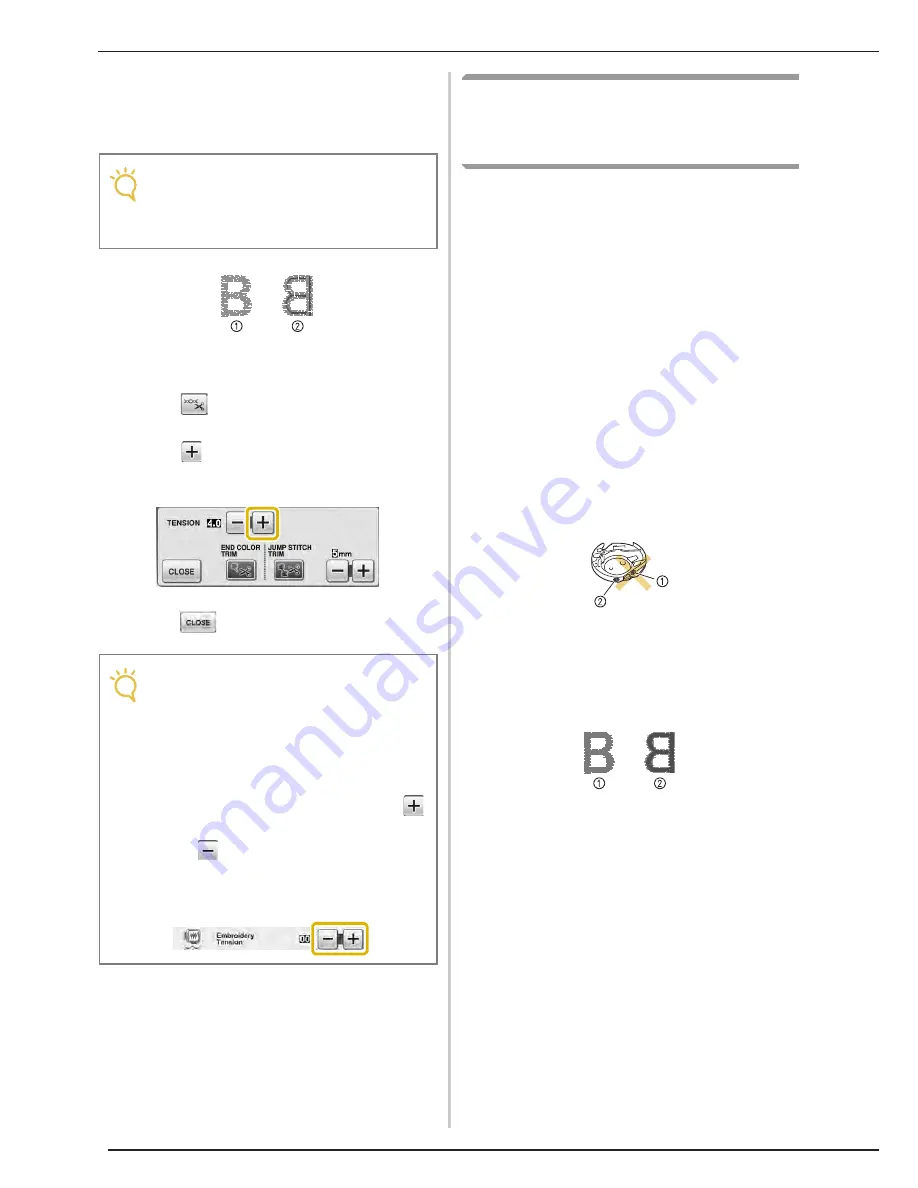
Upper Thread is Too Loose
The tension of the upper thread is too loose,
resulting in a loose upper thread, loose thread locks,
or loops appearing on the right side of the fabric.
a
Right side
b
Wrong side
a
Press .
b
Press
to tighten the upper thread
tension. (The tension number will increase.)
c
Press .
Adjusting the Alternate Bobbin
Case (with No Color on the
Screw)
When using the embroidery bobbin thread
provided, please be sure to choose the green
marked bobbin case when performing utility stitch
sewing and embroidery functions. When in the
embroidery function mode, the alternate bobbin
case (with no color on the screw) should be
selected when substitute embroidery bobbin
threads (other than what is accompanied with your
machine) are being used. The alternate bobbin
case (with no color on the screw) can be easily
adjusted when bobbin tension changes are
required to accommodate different bobbin
threads. See “Sewing Attractive Finishes” on page
210.
To adjust the bobbin tension for embroidery
function, using the alternate bobbin case (with no
color on the screw), turn the slotted screw (-) with
a (small) screwdriver.
a
Do not turn a phillips screw (+).
b
Adjust with a screwdriver (small).
■
Correct Tension
Upper thread slightly appears on the wrong side of
fabric.
a
Right side
b
Wrong side
Note
• If the upper thread was incorrectly threaded,
the upper thread may be too loose. In this
case, refer to “Upper Threading” (page 46)
and rethread the upper thread.
Note
• With “Embroidery Tension” on page 6/7 of
the setting screen, the tension of the upper
thread can be adjusted for embroidering.
The selected setting will be applied to all
patterns.
When embroidering, if the overall tension of
the upper thread is too tight or too loose,
adjust it from the setting screen. Press
to tighten the upper thread tension and
press
to loosen the upper tension. If an
individual embroidery pattern needs
additional fine tuning, refer to “Adjusting
Thread Tension” on page 225.
Summary of Contents for Ellisimo BLSO
Page 1: ......
Page 7: ...IMPORTANT SAFETY INSTRUCTIONS v...
Page 14: ...CONTENTS xii...
Page 35: ...LCD SCREEN Getting Ready 21 1...
Page 90: ...USEFUL FUNCTIONS 76...
Page 194: ...USING THE MEMORY FUNCTION 180...
Page 267: ...USING THE MEMORY FUNCTION Embroidery 253 5 f Press o The sewing screen is displayed...
Page 300: ...EDITING PATTERNS 286...
Page 324: ...PRINT AND STITCH COMBINING EMBROIDERY PATTERNS AND PRINTED DESIGNS 310...
Page 348: ...UPGRADING YOUR MACHINE S SOFTWARE 334...
Page 361: ......
Page 362: ......
Page 363: ......
Page 364: ...X1_TaconeyE_OM_cover C M Y K...


