LOWER THREADING
Ge
tting
Re
ad
y
43
1
Setting the Bobbin
Press
o
o
o
o
in this order to display a
video example of the operation on the LCD (see
page 34). Follow the steps explained below to
complete the operation.
a
Press .
b
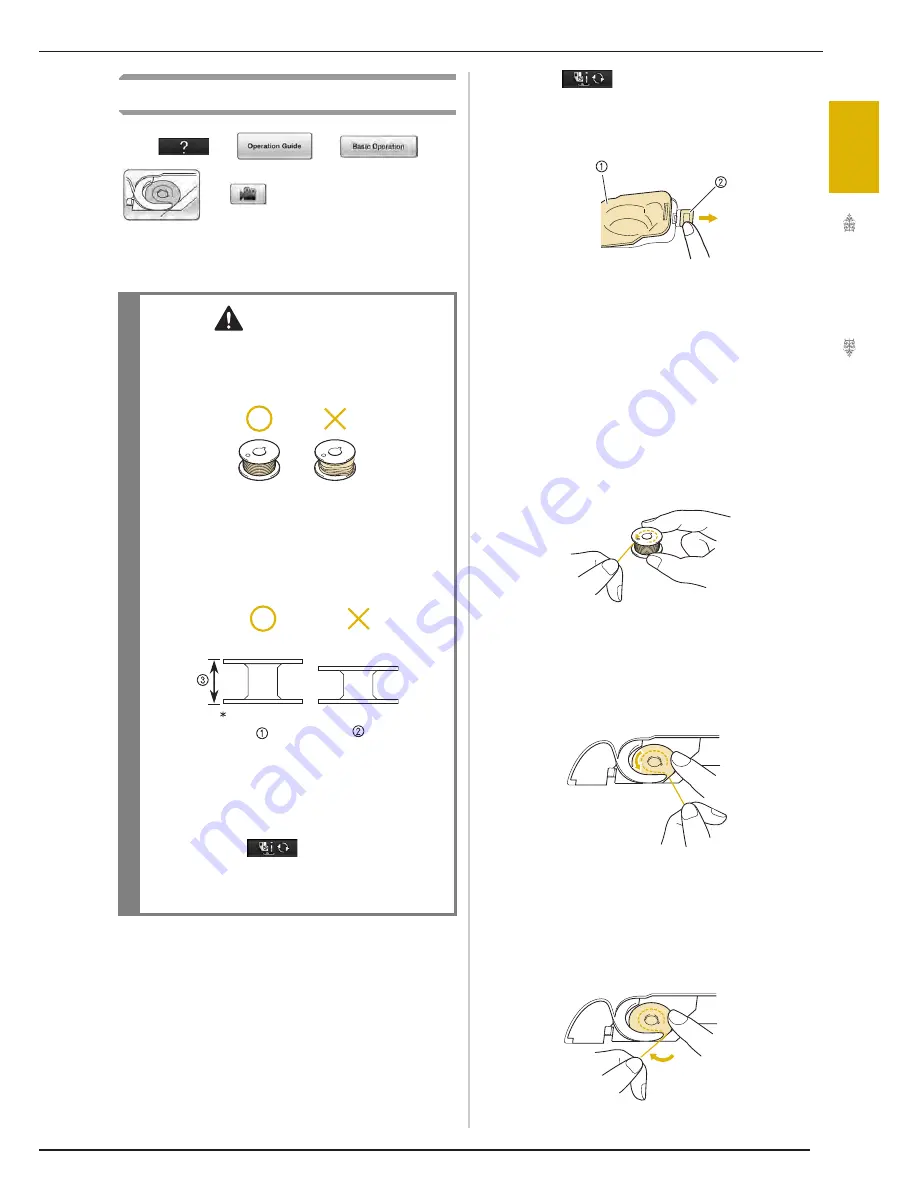
Slide the bobbin cover latch to the right.
a
Bobbin cover
b
Latch
o
The bobbin cover opens.
c
Remove the bobbin cover.
d
Hold the bobbin with your right hand and
hold the end of the thread with your left
hand.
e
Set the bobbin in the bobbin case so that
the thread unwinds to the left.
f
Hold the bobbin lightly with your right
hand, and then guide the thread with your
left hand.
CAUTION
• Use a bobbin thread that has been correctly
wound. Otherwise, the needle may break or
the thread tension will be incorrect.
• The included bobbin was designed specifically
for this sewing machine. If bobbins from other
models are used, the machine will not operate
correctly. Use only the included bobbin or
bobbins of the same type (part code: SFB:
XA5539-151).
*
Actual size
a
This model
b
Other models
c
11.5 mm (approx. 7/16 inch)
• Before inserting or changing the bobbin, be
sure to press
in the LCD, otherwise
injuries may occur if the “Start/Stop” button
or any other button is pressed and the
machine starts sewing.
Summary of Contents for Ellisimo BLSO
Page 1: ......
Page 7: ...IMPORTANT SAFETY INSTRUCTIONS v...
Page 14: ...CONTENTS xii...
Page 35: ...LCD SCREEN Getting Ready 21 1...
Page 90: ...USEFUL FUNCTIONS 76...
Page 194: ...USING THE MEMORY FUNCTION 180...
Page 267: ...USING THE MEMORY FUNCTION Embroidery 253 5 f Press o The sewing screen is displayed...
Page 300: ...EDITING PATTERNS 286...
Page 324: ...PRINT AND STITCH COMBINING EMBROIDERY PATTERNS AND PRINTED DESIGNS 310...
Page 348: ...UPGRADING YOUR MACHINE S SOFTWARE 334...
Page 361: ......
Page 362: ......
Page 363: ......
Page 364: ...X1_TaconeyE_OM_cover C M Y K...


