


STITCH SETTINGS
66
STITCH SETTINGS
When you select a stitch, your machine automatically selects the appropriate stitch width, stitch length,
and upper thread tension. However, if needed, you can change any of the individual settings.
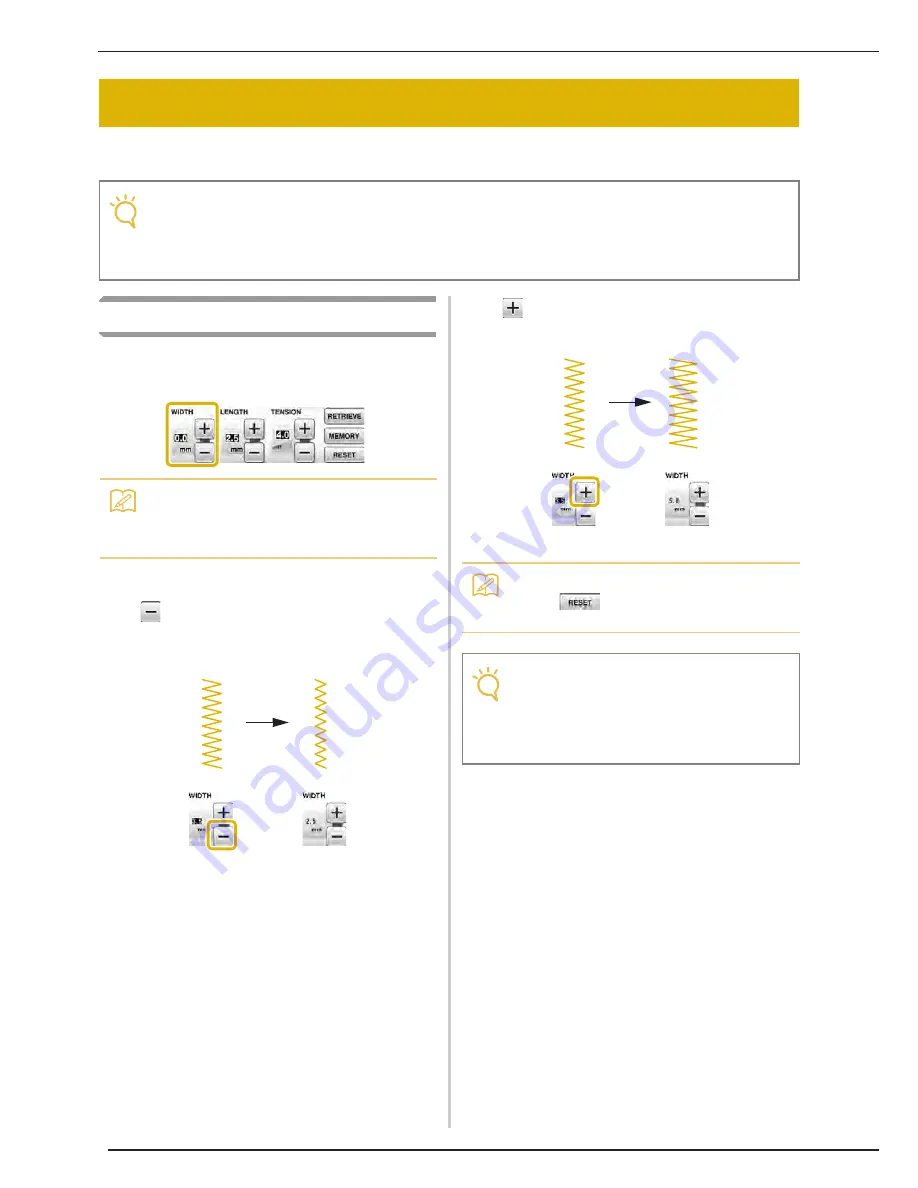
Setting the Stitch Width
Follow the steps below when you want to change
the zigzag stitch pattern width.
Example:
Press
to narrow the zigzag stitch pattern
width.
o
The value in the display gets smaller.
Press
to widen the zigzag stitch pattern width.
o
The value in the display gets bigger.
Note
• Settings for some stitches cannot be changed (refer to the “STITCH SETTING CHART” at the end of
this manual).
• If you turn off the machine or select another stitch without saving stitch setting changes (“Saving Your
Stitch Settings” on page 81), the stitch settings will return to their default settings.
Memo
• For an alternate method of changing the
stitch width using the speed controller, see
page 104.
Memo
• Press
to return the stitch width to the
original setting.
Note
• After adjusting the stitch width, slowly rotate
the handwheel toward you (counterclock-
wise) and check that the needle does not
touch the presser foot. If the needle hits the
presser foot, the needle may bend or break.
Summary of Contents for Ellisimo BLSO
Page 1: ......
Page 7: ...IMPORTANT SAFETY INSTRUCTIONS v...
Page 14: ...CONTENTS xii...
Page 35: ...LCD SCREEN Getting Ready 21 1...
Page 90: ...USEFUL FUNCTIONS 76...
Page 194: ...USING THE MEMORY FUNCTION 180...
Page 267: ...USING THE MEMORY FUNCTION Embroidery 253 5 f Press o The sewing screen is displayed...
Page 300: ...EDITING PATTERNS 286...
Page 324: ...PRINT AND STITCH COMBINING EMBROIDERY PATTERNS AND PRINTED DESIGNS 310...
Page 348: ...UPGRADING YOUR MACHINE S SOFTWARE 334...
Page 361: ......
Page 362: ......
Page 363: ......
Page 364: ...X1_TaconeyE_OM_cover C M Y K...


