USEFUL FUNCTIONS
72
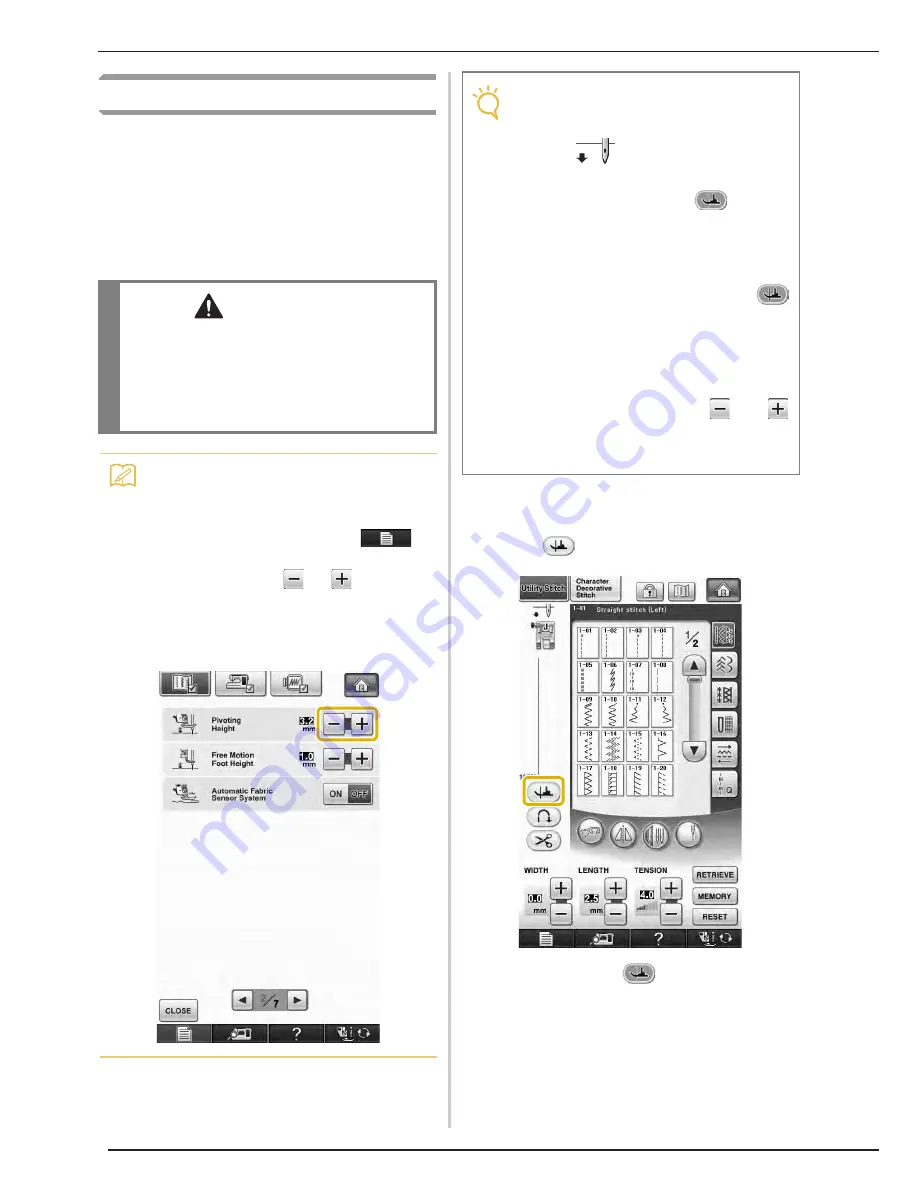
Pivoting
If the pivot setting is selected, the machine stops
with the needle lowered (in the fabric) and the
presser foot is automatically raised to an
appropriate height when the “Start/Stop” button is
pressed. When the “Start/Stop” button is pressed
again, the presser foot is automatically lowered
and sewing continues. This function is useful for
stopping the machine to rotate the fabric.
a
Select a stitch.
b
Press
to select the pivot setting.
o
The key appears as
.
CAUTION
• When the pivot setting is selected, the
machine starts when the “Start/Stop” button is
pressed or the foot controller is pressed down
even if the presser foot has been raised. Be
sure to keep your hands and other items away
from the needle, otherwise injuries may occur.
Memo
• When the pivot setting is selected, the
height of the presser foot when sewing is
stopped can be changed according to the
type of fabric being sewn. Press
to
display “Pivoting Height” on 2/7 of the set-
tings screen. Press
or
to select
one of the three heights (3.2 mm, 5.0 mm or
7.5 mm). To raise the presser foot further,
increase the setting. (Normally, 3.2 mm is
set.)
Note
• The “Needle Position – UP/DOWN” (3/7 of
the settings screen) must be set in the down
position
for the pivot function to be
used. When “Needle Position – UP/DOWN”
is set in the raised position,
appears
as light gray and cannot be used.
• The pivot function can only be used with
stitches where presser foot J or N is
indicated in the upper-left corner of the
screen. If any other stitch is selected,
appears as light gray and is not available.
• Use the “Presser Foot Lifter” button to make
sure the presser foot is lowered, and then
press the “Start/Stop” button to continue
sewing.
• If the pivot setting is selected,
and
beside “Presser Foot Height” in the settings
screen are not available and the setting
cannot be changed.
Summary of Contents for Ellisimo BLSO
Page 1: ......
Page 7: ...IMPORTANT SAFETY INSTRUCTIONS v...
Page 14: ...CONTENTS xii...
Page 35: ...LCD SCREEN Getting Ready 21 1...
Page 90: ...USEFUL FUNCTIONS 76...
Page 194: ...USING THE MEMORY FUNCTION 180...
Page 267: ...USING THE MEMORY FUNCTION Embroidery 253 5 f Press o The sewing screen is displayed...
Page 300: ...EDITING PATTERNS 286...
Page 324: ...PRINT AND STITCH COMBINING EMBROIDERY PATTERNS AND PRINTED DESIGNS 310...
Page 348: ...UPGRADING YOUR MACHINE S SOFTWARE 334...
Page 361: ......
Page 362: ......
Page 363: ......
Page 364: ...X1_TaconeyE_OM_cover C M Y K...


