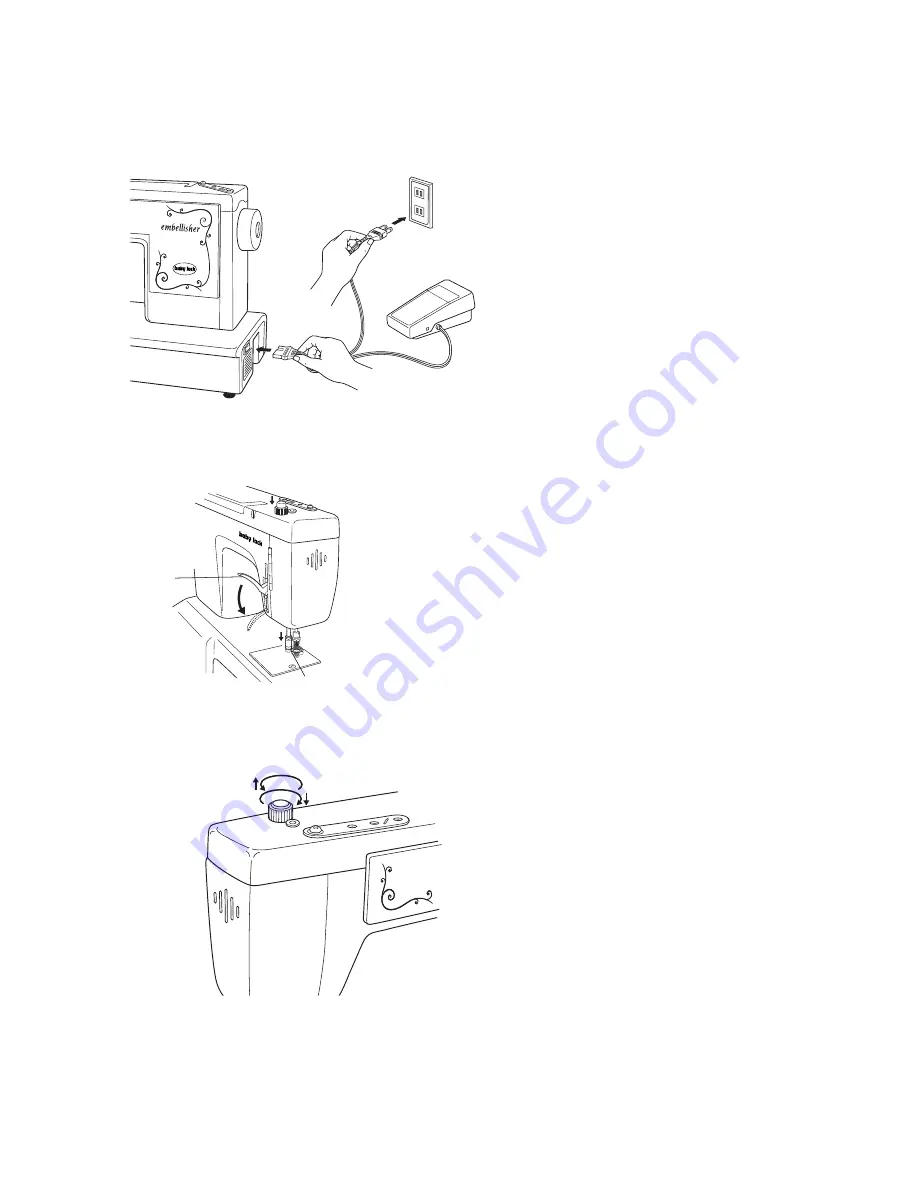
2. Setting Up Your Baby Lock Embellisher
1. Plug in the machine: Plug the power cord
into the machine first, then into a wall out-
let. Always make sure the power is off and
remove the plug from the wall outlet when
the machine is not in use, or when making
any adjustments such as changing needles
or light bulb. Available foot control for
U.S.A.: Model EZ-168A.
2. Polarized Plug: This appliance has a polar-
ized plug (one blade wider than the other).
To reduce the risk of electric shock, this
plug is intended to fit in a polarized outlet
only one way. If the plug does not fit fully in
the outlet, reverse the plug. If it still does
not fit, contact a qualified electrician to
install the proper outlet. Do not modify the
plug in any way.
3. Foot control: The felting speed of the
machine is determined by the amount of
pressure applied to the foot control. When
not in use, do not place anything on the
foot control or the machine could start inad-
vertently and the foot control or motor could
burn out.
4. Cloth Presser: The cloth presser is to
prevent cloth/fabric/material from flapping
during the felting process. Place the
cloth/fabric/materials on the needle plate
and under the cloth presser. Lower the
cloth presser lifter lever. To adjust the
height of the cloth presser, turn the cloth
presser height adjusting screw until you get
the correct height for your cloth/ fabric/
material. Turn the cloth presser height
adjusting screw counter-clockwise to raise
the cloth presser. Turn the cloth presser
height adjusting screw clockwise to lower
the cloth presser. The cloth/fabric/material
should move freely under the cloth presser
without any restrictions.
2
Cloth presser height adjusting screw
Turn left (counter-clockwise)
Cloth presser is raised
Turn right (clockwise)
Cloth presser is lowered
Cloth presser
Cloth presser
lifter lever
Summary of Contents for embellisher EMB12
Page 1: ......
Page 16: ...EMB12 EI 35 Ta 2008 8 1200...


