2 - 66
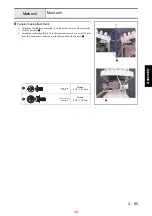
Thread tension unit
Main unit
3
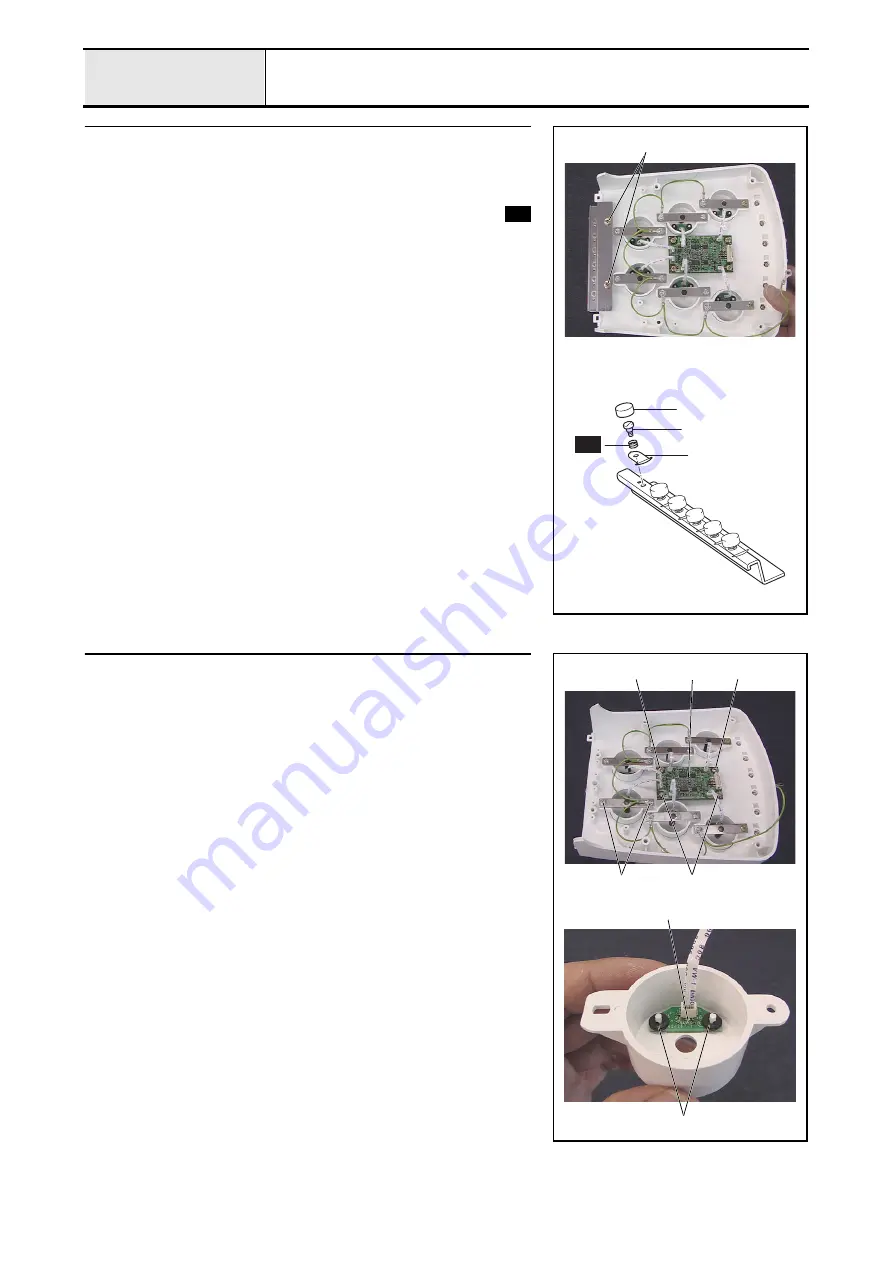
Inner thread eyelet base removal
1. Remove the 2 screws
1
, and then remove the inner thread eyelet base
assembly from the tension base assembly.
2. Remove the tension axis cap
1
. (6 locations)
3. Loosen the thread guide tension axis
2
, and then remove the spring
and the thread guide tension plate
3
. (6 locations)
1
2
3
S52
1
S52
4
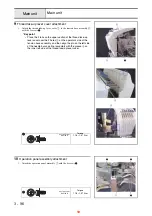
Thread sensor PCB assembly and head PCB assembly removal
1. Disconnect the FFC (SML2CD-H) from the head PCB assembly
1
.
(6 locations)
2. Remove the 4 screws
1
, and then remove the head PCB assembly.
3. Remove the 2 screws
2
, and then remove the thread tension bracket,
thread quantity sensor cover, and head grounding wire assembly.
(6 locations)
4. Remove the 2 retaining rings CS2, and then remove the 2 rubber washers
and the thread sensor assembly
2
from the thread quantity sensor cover.
(6 locations).
5. Remove the FFC (SML2CD-H) from the thread sensor assembly.
1
1
2
2
1
1
Retaining ring CS2
10
Summary of Contents for EMP6
Page 1: ...EMP6 BMP8 Technical Training...
Page 16: ...2 55 Disassembly Power unit Main unit 15...
Page 18: ...2 73 Disassembly Operation panel Main unit 17...
Page 44: ......


