UTILITY STITCHES
— — — — — — — — — — — — — — — — — — — — — — — — — — — — — — — — — — — — — — — — — — —
94
Zipper/piping Insertion
A zipper and piping can be sewn in place.
There are many methods for inserting zippers and pipings. The procedures for inserting a centered zipper
and a piping are described below, with the adjustable zipper/piping foot.
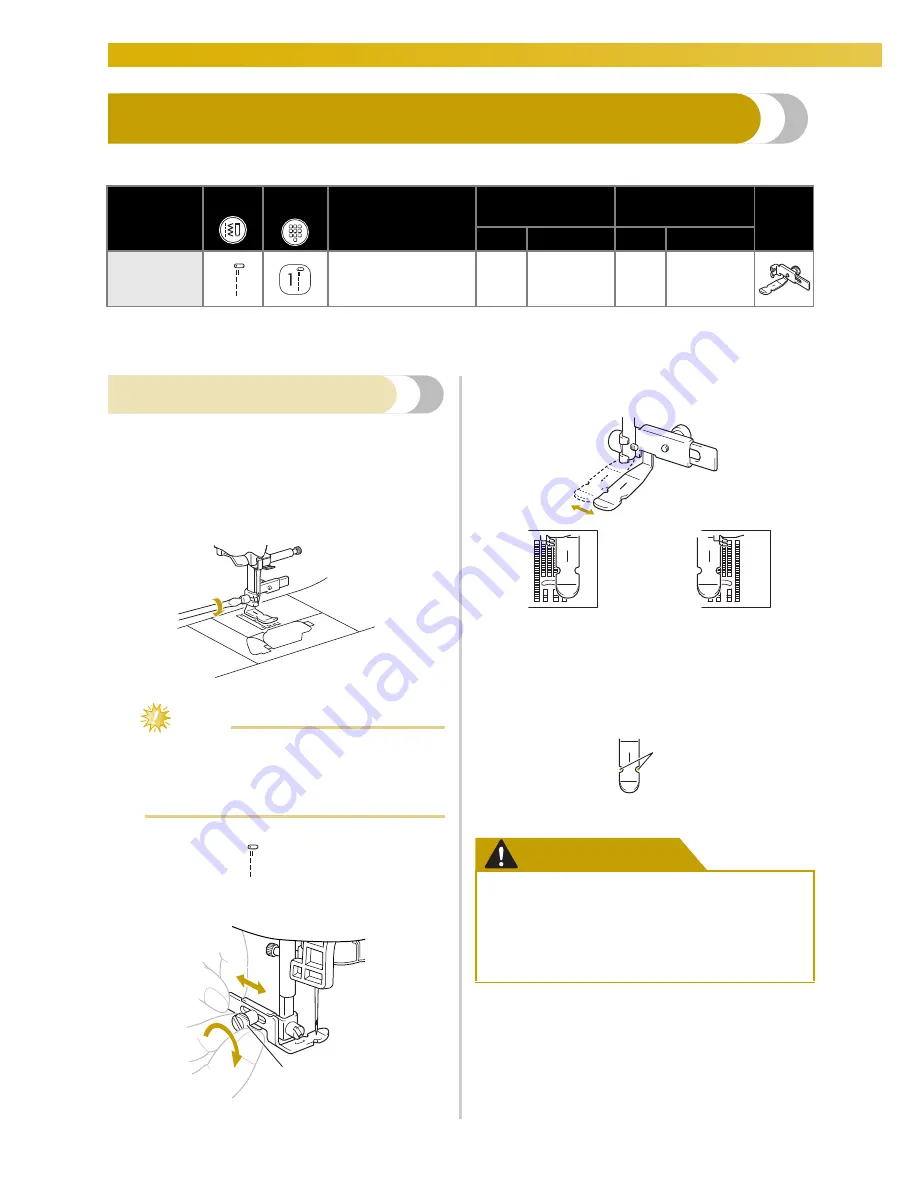
Inserting a centered zipper
a
Refer to step
a
–
d
of “Inserting a centered
zipper” (page 89).
b
Remove the presser foot and presser foot
holder (page 41) to attach the screw-on
adjustable zipper/piping foot.
Note
z
Use a screw driver to securely tighten the
screw that holds the presser foot. If the screw
is loose, the needle may break and cause
injures.
c
Select stitch
01
.
d
Loosen the positioning screw on the back of
the presser foot.
a
Positioning screw
e
Slide the presser foot over either the left or
right feed dog.
f
Change the needle position so that the needle
does not touch the presser foot.
For details, refer to “Adjusting the stitch width”
(page 57).
a
Needle drop point
CAUTION
Stitch Name
Pattern Numeric
Key
Application
Stitch Width
[mm (inch)]
Stitch Length
[mm (inch)]
Presser
Foot
Auto
Manual
Auto
Manual
Straight stitch
(left needle
position)
01
Attaching zippers
Sewing concealed
seams and piping
0.0
(0)
0.0–7.0
(0–1/4)
2.5
(3/32)
0.2–5.0
(1/64–3/16)
1
●
After adjusting the needle position, slowly
turn the handwheel toward you and
check the needle does not touch the
presser foot. If the needle hits the presser
foot, the needle may bend or break.
Left sewing position
Right sewing position
1
Summary of Contents for Melody BLMY
Page 1: ......
Page 48: ...GETTING READY 46...
Page 157: ...Index 155 4...
Page 158: ...NewF3_dash_TaconyEng_coverH1 H4...


