EDITING PATTERNS
48
e
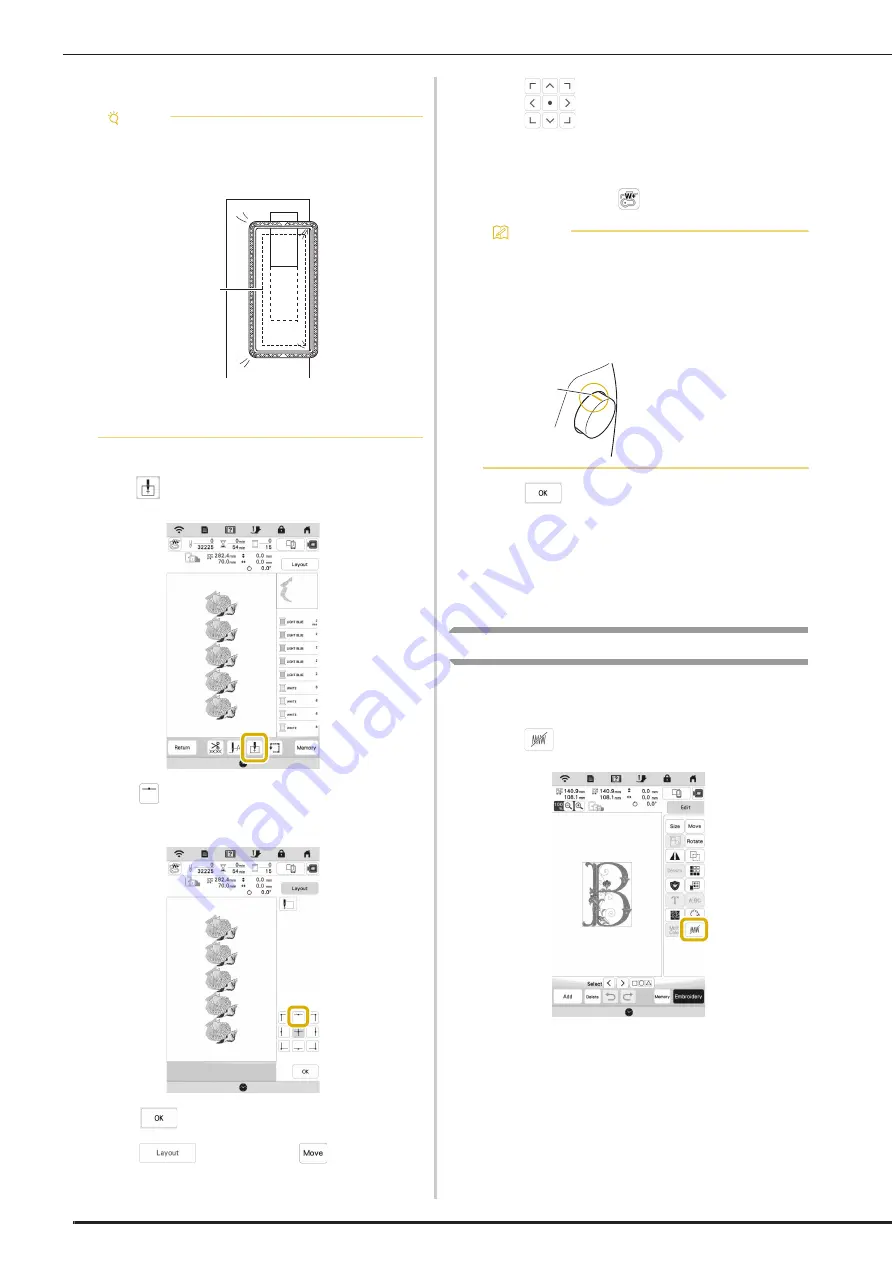
Rehoop the fabric in the embroidery frame.
f
Attach the embroidery frame to the machine, and then
touch .
g
Touch
to set the starting point to the center top of
the pattern.
h
Touch .
i
Touch
, and then touch
.
j
Touch
to move the embroidery frame until
the thread mark on the fabric is aligned with the light
of the LED pointer.
*
To check the needle drop point with the light of the
LED pointer, touch
.
k
Touch .
l
Remove the thread mark.
m
Start embroidering.
Deselect Region Setting (No Sew Setting)
The deselect region setting (which specifies that a thread color
will not be embroidered) can be applied to a part of the
pattern with a specific color.
a
Touch
in the embroidering edit screen.
Note
• Adjust the position of the fabric so that the
embroidering area for the next pattern is within the
embroidering area.
1
Pattern embroidered first
2
Position of pattern to be embroidered next
3
Embroidering area
c
a
b
Memo
• For the accurate needle drop point, slowly turn the
handwheel toward you (counterclockwise) to lower
the needle. Then, turn the handwheel away from
you (clockwise) until the mark on the handwheel is
at the top. The carriage cannot move if the mark on
the handwheel is not at the top.
1
Mark
a
Summary of Contents for Meridian 2
Page 1: ......
Page 2: ......
Page 10: ...CONTENTS 8...
Page 74: ...ADJUSTMENTS DURING THE EMBROIDERY PROCESS 72...
Page 112: ...IQ INTUITION POSITIONING APP 110...
Page 129: ......
Page 130: ......
Page 131: ......
Page 132: ...D02M4U 001 English 882 W84...


