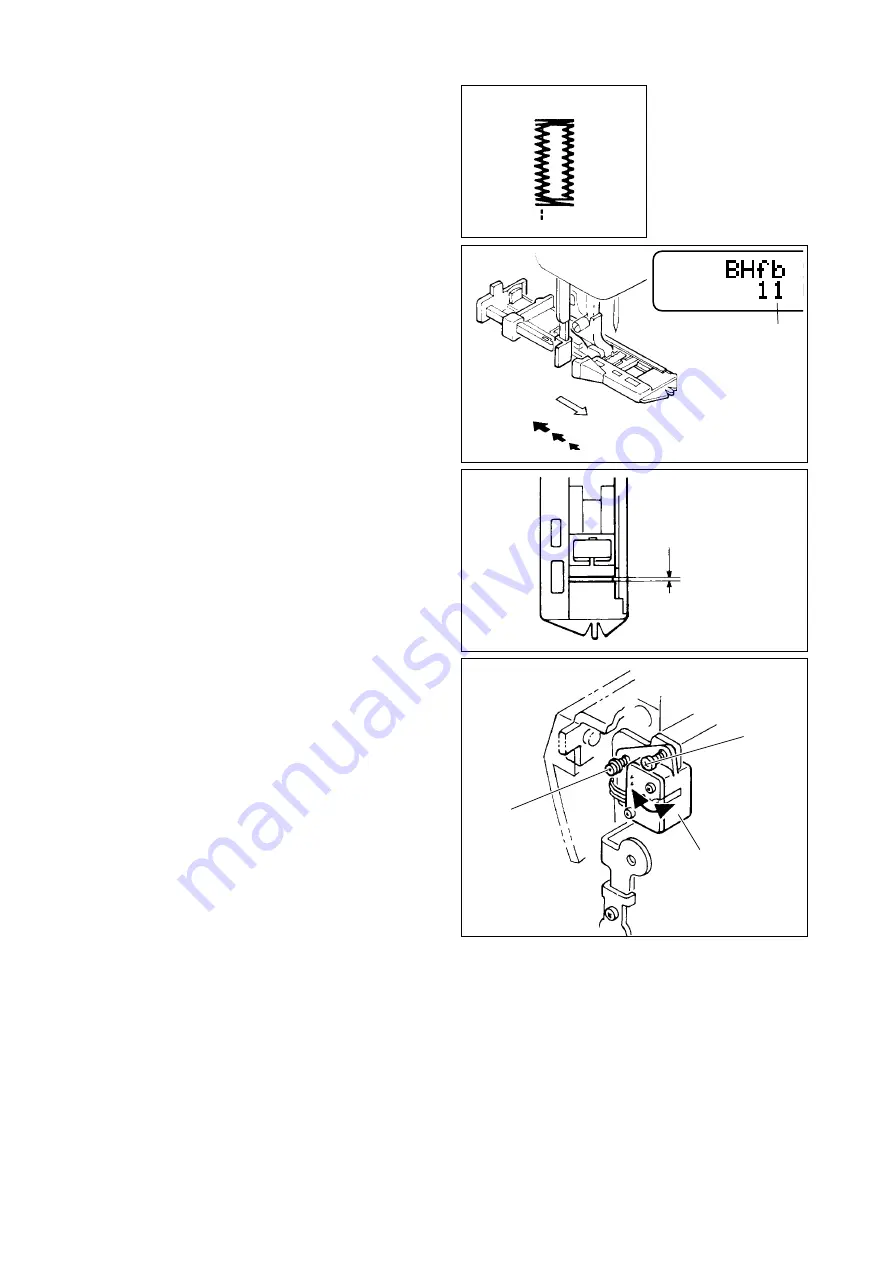
fig. b-1a
fig. b-1b
0
fig. b-1c
fig. b-1d
a
b
- 16 -
b-1. Adjustment for buttonhole
lever position
If the machine does not sew even with the buttonhole
lever all the way down, it means that the buttonhole lever
is not positioned properly. Also, if the buttonhole lever is
not positioned properly, the machine will sew buttonhole
as fig. b-1a.
1. Run the self-diagnostic program and set the mode to
check the condition of switches and sesors.
2. Attach the buttonhole foot.
3. Lower the presser foot and the buttonhole lever.
4. Pull the presser foot frame towards you about 1 cm
while lifting the presser foot lifter slightly. Then slowly
move frame back again. Lower the lifter when BH f
changes to 0.
5. At this time, the presser foot frame should be about 1
mm forward from the extreme end.
If it is not correct position, adjust as follows:
6. Pull the presser foot frame 1 mm forward from the
extreme end, and lower the presser foot.
7. Remove the light cover.
8. Loosen the set screws (a, b). (fig b-1d)
9. Use the screw (a) as a pivot and pull the circuit board
towards you.
10. Tighten screw (b) when BH f changes from 1 to 0 and
while slowly pushing the circuit board backwards.
11. Tighten screw (a) and replace the light cover.
Re-check the buttonhole lever position when adjustments
have been completed.
Pull about 1 cm
Slowly move back
About 1 mm
Circuit board


