NAMES OF MACHINE PARTS AND THEIR FUNCTIONS
14
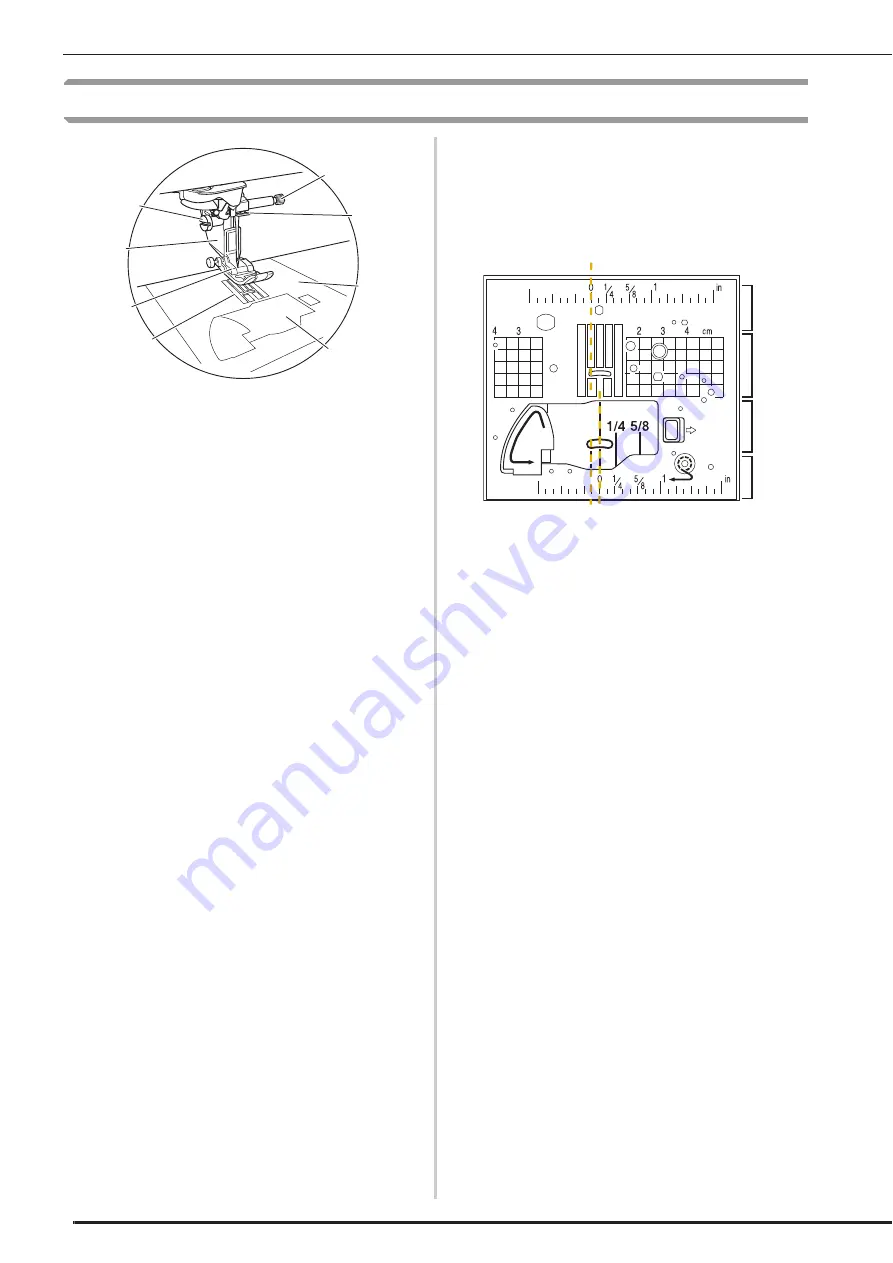
Needle and Presser Foot Section
a
Presser foot holder screw
Use the presser foot holder screw to hold the presser foot
holder in place. (page 73)
b
Presser foot holder
The presser foot is attached to the presser foot holder.
(page 72)
c
Presser foot
The presser foot consistently applies pressure to the fabric as
sewing takes place. Attach the appropriate presser foot for the
selected stitch. (page 72)
d
Feed dogs
The feed dogs feed the fabric in the sewing direction.
e
Bobbin cover
Open the bobbin cover to set the bobbin. (page 58, 119)
f
Needle plate
The needle plate is marked with guides to help sew straight
seams. (page 112)
Remove the needle plate to clean the race. (page 113, 188)
g
Needle bar thread guide
Pass the upper thread through the needle bar thread guide.
(page 61)
h
Needle clamp screw
Use the needle clamp screw to hold the needle in place.
(page 73)
Measurements on the needle plate and the bobbin
cover (with mark)
The measurements on the bobbin cover and
needle plate are references for stitch patterns with
a left or middle (center) needle position.
a
For stitches with a middle (center) needle position
b
For stitches with a left needle position
c
Left needle position on the needle plate <inch>
d
Left needle position on the needle plate <cm>
e
Middle (center) needle position on the bobbin cover
(with mark) <inch>
f
Middle (center) needle position on the needle plate
<inch>
a
b
c
d
g
h
e
f
a
b
c
d
e
f
b
Summary of Contents for Solaris 2
Page 1: ......
Page 2: ......
Page 12: ...CONTENTS 10...
Page 53: ...Chapter 2 Sewing Basics...
Page 105: ...Chapter 3 Utility Stitches...
Page 162: ...SEWING THE STITCHES 160...
Page 163: ...Chapter 4 Character Decorative Stitches...
Page 183: ...COMBINING STITCH PATTERNS Character Decorative Stitches 181 4 Press Press Press...
Page 189: ...Chapter 5 Appendix...
Page 224: ...English 882 W31 Version 0...


