


EMBROIDERY APPLICATIONS
109
Ad
va
nc
ed
Ed
iti
n
g
3
■
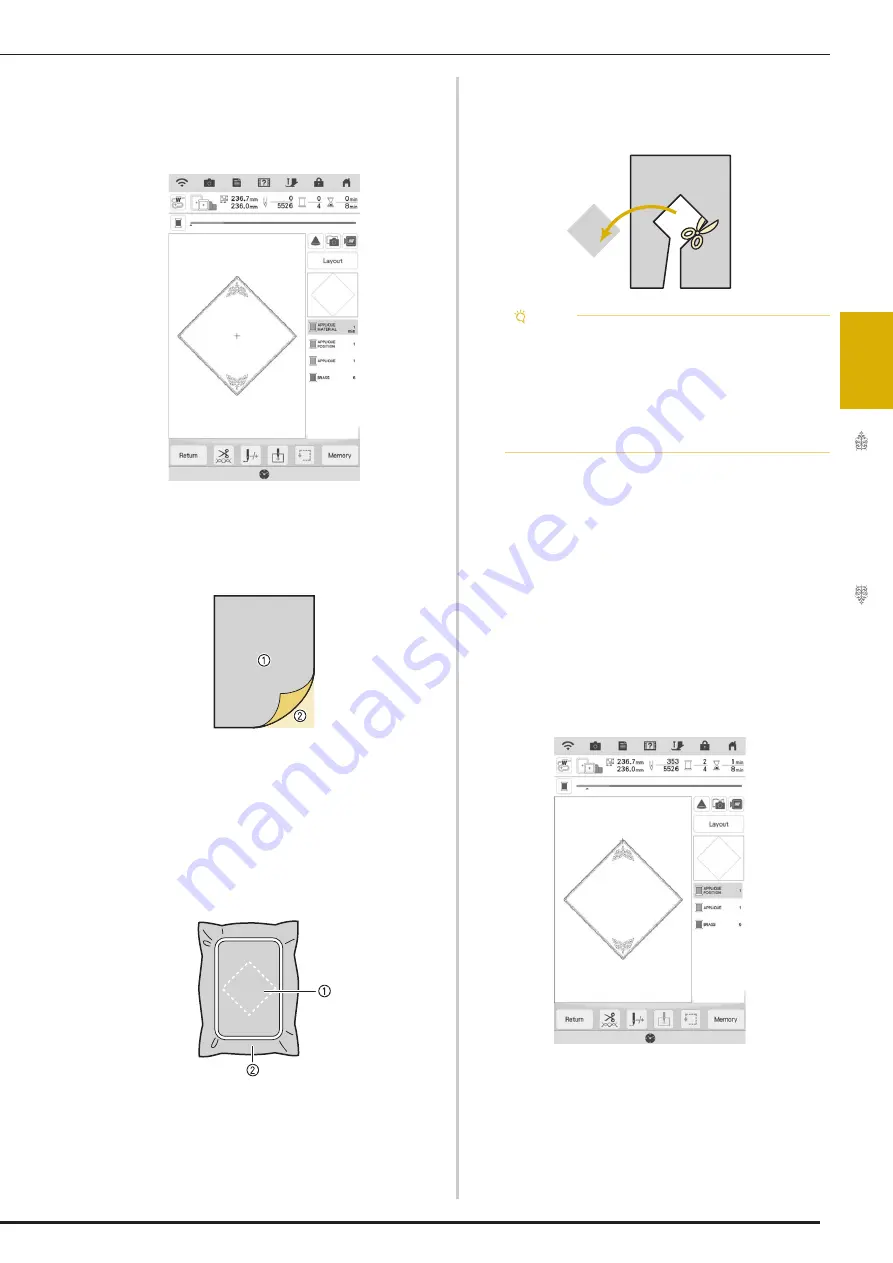
1. Creating the Appliqué Piece
a
Select the appliqué pattern, and then
continue to the embroidery screen.
b
Attach stabilizer material to the wrong side
of the appliqué fabric.
Hoop the fabric in the embroidery frame, and then
attach the embroidery frame to the embroidery unit.
a
Appliqué (cotton, felt, etc.)
b
Stabilizer
c
Thread the machine with the embroidery
thread, lower the presser foot lever, and
then press the “Start/Stop” button to sew
the cutting line of the appliqué piece.
The outline of the appliqué piece is sewn, and then
the machine stops.
a
Cutting line for appliqué piece
b
Fabric for appliqué piece
d
Remove the fabric for the appliqué piece
from the embroidery frame, and then
carefully cut along the sewn cutting line.
■
2. Sewing the Appliqué Position on
the Base Fabric
a
Attach stabilizer material to the wrong side
of the fabric for the appliqué base.
Hoop the fabric in the embroidery frame, and then
attach the embroidery frame to the embroidery unit.
b
Thread the machine with the embroidery
thread, lower the presser foot lever, and
then press the “Start/Stop” button to sew
the appliqué position.
Note
• If the appliqué piece is cut out along the
inside of the cutting line, it may not be
correctly attached to the fabric. Therefore,
carefully cut out the appliqué piece along the
cutting line.
• After cutting out the appliqué piece, carefully
remove the thread.
Summary of Contents for Solaris VISION BLSA3
Page 1: ......
Page 2: ......
Page 6: ...CONTENTS 4 ...
Page 7: ...Chapter 1 Embroidery Step by Step ...
Page 59: ...Chapter 2 Basic Editing ...
Page 87: ...Chapter 3 Advanced Editing ...
Page 150: ...USING THE CAMERA TO CONNECT PATTERNS 148 ...
Page 151: ...Chapter 4 IQ Designer ...
Page 192: ...IQ INTUITION POSITIONING APP 190 ...
Page 193: ...Chapter 5 Appendix ...
Page 204: ...English 882 W34 Version 0 ...


