


EMBROIDERY APPLICATIONS
114
e
Select the desired pattern from the desired
category.
And then touch
.
a
Couching patterns
b
Fill couching embroidery font
f
Touch
to lock all keys and buttons,
and then raise the presser foot lever.
g
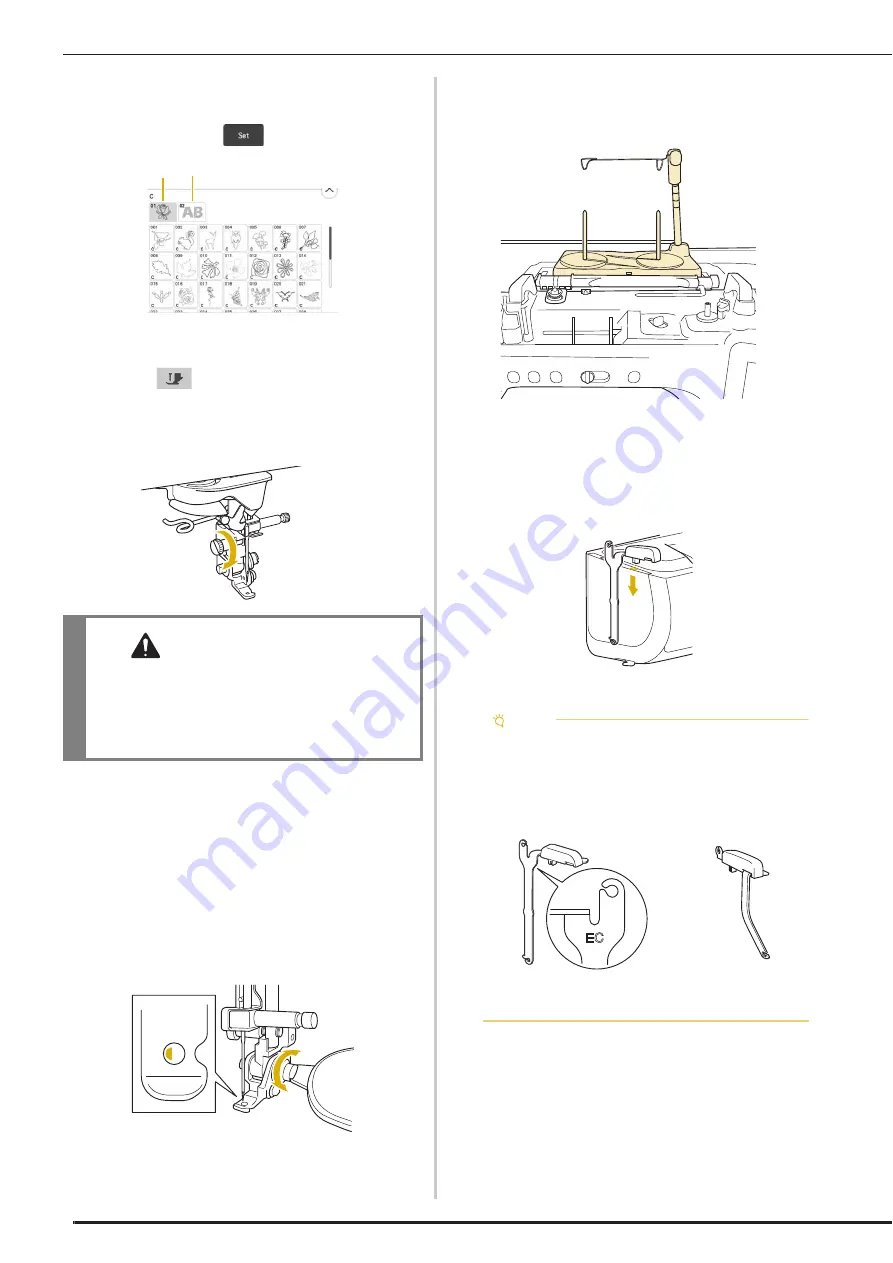
Attach embroidery couching foot “Y”.
h
Rotate the handwheel and check that the
needle is in the left half of the hole in
embroidery couching foot “Y”.
If the needle is not in the left half, use the multi-
purpose screwdriver to turn the screw of embroidery
couching foot “Y” to adjust the position of the
embroidery foot. Turn the screw toward you to move
the embroidery foot to the right. Turn the screw toward
the back to move the embroidery foot to the left.
After making adjustments, rotate the handwheel and
check that the needle does not touch the presser foot.
i
Attach the spool stand to the machine.
At this time, do not raise the telescopic thread guide
shaft.
*
Refer to “Using the Spool Stand” on page 24.
j
Insert the yarn guide for embroidery
couching into the slot on the top left of the
machine.
CAUTION
• When using embroidery couching foot “Y”,
make sure the machine is in embroidery mode.
Otherwise, the needle will strike the
embroidery couching foot, causing the needle
to break and possibly causing injury.
a
b
Note
• There are two yarn guides: one for sewing
couching and one for embroidery couching.
Check the shape of the part, and then install
the appropriate guide.
a
Yarn guide for embroidery couching
b
Yarn guide for sewing couching
a
b
Summary of Contents for Solaris VISION BLSA3
Page 1: ......
Page 2: ......
Page 6: ...CONTENTS 4 ...
Page 7: ...Chapter 1 Embroidery Step by Step ...
Page 59: ...Chapter 2 Basic Editing ...
Page 87: ...Chapter 3 Advanced Editing ...
Page 150: ...USING THE CAMERA TO CONNECT PATTERNS 148 ...
Page 151: ...Chapter 4 IQ Designer ...
Page 192: ...IQ INTUITION POSITIONING APP 190 ...
Page 193: ...Chapter 5 Appendix ...
Page 204: ...English 882 W34 Version 0 ...


