EMBROIDERY APPLICATIONS
117
Ad
va
nc
ed
Ed
iti
n
g
3
c
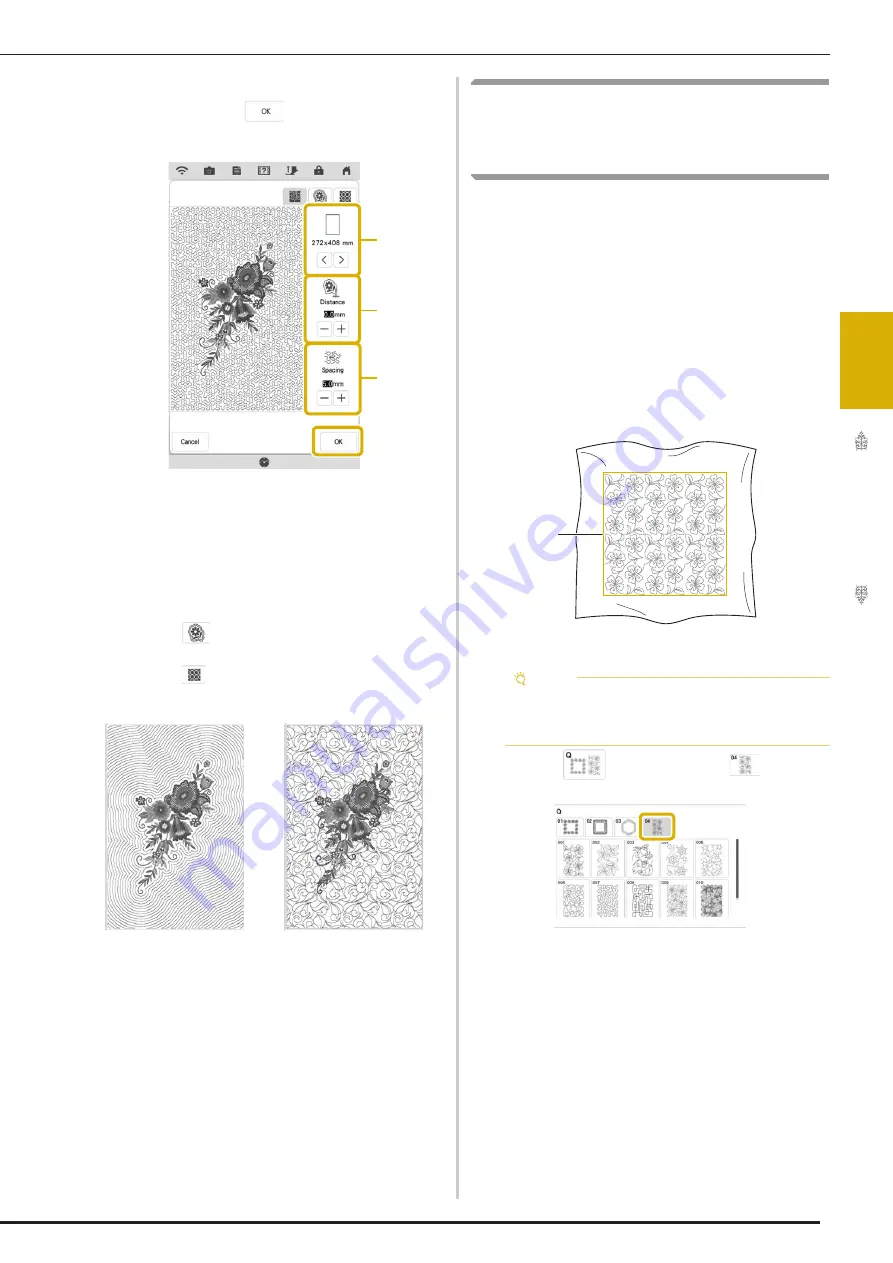
After specifying the stitch settings for the
stippling, touch
.
a
The stippling is added within the area of the
selected frame size. If the pattern is larger than the
selected frame size, the area indicating the frame
size will appear in gray, and stippling will not be
added.
b
Specify the distance from the outline of the pattern
to the stippling.
c
Specify the spacing for the stippling.
*
Touch
in the stippling settings screen to create
an echo quilting pattern.
*
Touch
in the stippling settings screen to create
a decorative fill pattern.
a
Echo quilting pattern
b
Decorative fill pattern
Embroidering a Quilting Pattern
Across the Entire Fabric (Edge-to-
Edge Quilt Function)
Connect quilting patterns to embroider from edge
to edge of a specified area. By rehooping a large
piece of fabric, you can continue embroidering the
quilting pattern across the entire fabric.
■
Creating Edge-to-Edge Quilt Data
a
Determine the area of the fabric to be
embroidered, and then draw a line around
it with a chalk pencil. Measure the width
and height.
a
Embroidering area
b
Touch
, and then touch
.
a
b
a
b
c
Note
• Make sure that the chalk pencil line is within
the embroidering area when the fabric is
hooped.
a
Summary of Contents for Solaris VISION BLSA3
Page 1: ......
Page 2: ......
Page 6: ...CONTENTS 4 ...
Page 7: ...Chapter 1 Embroidery Step by Step ...
Page 59: ...Chapter 2 Basic Editing ...
Page 87: ...Chapter 3 Advanced Editing ...
Page 150: ...USING THE CAMERA TO CONNECT PATTERNS 148 ...
Page 151: ...Chapter 4 IQ Designer ...
Page 192: ...IQ INTUITION POSITIONING APP 190 ...
Page 193: ...Chapter 5 Appendix ...
Page 204: ...English 882 W34 Version 0 ...


