


EMBROIDERING A PATTERN
50
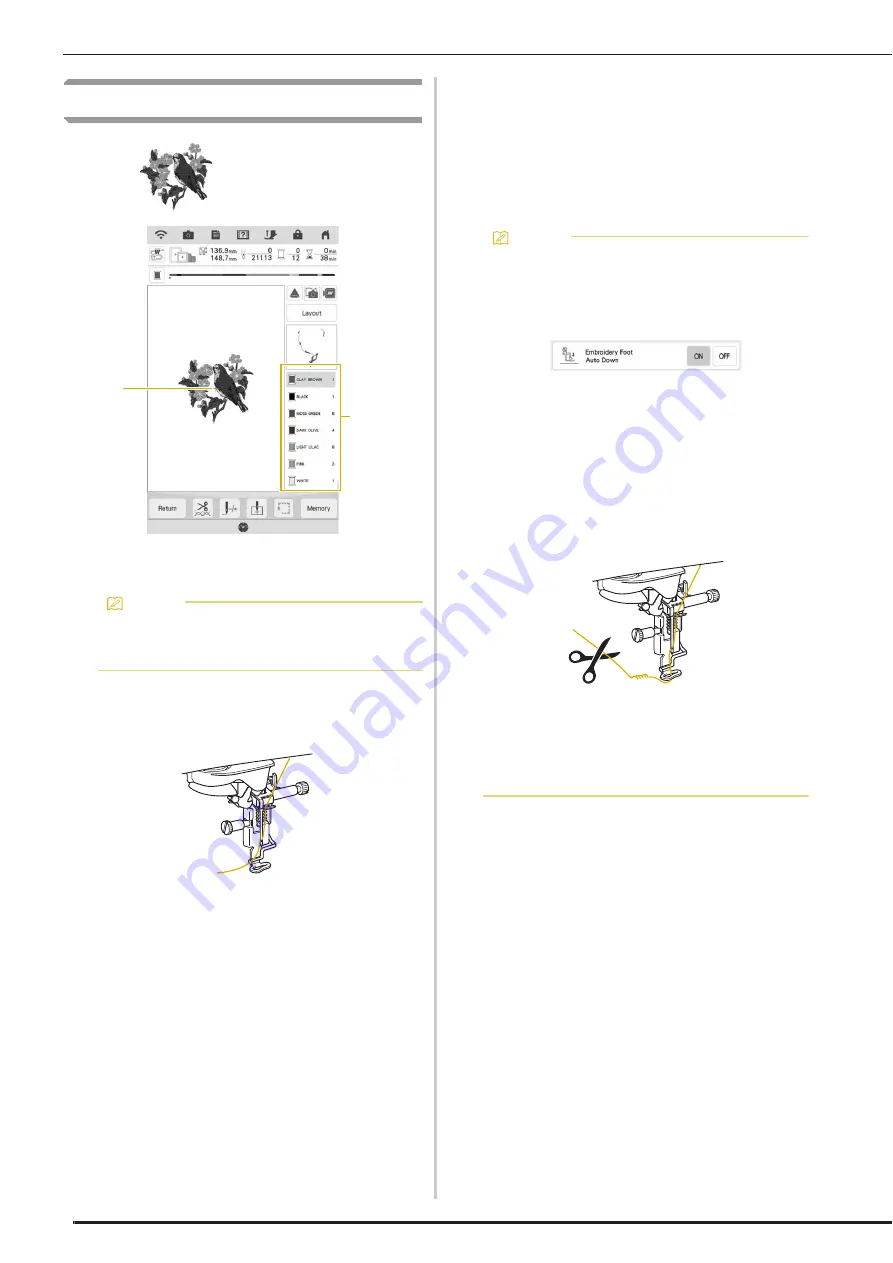
Embroidering Patterns
Example:
a
Embroidery color order
b
Cursor
a
Using the automatic needle threader,
thread the machine for the first color.
b
Lower the embroidery foot, then press the
“Start/Stop” button to start embroidering.
When the first color is completely embroidered, the
machine will automatically trim the threads and
stop. The embroidery foot will then automatically be
raised.
On the embroidery color order display, the next
color will move to the top.
c
Remove the thread for the first color from
the machine. Thread the machine with the
next color.
Memo
• The [+] cursor moves over the pattern,
showing which part of the pattern is being
embroidered.
b
a
Memo
• A setting in the settings screen can be
specified so that pressing the “Start/Stop”
button before starting embroidering
automatically lowers the embroidery foot.
(page 7)
• If you want to get more attractive finishes, try
the procedures below;
- After 5-6 stitches, press the “Start/Stop”
button again to stop the machine.
- Trim the excess thread at the beginning of
embroidering. If the thread at the beginning
of embroidering is under the embroidery
foot, raise the embroidery foot, then trim the
excess thread.
• If there is thread left over from the beginning
of embroidering, it may be embroidered over
as you continue embroidering the pattern,
making it very difficult to deal with the thread
after the pattern is finished. Trim the threads
at the beginning of each thread change.
Summary of Contents for Solaris VISION BLSA3
Page 1: ......
Page 2: ......
Page 6: ...CONTENTS 4 ...
Page 7: ...Chapter 1 Embroidery Step by Step ...
Page 59: ...Chapter 2 Basic Editing ...
Page 87: ...Chapter 3 Advanced Editing ...
Page 150: ...USING THE CAMERA TO CONNECT PATTERNS 148 ...
Page 151: ...Chapter 4 IQ Designer ...
Page 192: ...IQ INTUITION POSITIONING APP 190 ...
Page 193: ...Chapter 5 Appendix ...
Page 204: ...English 882 W34 Version 0 ...


