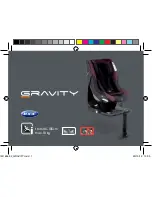


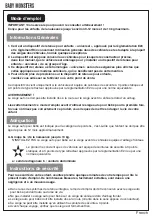


Important! Keep for future reference Suitable for children from birth to
approximately 9-12 months 13kg(29LBS).
1.This is a”Universail” child restraint; it is approved to E24 Regulation R44 for general use in
vehicles and will fit iost, but not all vehicle seats.
2.Acorrect fit is likely if the vehicle manufacturer has declared in the vehicle handbook that the
vehicle is capable of accepting a “Universal” hild restraint for this group.
3.This child restraint has been declared “Universal” under more stringent conditions
than those applied to earlier designs which do not carry this notice.
4.If in doubt, consult either the child restraint manufacturer or the retailer.
Only suitable if the vehicle is fitted with 3-point static,3-point retractor safety belts,
approved to E24 Regulation or other equivalent standards.
WARNING!
DO NOT place rear-facing child seat on front seats with airbags.
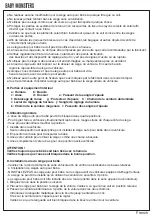
Please read this instruction carefully before using baby car seat for first time.
You risk endangering your child’s life if you use the product incorrectly.
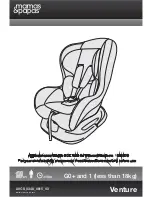
The baby car seat is suitable for weight categories 0+, (Not older than approx. 12 months).
A.Grupo 0+: Birth - 13 kg
DO NOT place this baby seat on seats with front airbags.
Only suitable if the vehicle is fitted with 3-point static, 3-point retractor safety belts,
approved toE24 Regulation or other equivalent standards.
a:DIAGONAL BELT b:LAP BELT
Please invest a few minutes in your child’s safety to read these instructions,
Many injuries, which are easily avoidable, are caused by carelessness and incorrect use.
● The instructions can be retained with baby car seat for its life period in the case of built-in restraints.
● DO NOT place this baby seat on seats with front airbags.
● The baby car seat must be instralled rearwards facing
(in the direction pooosite the one in which you are traveling).
● This baby carseat can only be installed using a 3-point vehicle belt.
● Before each journey check whether the baby car seat is instralled firmly.
● DO NOT changethe the baby seat in any way.
● DO NOT leave your baby unattended in the seat at any time.
● Never use theseat as shopping bag or as a means for transporting something.
● Protect the baby seats ystem against direct sun light otherwise the high teemperature will hurt your child.
● Ensure that all parts are locked in place correctly and not trapped in the adjustable seats or door.
● Luggage or otherobjects liable to cause injuries in the event of a collision should br properly secured.
● The baby seat must not be used without the seat cover.
● The seat cover should not be raplacedewith any other than the one recommended by the manufacturer.
● Periodically inspect the harness, pay particular attention to attachment points,
stitching and adjusting devices. Check forewear and tear or demage.
● Do not continue to use the baby seat if parts have become damaged or have loosened after an accident.
● The handle of the baby seat has to reat against the back of the vehicle seat.
If necessary, adjust the head rest of the vehicle seat.
● When you drive without ababy in the baby seat, always secure the system with the adult belt.
● Do not use any load bearing contact points other than those described in the instructions
and marked in the baby seat.
● We recommend using the baby seat on the back seat of the car.
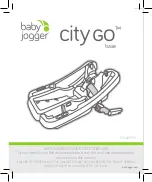
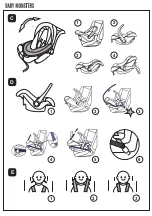
B.Parts and interior epuipment
a:Harness b:Buckle
c:Handle d:Shell e:Shoulder belt slot
f:Handle release g:Chest pad h:Lap belt guide
i:Harness adjuster lever j:Harness adjuster strap
k:Digonal belt guide l:Shoulder belt slot
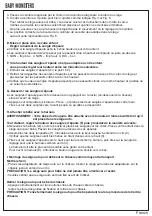
C.General use
-The handle for the babyseat can be placed into 4 positions.
-To adjust the handke, please press the red button og handle on oth side at the same time.
-Now it can be rotated,
1.Installed in the car.
This position(only this position) is suitable for the baby car seat instralled on the vehicle seat.
2.Upright for carrying.
3.Handle positioned back to intitate the rocking feature.
4.Handle positioned fully down for a more upright sitting position.
WARNING:
Always ensure that the baby is secured correctly in the harness.
Always ensure that the handle is locked correctly in position.
D.Securing the infant carrier
-Please red the operating handbook in your vehicle to inform yourself about the basics concerning
children’s seats in vehicles.
-DO NOT place this baby seat on seats with front airbags.
-This baby car sezt can only be installed using a 3-pointcehicle belt.
-The baby car seat must be installed reawards facing
(in the direction opposite the one in which you are traveling).
1.Adjust the handle to the forward position.
2.Place the infant carrier in the seat of car. Ensure handle is in upright position.
3.Slide the lap belt of the vehicle’s 3-point seatbelt through both Lap belt guides.
Let the tongue plate snap in the belt lock with aclearly audible “ click. Pill the shoulder belt in narrow
direction to tighten the lap belt. Check to make sure the tongue plate is looked by pulling on the belt.
4.Place the diagonal belt in the digonal belt guide at the back of the seat.
5.Tighten the vehicle’s own 3-poiny seatbelt by pulling hard on the positions showed in Fig 4 and Fig 5.
To release your baby car seat following the aboves instructions in reverse order.
Make sure all th belts’ position is right and they has not become twisted.
Also check that the cover is not impeding the movement or fit of the belt webbing in any way.
6.The satisfactory position of adult safety-belt buckle relative to the child car seat is as the Fig 6.
You can contact the child car seat manufacturer if in doubt about this point.
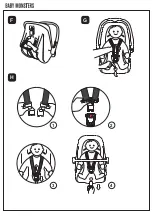
E.Securing your baby
Adjusting the shoulder belt height
● Check whether the shoulder belts are set at the right height for your child.
The shoulder belts should be fed into the belt slots that lie at shoulder height or just above.
1.NO -Too low 2.NO -Too high 3.YES-Corect
F.If the height of your shoulder belts do not fit your child,
then adjust the height of the shoulder helts as follows.
1.Loosen the shoulder harness(G).
2.Pull out the buckle tongues from the chest pad and the slots on the cover and the shell,
then thread them unto the corresponding belt slodts.
● Ensure that both of the shoulder belt go throught slots at the same height,and not twised.
G.Loosening the shoulder straps
●Te shoulder straps is slack ened by pressing the lever (under the seat coner) on the front of the seat.
● Press down on the label marked ”Press” as you grip the two shoulder straps with your other hand.
Pull the shoulder straps towards you to loosen it.
H.Securing the baby with the harness
Warning:Your child must be fastened in the safety harness at all times
when using the infant carrier.
Firstly, adjust the shoulder straps height(F), proceed as follows:
● Loosen the harness(G), openthe buckle, and place them down sideways.
● Put the two metal sections ofthe buckle connectors together (1).
Slot the buckle connoctors into theslot the top of the buckle until they “click”into place.
Check the harness is correctly locked bu pulling the shoulder straps upwards(3).
● Pull the shoulder straps upwards to remove the whole harness then pull the adjuster strap
until the harness is fully tightened(4).
The harness should be adjucted as tightly as possible withoyt causing discomfort to your child.
To release the harness (E), press the red button on thebuckle downnwards.
I.Fitting infant carrier to pushcsair foruese as travel systrm
Engage the buckle
-Fit car seat adaptors to pushichair.Attach the infant carrier to the adaptors on the chassis
and push down to lock until the“click” isheard.
Caution! ever try to attach the infant carrier to the pushchair in a forward-facing position.
-Plaese ensure that the eseat until is securely attached to the pushchair before use.
To remove infant carrier from pushchair
-PushT the buttomns iewards on each side,
releaes frm the fixantion slots and lift the infrant carrier firom the frame.
Caution!K eep a firm grip on the infant carrier at tines while removing from pushchair.
The chid car seat must be replaced whin it has been subject to violent sresses in accident.
● To remove cover,first loosen the shoulder straps (F) ,
then open the buckle (G).
● Then pull out the harness from the seat.
● Loosen the elestic, you can remove the cover from the shell
Use only neatral detergent and warm water to wash
Do not wash by machine, Spin-dry or tumble-dry are not recommended.
English
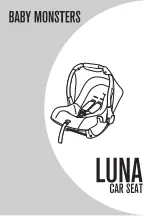
Summary of Contents for Luna
Page 1: ......
Page 2: ...A B a b a b c d e f g h i j k l...
Page 3: ...C D E cl 1 1 4 1 2 3 5 2 3 6 2 3 4...
Page 4: ...F H G 1 2 3 4...