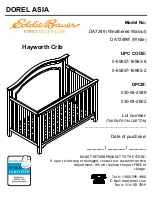
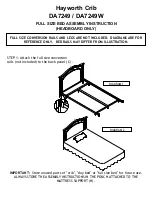
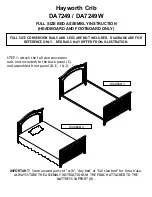
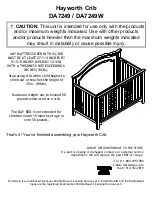
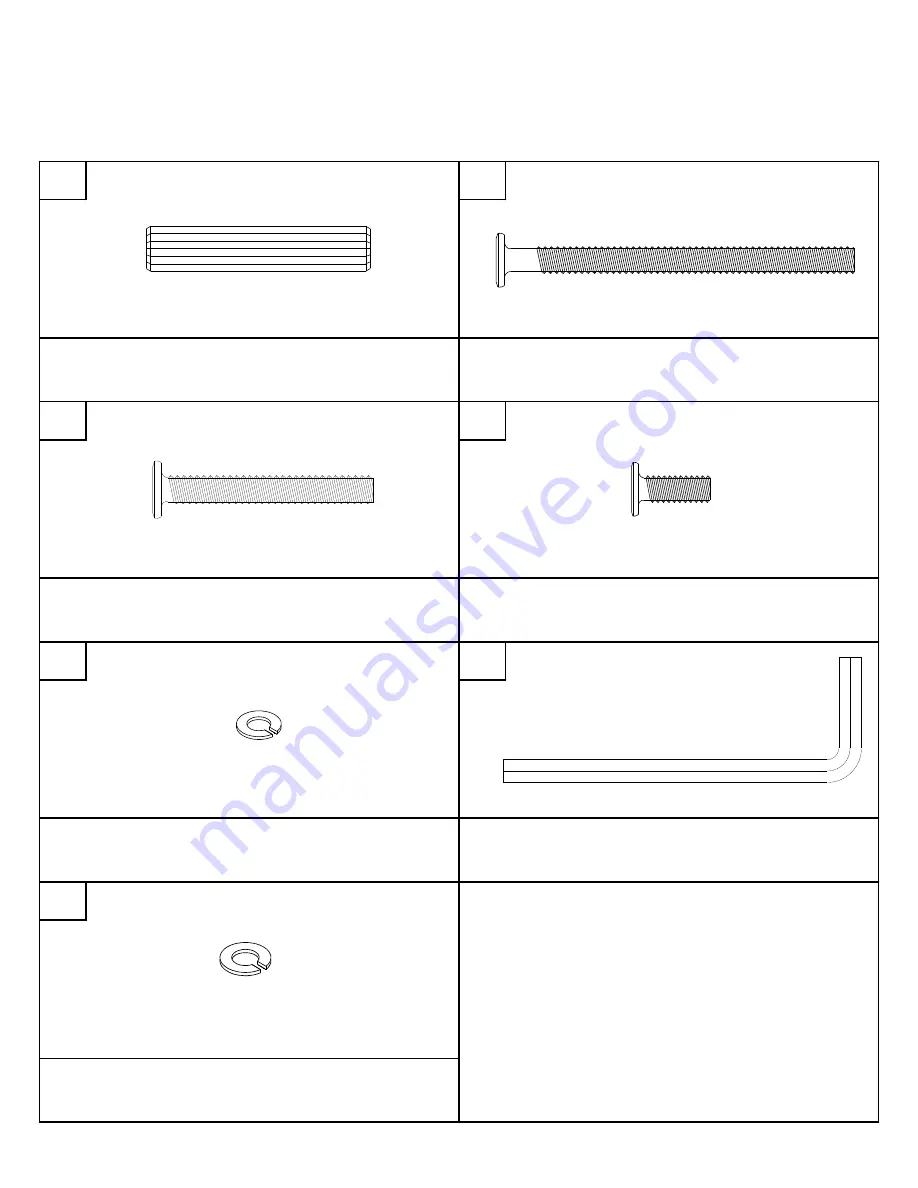
background image

1

2

3

4

5

6

7

Ø10mm x 50mm

Ø1/4" x 3-1/8"

Ø1/4" x 1-3/4"

Ø1/4" x 1/2"

BOLT

MATTRESS SUPPORT BOLT

BOLT

12 PCS

6 PCS

16 PCS

Ø6mm x 10mm x 1.2mm

4mm

SPRING WASHER

Ø8mm x 13mm x 1.5mm

SPRING WASHER

ALLEN KEY

16 PCS

1 PC

18 PCS

Hayworth Crib

DA7249 / DA7249W

HARDWARE LIST

WOOD DOWEL

20 PCS

Summary of Contents for DA7249

Page 1: ...49 Weathered Walnut 030 08 2599 _______ _______ _______ 030 08 2602 Date of purchase DO NOT RETURN PRODUCT TO THE STORE If a part is missing or damaged contact our customer service department We will replace the part FREE of charge Tel 1 800 295 1980 E Mail das dorel com Fax 514 353 7819 NEED HELP CALL US FOR ASSIST 1 800 295 1980 DO NOT RETURN PRO E MAIL DAS DOREL ...

Page 2: ...to standing position set mattress to lowest position and remove bumper pads large toys and other objects that could serve as steps for climbing out Infants can suffocate on soft bedding Never add a pillow or comforter Never place additional padding under an infant Stop using crib when child begins to climb out or reaches the height of 35 inches 89 cm To reduce the risk of SIDS pediatricians recomm...

Page 3: ...G MAINTENANCE Check bolts screws periodically and tighten them if necessary Dorel warrants its product to be free from defects in material and workmanship and agrees to remedy any such defect This warranty covers 1 year from the date of original purchase This warranty is valid only upon presentation of proof of purchase This is solely limited to the repair or replacement of defective furniture com...

Page 4: ...8 Ø1 4 x 1 3 4 Ø1 4 x 1 2 BOLT MATTRESS SUPPORT BOLT BOLT 12 PCS 6 PCS 16 PCS Ø6mm x 10mm x 1 2mm 4mm SPRING WASHER Ø8mm x 13mm x 1 5mm SPRING WASHER ALLEN KEY 16 PCS 1 PC 18 PCS Hayworth Crib DA7249 DA7249W HARDWARE LIST WOOD DOWEL 20 PCS ...

Page 5: ...worth Crib DA7249 DA7249W LEFT SIDE PANEL 1 PC 1 PC PARTS LIST LEFT BACK POST 1 PC RIGHT BACK POST FRONT PANEL BACK PANEL 1 PC 1 PC 1 PC LEFT FRONT POST RIGHT FRONT POST 1 PC RIGHT SIDE PANEL MATTRESS SUPPORT 1 PC 1 PC FRONT RAIL ...

Page 6: ...A B to the back panel C with bolts 2 and spring washers 7 as shown Use Allen key 6 to tighten the bolts Hayworth Crib DA7249 DA7249W STEP 1 NOTE The back panel C is labeled INSIDE To ensure proper assembly the posts must be attached so that the INSIDE label face inside the crib INSIDE ...

Page 7: ...9W STEP 2 Insert the wood dowels 1 into the left and right side panels F G Attach the left and right front posts D E to the side panels F G with bolts 3 and spring washers 7 as shown Use Allen key 6 to tighten the bolts 6 F G D ...

Page 8: ...ack panel C with bolts 2 and spring washers 7 as shown Use Allen key 6 to tighten the bolts Repeat this step to attach the right side panel G to back panel C as shown C G INSIDE NOTE The back panel C is labeled INSIDE To ensure proper assembly the side panels must be attached so that the INSIDE label face inside the crib ...

Page 9: ... face down this photo shows mattress support is upside down INCORRECT Tabs on corners of mattress support should point up CORRECT Tabs to point UP Flat surface of mattress support to face up mattress must sit on flat surface THIS SIDE UP label shows which side to face upward NOTE The above photos and drawings showing how to properly attach the mattress support are for reference only Crib styles an...

Page 10: ... shown Use Allen key 6 to tighten the bolts NOTE The curved edge of front rail J must face towards the ground Hayworth Crib DA7249 DA7249W STEP 5 J INSIDE NOTE The front panel I is labeled INSIDE To ensure proper assembly the front panel I must be attached to side panels G and F so that the INSIDE label face inside the crib ...

Page 11: ...pring washers 7 as shown Use Allen key 6 to tighten the bolts STEP 6 NOTE When the child is able to stand on his her own place the mattress support at its lowest position F G NOTE The front panel I is labeled INSIDE To ensure proper assembly the front panel I must be attached to side panels G and F so that the INSIDE label face inside the crib ...

Page 12: ...lts 2 wood dowels 1 spring washers 7 and Allen key 6 STEP 3 Move the mattress support H to the lowest position by unscrewing bolts 4 with Allen key 6 STEP 2 Detach the front rail J from front panel I with Allen key 6 The day bed is not intended for children under 15 months of age or over 50 pounds 22 7 kgs Any mattress used in this crib must be at least 27 1 4 inches by 51 5 8 inches 69cm by 131cm...

Page 13: ...ize bed for future use ALWAYS STORE THE ASSEMBLY INSTRUCTIONS IN THE POUCH ATTACHED TO THE MATTRESS SUPPORT H FULL SIZE CONVERSION RAILS AND LEGS ARE NOT INCLUDED DIAGRAMS ARE FOR REFERENCE ONLY BED RAILS MAY DIFFER FROM ILLUSTRATION STEP 1 Attach the full size conversion rails not included to the back panel C C C DIAGRAM 1 DIAGRAM 2 ...

Page 14: ...ull size bed for future use ALWAYS STORE THE ASSEMBLY INSTRUCTIONS IN THE POUCH ATTACHED TO THE MATTRESS SUPPORT H DIAGRAM 3 FULL SIZE CONVERSION RAILS AND LEGS ARE NOT INCLUDED DIAGRAMS ARE FOR REFERENCE ONLY BED RAILS MAY DIFFER FROM ILLUSTRATION STEP 1 Attach the full size conversion rails not included to the back panel C and assembled front panel D E I J ...

Page 15: ...Bauer Licensing Services LLC Stop using crib when child begins to climb out or reaches the height of 35 in 89cm ANY MATTRESS USED IN THIS CRIB MUST BE AT LEAST 27 1 4 INCHES BY 51 5 8 INCHES 69CM BY 131CM WITH A THICKNESS NOT EXCEEDING 6 INCHES 15CM The DAY BED is not intended for children under 15 months of age or over 50 pounds DO NOT RETURN PRODUCT TO THE STORE If a part is missing or damaged c...

Page 16: ... City State Zip Code Day Time Phone Number including area code Date Place of Purchase Part s description and quantity Please be sure to list model number or SKN number Customer Service Customer Service Representative Mailing Address Customer Service Department No 413 12345 Albert Hudon Boulevard Suite 100 Montreal QC Canada H1G 3L1 Email das dorel com Customer Service Phone Number 1 800 295 1980 C...

Reviews: