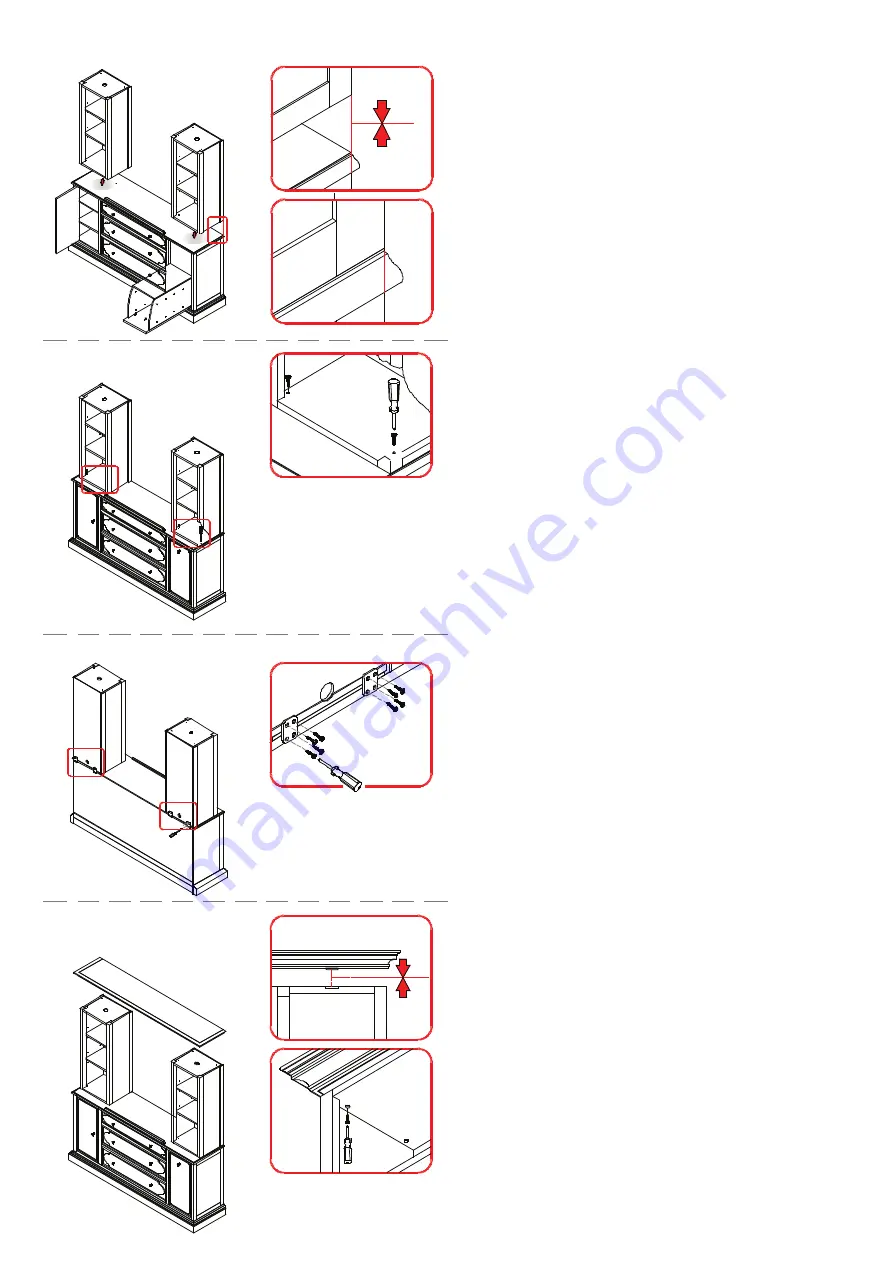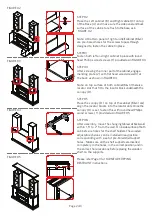
STEP #2
Place the Left cabinet (B) and Right cabinet (C) on top
of the Base (A) and make sure the side panel and back
surface of the cabinet are flush to the base, as in
FIGURE 02.
Note: At bottom panel of right and left cabinet (B & C)
are pre-bored holes for the screws to pass through
designed to fasten the cabinet in place.
STEP#3
Fasten both left and right cabinet in place with round
head Phillips wood screws (1) provided as in FIGURE 03.
STEP #4
After screwing the inner part of the cabinet, engage
mending plate (2) with flat head wood screws (3) at
the back as shown in FIGURE 04.
Note: on top surface of both cabinet (B & C) there is a
locator slot that fit to the locator block underneath the
canopy (D).
STEP #5
Place the canopy (D) on top of the cabinet (B & C) and
align the locator blocks into the locator slots. Once the
canopy (D) is set, fasten this with round head Phillips
wood screws (1) provided as in FIGURE 05.
STEP #6:
After assembly, move the changing table wall backward
within 1.5" to 2" from the wall. On inside surface of both
cabinets are holes for the shelf holders. The wooden
adjustable shelves can be installed in any position
corresponding with a set of pre-bored shelf support
holes. Make sure all the shelf supports are inserted
completely in the holes, in the correct position, and in
the correct hole locations before placing the wooden
shelf on the supports.
Please refer Page 3 for FURNITURE TIPPING
RESTRAINT instructions.
FIGURE 02
FIGURE 03
FIGURE 04
FIGURE 05
Page 2 of 3


