background image

K-2

H2

H2

N-2

P-1

H17

H17

H16

H16

H17

H17

S-1

P-1

K-2

11

10b

10c

10d

Summary of Contents for 4223

Page 1: ...4223 Hudson 3 drawer changer dresser Assembly Instructions 1 READ ALL INSTRUCTIONS BEFORE USE OF THE CHANGING TABLE ADD ON CHANGING UNIT OR CHANGING PAD WARNING LISEZ TOUTES LES INSTRUCTIONS AVANT D UTILISER LA TABLE À LANGER L UNITÉ COMPLÉMENTAIRE OU LE COUSSIN À LANGER AVERTISSEMENT ...

Page 2: ...olor grain or texture is to be expected We hope you and your growing family enjoy our product With thanks Babyletto Nous vous remercions de votre achat d un produit pour tout petits Babyletto Pour assurer une utilisation sans risque du produit veuillez suivre attentivement ces directives d assemblage Si des pièces manquent ou si vous avez des questions veuillez visiter notre site Web à l adresse w...

Page 3: ... Left drawer side 3 L 2 Côté gauche de tiroir 3 K 2 Drawer front 3 K 2 Façade de tiroir 3 N 2 Drawer back 3 N 2 Arrière de tiroir 3 F Foot 2 F Pied 2 G Base Cross Bar 2 G Traverse de base 2 J 1 Back Top Bar J 1 Rampe arrière J 2 Front Cross Bar J 2 Traverse avant C 2 Center Panel C 2 Panneau central Face Up Face supérieure AX 2 Left Side Panel AX 2 Panneau latéral gauche BX 1 Right Side Panel BX 1...

Page 4: ...tal Pin 4 H7 Cheville métallique 4 H5 Door Hinge 2 H5 Charnière 2 TRAY PARTS PIÈCES DU PLATEAU HARDWARE ACCESSOIRES DE MONTAGE AA Tray Bottom Panel AA Fond du plateau UX Tray Back Rail UX Bordure arrière du plateau VX Tray Left Side Rail VX Bordure gauche du plateau Z Tray Small Rail Z Petite division WX Tray Right Side Rail WX Bordure droite du plateau X Tray Cross Support X Support transversal d...

Page 5: ...m Lock 22 H11 Verrou de came 22 H13 5 8 Flat Head crew 4 H13 Vis à tête plate de 1 58 cm 5 8 po 4 1 ASSEMBLY INSTRUCTIONS INSTRUCTIONS D ASSEMBLAGE H16 0 8 x 2 cm wood dowel 6 H16 0 8 x 2 cm Goujon de bois 6 H17 3 4 Phillips head screw 12 H17 Vis à tête cruciforme de 1 9 cm 3 4 po 12 H11 H11 H11 H11 H10 H9 H11 H11 H11 H11 H11 H11 H11 H11 BX 1 AX 2 C 2 Face Left Side Face gauche 5 H10 H9 H10 H9 H11...

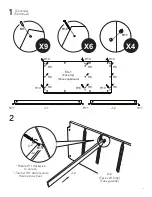
Page 6: ... Face supérieure H9 H9 H9 H10 H10 H9 H9 H9 H10 H10 H9 H9 H9 H10 H10 2 1 Continue Continuer 6 Rotate H11 clockwise to secure Tourner H11 dans le sens horaire pour fixer C 2 J 2 C 2 Face Left Side Face gauche J 2 H11 H10 X6 H9 X9 X4 H11 ...

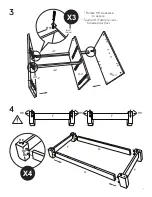
Page 7: ...4 X4 G G F F 7 3 Rotate H11 clockwise to secure Tourner H11 dans le sens horaire pour fixer X3 AX 2 BX 1 C 2 J 2 J 1 H8 H8 F H8 F H11 H8 H8 H8 back arrière ...

Page 8: ...6 Rotate H11 clockwise to secure Tourner H11 dans le sens horaire pour fixer H10 H11 EX 1 BX 1 EX 1 C 2 AX 2 X6 5 EX 1 Face Up Face supérieure F G X8 F H1 F EX 1 8 H11 H9 ...

Page 9: ...7 8 H5 Q 1 BX 1 BX 1 X2 Q 1 H6 H6 H6 H6 D 1 H9 H9 H9 H10 H10 H9 H9 H9 H10 H10 H9 H9 H10 H10 9 H10 X6 H9 X8 ...

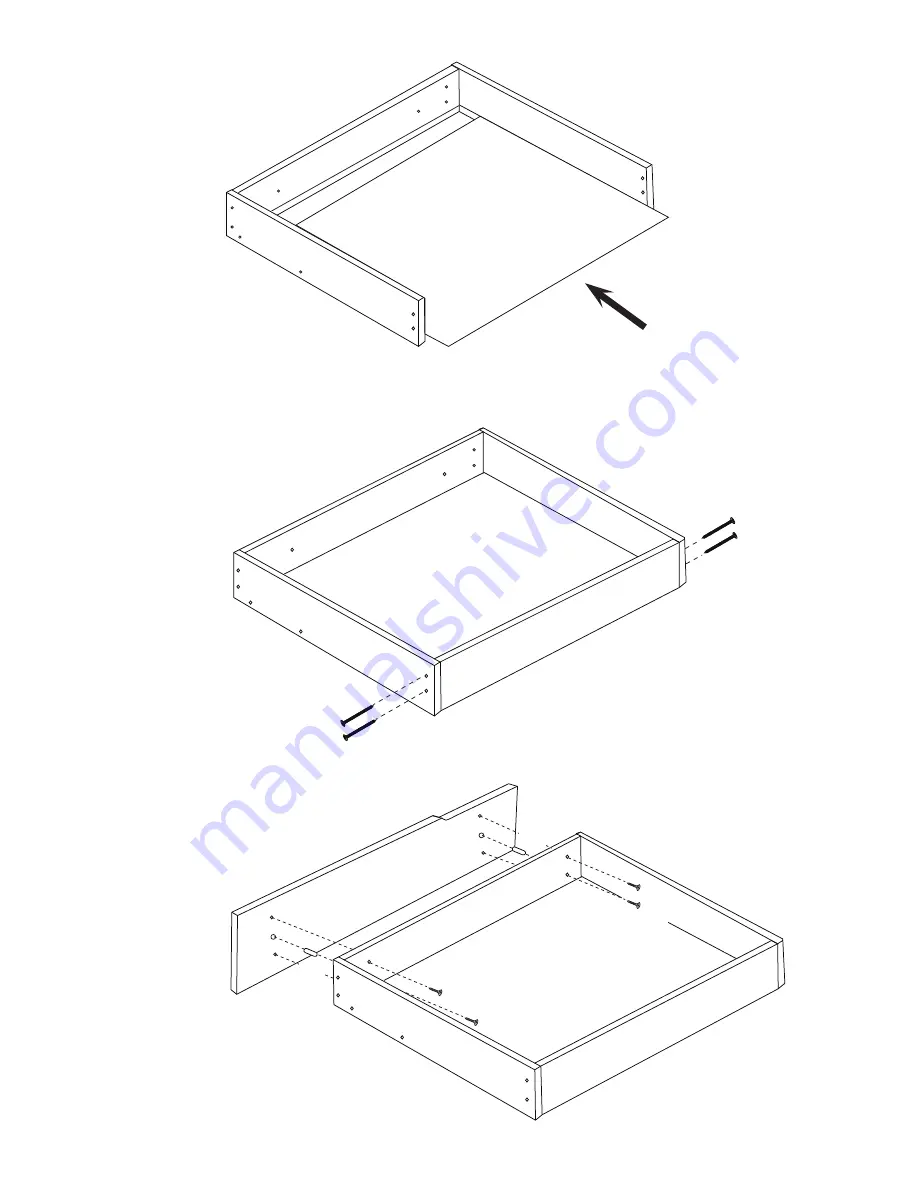
Page 10: ...9 D 1 Rotate H11 clockwise to secure Tourner H11 dans le sens horaire pour fixer H10 X6 DRAWER ASSEMBLY INSTRUCTIONS INSTRUCTIONS D ASSEMBLAGE DES TIROIRS 10 M 2 L 2 H2 H2 K 2 10 H11 H11 H9 10a ...

Page 11: ...K 2 H2 H2 N 2 P 1 H17 H17 H16 H16 H17 H17 S 1 P 1 K 2 11 10b 10c 10d ...

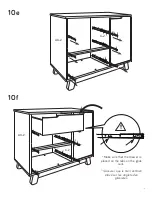
Page 12: ...10e 10f C 2 AX 2 C 2 AX 2 Make sure that the drawer is placed on the tabs on the glide rails S assurer que le tiroir est bien placé sur les onglets des glissières 12 C 2 ...

Page 13: ...7X4 13 10g Screw the 9 16 wood screw H3 in the pre drilled holes on the drawer side panels Visser les vis à bois de 1 4 cm 9 16 po H3 dans les avant trous des côtés du tiroir DO NOT OVERTIGHTEN THE SCREWS NE PAS TROP SERRER LES VIS X2 H3 H3 Make sure that the glide touch the drawer front panel S assurer que la glissière touche le panneau avant du tiroir S 1 S 1 S 1 C 2 AX 2 ...

Page 14: ...NS INSTRUCTIONS D ASSEMBLAGE DU PLATEAU 13a 12 H 1 H 2 H15 H15 H15 H3 H3 H3 H3 H3 H3 H3 H3 H3 H3 H3 H3 H3 H3 H3 H3 Dresser Back Arrière de la commode X3 H 2 H 1 H15 X16 H3 H 1 H9X2 X2 H9 X6 H9 H9 H9 H9 H9 H9 VX Y Z H9 H9 WX 14 ...

Page 15: ...13c Slide AA UX VX Y WX X UX X 13b H10 H11 X3 H11 H10 H11 H10 H11 UX WX V H10 H11 Y VX Rotate H11 clockwise to secure Tourner H11 dans le sens horaire pour fixer 15 ...

Page 16: ...4 H14 Make sure that the end of cross support X fits the notch centered in the front rail T S assurer que l extrémité du support transversal X est dans l encoche au centre de la bordure avant T 16 Rotate H11 clockwise to secure Tourner H11 dans le sens horaire pour fixer H11 ...

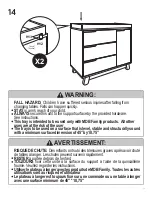
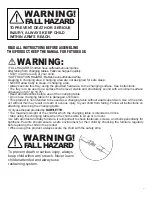
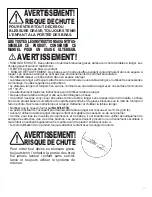
Page 17: ...sound with a minimum surface dimension of 45 by 18 75 WARNING RISQUE DE CHUTE Des enfants ont subi des blessures graves après avoir chuté de tables à langer Les chutes peuvent survenir rapidement RESTER à portée de bras de l enfant TOUJOURS fixer cette unité à la surface du support à l aide de la quincaillerie fournie Veuillez regarder les instructions UtiliserleplateauàlangeraveclesproduitsdeMDBF...

Page 18: ...r heavy objects on top of this product unless the product is specifically designed to accommodate them Never allow children to climb or hang on drawers doors or shelves Never open more than one drawer at a time OR Do not defeat or remove the drawer interlock system AVERTISSEMENT Le basculement du meuble peut entraîner des blessures graves ou fatales par écrasement Pour aider à prévenir le basculem...

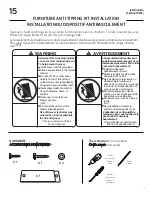
Page 19: ... 15b Install the strap on the wall with long screw and washer Fixer la sangle au mur avec la vis longue et une rondelle 15c Install the other end of strap on the back of dresser with short screw and washer into the wood framing of the dresser Fixer l autre extrémité de la sangle à l arrière de la commode avec la vis courte et une rondelle dans le cadre de bois de la commode ...

Page 20: ...sur celui ci IMPORTANT As with all infant and baby furniture it is important to check fasteners screws and bolts periodically for tightness Parents should ensure a safe environment for their children by checking the furniture regularly before placing a child in the product The recommended maximum weight of the occupant is 30 lbs on changing table Le poids maximal recommandé de l occu pant de cette...

Page 21: ...o not use changing table if it is damaged or broken This product is not intended to be used as a changing table without adult supervision Use of the prod uct without this may result in death or serious injury to your child from falling Follow all instructions on attaching and using the changing table Only use the pad provided by BABYLETTO The maximum weight of the child for which the changing tabl...

Page 22: ...omme table à langer sans la supervision d un adulte L utilisa tion de ce produit sans la surveillance d un adulte peut entraîner de graves blessures ou la mort de l enfant s il fait une chute Suivre les instructions sur la façon d attacher et d utiliser la table à langer N utiliser que le coussin fourni par BABYLETTO Le poids maximal de l occupant pour lequel cette table à langer est conçue est de...

Page 23: ...pour enfants Si vous entreprenez de refinir ce meuble sa garantie sera annulée ONE YEAR LIMITED WARRANTY We will replace any missing parts at the time of purchase or any defective item within a one year period from the date of original purchase Please keep your receipt so that we may process your warranty request This warranty only covers new units with original packaging and ownership and is not ...

Page 24: ...mber du coussin à langer La chute de l enfant du coussin à langer peut entraîner de graves blessures ou la mort Étape 1 Placer le bébé sur le coussin en plaçant ses fesses sur la couche Attacher l enfant en sûreté sur le cous sin à l aide de la sangle et de la boucle Ceci contribuera à l empêcher de tomber du coussin entraînant de graves blessure ou la mort Place a baby on the pad with his her bot...

Page 25: ...TTO COM PARTS OR YOU CAN CONTACT US BY MAIL BABYLETTO 8700 REX RD PICO RIVERA CA 90660 TEL 323 282 5163 L enregistrement de votre produit est plus facile que jamais Veuillez l enregistrer sur notre site Web à www babyletto com registrations POUR COMMANDER DES PIÈCES DE RECHANGE OU MANQUANTES VISITEZ NOUS À WWW BABYLETTO COM PARTS OU CONTACTEZ NOUS PAR LA POSTE BABYLETTO 8700 REX RD PICO RIVERA CA ...

Reviews: