REPLACEMENT (REMOVAL) OF BLADE SET
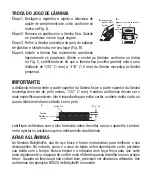
Step 1.
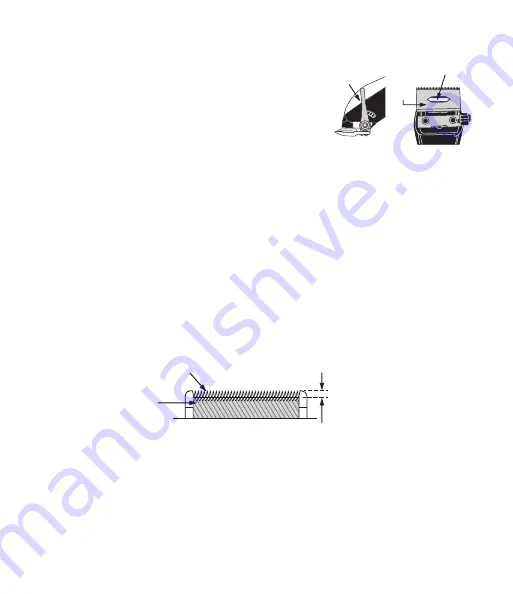
Unplug the unit and adjust the taper (see
illustration A).
Step 2. Remove the screws and the fixed blade. Save
the screws.
Step 3. Lift off the small moving blade and replace it
with the new one on the plastic oscillator (see
illustration B).
Step 4. Replace the fixed blade using the screws and lightly tighten them. Adjust the
teeth as shown in illustration C, to a gap of 1/32" (1 mm) to 1/16" (1.5 mm),
and the small, moving blade as centered and parallel as possible to the fixed
blade’s teeth.
IMPORTANT NOTE:
The top edge of the fixed blade must be a minimum of 1/32" (1 mm) higher than the top
edge of the moving blade, as centered as possible. This is important so that the moving
blade does not come in contact with the skin.
Be sure to add a few drops of BabylissPro lubricating oil to the blades before running.
Don’t forget to tighten the screws after the blades have been aligned.
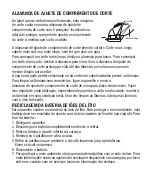
BLADE SHARPENING
BabylissPro cutting blades are ground from the finest quality steel to extend the cutting
performance. As with any cutting appliance, the cutting edges become dull from
repeated usage. Increasing blade tension to force the blade cutting would cause the
clipper to overheat and reduce its motor life. When the blade is no longer able to cut
smoothly, sharpening is required or replace it with a new BabylissPro blade set (model
B802G).
C.
Fixed Blade
1/32" to 1/16"
Small
Moving
Blade
Taper
A.
B.
Small
Moving
Blade
Plastic Oscillator


