background image

Babymoov

Parc Industriel des Gravanches - 16, rue Jacqueline Auriol

63051 Clermont-Ferrand cedex 2 - France

www.babymoov.com

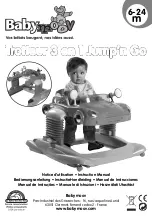
Notice d’utilisation • Instruction Manual

Bedienungsanleitung • InstructieHandleiding • Manual de Instrucciones

Manual de Instruções • Manuale di Istruzioni • Használati Utasitást

6-24

m

Summary of Contents for Jump'n Go

Page 1: ...Jacqueline Auriol 63051 Clermont Ferrand cedex 2 France www babymoov com Notice d utilisation Instruction Manual Bedienungsanleitung InstructieHandleiding Manual de Instrucciones Manual de Instruções Manuale di Istruzioni Használati Utasitást 6 24 m ...

Page 2: ...2 1 2 3 6 4 5 ...

Page 3: ...3 8 10 9 7 a a b c b ...

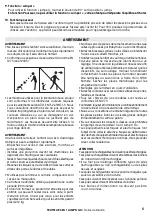
Page 4: ...tteur à l aide d un tournevis Introduisez les deux piles AA en vous assurant qu elles soient dans la bonne position polarité Fermez le couvercle et resserrez les vis Faire l opération inverse pour retirer les piles 7 Montage du capot son et lumière de la voiture Fixez le capot de la voiture à la tablette a Afin d enlever le capot de la voiture il suffit d écarter légèrement les deux roues b Mainte...

Page 5: ...ulière est nécessaire afin de vérifier la sécurité des éléments et s assurer que les dispositifs de verrouillage manuel fonctionnent correctement Toutes les pièces du trotteur peuvent être nettoyées au savon doux à l aide d un chiffon humide Séchez les pièces métalliques pour les empêcher de rouiller Ne réglez pas le trotteur en cours d utilisation Evitez les collisions avec les surfaces vitrées d...

Page 6: ... walker play tray using a screwdriver Insert the two AA batteries correctly polarity Screw the compartment lid back in place Do the reverse operation to remove the batteries 7 Light and Sound car top Secure the car top of the walker to the tray a In order to remove the top from the car you just need to slightly push apart the two wheels b Then you can easily take off the top 8 How to adjust the se...

Page 7: ...essary Check regularly that all fastenings and components are secure and working properly All parts of the walker can be wiped with a damp cloth and mild detergent Dry all metal parts to prevent rust Never adjust the walker whilst your child is still in it Prevent bumping into glass door window or furniture surfaces The frames of all our models have been tested and proven in compliance with EN 127...

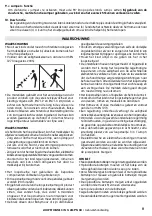
Page 8: ...hmen Die beiden AA Batterien einlegen dabei auf die richtige Lage achten polarität Der Deckel schließen und die Schrauben anziehen Zur Entnahme der Batterien in umgekehrter Reihenfolge verfahren 7 Einbau des Licht und Ton Motorhaube des Autos Die Motorhaube des Autos an der Ablage befestigen a Um die Motorhaube vom Auto abzunehmen lediglich die beiden Rollen b etwas spreizen Die Motorhaube des Aut...

Page 9: ...und der Funktionsfähigkeit der manuellen Blockierungen ist jedoch notwendig Alle Teile der Lauflernhilfe können mit sanfter Seife und einem feuchten Lappen gereinigt werden Metallische Teile abtrocknen um Rostbildung zu vermeiden Die Lauflernhilfe nicht während der Benutzung einstellen Erhöhte Kollisionsgefahren mit Scheiben in Türen Fenstern und Möbeln vermeiden Die Gestelle unserer Modelle wurde...

Page 10: ...en met behulp van een schroevendraaier Breng twee batterijen AA aan let erop dat ze in de juiste richting worden geplaatst polariteit Breng de dekseltjes weer op hun plaats en schroef ze dicht Deze handelingen in omgekeerde volgorde uitvoeren om de batterijen te verwijderen 7 Montage van de klank en lichtspel kap van de auto Zet de kap van de auto vast op het blad a Om de kap weer van de auto af t...

Page 11: ...s nodig het loopstoeltje regelmatig te inspecteren om de veiligheid van de verschillende elementen te verifiëren en om zich ervan te verzekeren dat de handmatige vergrendelingsinrichtingen naar behoren werken Alle onderdelen van het loopstoeltje kunnen worden schoongemaakt met zachte zeep en een vochtige doek De metalen delen goed drogen om roestvorming te voorkomen Het loopstoeltje niet in of bij...

Page 12: ...las pilas que se encuentra bajo la mesita de juegos del andador utilizando un destornillador Introduzca las dos pilas AA asegurándose de colocarlas de forma correcta polaridad Cierre la tapa y vuelva a apretar los tornillos Para quitar las pilas repita la operación en sentido inverso 7 Montaje del capó sonido y luz del coche Fije el capó del coche a la mesita a Para retirar el capó del coche basta...

Page 13: ...n regularidad el andador para comprobar la seguridad de los elementos y asegurarse de que los dispositivos de bloqueo manual funcionan correctamente Todas las piezas del andador pueden limpiarse con jabón suave y un paño húmedo Seque las piezas metálicas para evitar que se oxiden No ajuste el andador mientras se está utilizando Prevenga las colisiones con las superficies acristaladas de puertas ve...

Page 14: ...do compartimento das pilhas sob a mesinha de jogos do andador Introduza as duas pilhas AA certificando se de que ficam na posição correcta polaridade Feche as tampas e volte a aparafusar os parafusos Fazer a operação inversa para retirar as pilhas 7 Montagem da cobertura som e luz da viatura Fixe a cobertura da viatura à mesa a Para retirar a cobertura da viatura basta afastar ligeiramente os dois...

Page 15: ...ra se verificar a segurança dos elementos e garantir que os dispositivos de fixação manual funcionam correctamente Todas as peças do voador podem ser lavadas com sabão suave e um pano húmido Enxugue as peças metálicas para não enferrujarem Nunca regule o voador enquanto está a ser utilizado Evite embates contra as superfícies envidraçadas das portas das janelas e dos móveis Todos os quadros dos no...

Page 16: ...to giochi del girello a Introdurre le due pile AA assicurandosi che esse si trovino in posizione corretta polarità Chiudere i coperchi e riavvitare le viti Compiere l operazione inversa per rimuovere le pile 7 Montaggio della cappottina suoni e luce della carrozzina Fissare la cappottina della carrozzina alla tavoletta a Per togliere la cappottina dalla carrozzina basta allargare leggermente le du...

Page 17: ...enti ed assicurarsi che i dispositivi di blocco manuale funzionino correttamente Tutti i pezzi del girello possono essere puliti con sapone delicato utilizzando un panno umido Asciugate le parti metalliche per impedire che si formi della ruggine Non regolare il girello mentre lo state utilizzando Evitare le collisioni con superfici vetrate delle porte finestre e mobili Tutti i telai dei nostri mod...

Page 18: ...a ki a Bébikomp polcának asztalának alján lévő elemtartó fedelet Helyezze bele a kettő darab AA elemet ügyeljen a megfelelő polaritásra Helyezze vissza a fedőket és csavarozza vissza a csavarokat 7 A világító és a hangot kiadó motorháztető felszerelése az autóra Rögzítse az autó motorháztetőt az asztalkára a A motorháztető eltávolításához elegendő enyhén széthúzni a két kereket b Mostmár könnyedén...

Page 19: ...sgálja meg a terméket győződjön meg arról hogy a zárószerkezet tökéletesen működik e A bébikomp minden alkatrésze nedves szappanos vízzel tisztítható Szárítsa meg a fém részeket azért hogy azok ne rozsdálódjanak meg Ne állítson semmit a bébikompot miközben a gyermek használja Kerüljön el minden olyan balesetet amit üvegajtó ablak vagy bútor okozhat A mi termékeink vázszerkezetei keretei az EN 1273...

Page 20: ...ous à Babymoov Parc Industriel des Gravanches 16 rue Jacqueline Auriol 63051 Clermont Ferrand cedex 2 Les informations qui vous concernent sont destinées à Babymoov Nous pouvons être amenés à les transmettre à des tiers partenaires commerciaux etc Le souhaitez vous Oui Non Oui je souhaite garantir à vie mon produit Babymoov et je vous joins une copie de mon ticket de caisse OBLIGATOIRE Sans cela n...

Reviews: