38
39
Installation in the car:
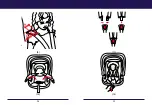
1. Press the red button of the buckle to release the harness as picture 10
2. Input the baby on the carrier and lock the harness via insert the both tongues
to the bottom of buckle with an audible “Click” (picture 11)
3. Pull cautiously on center adjustment belt in order to tighten shoulder belts
until they fit your baby’s body (picture12)
4. Pull up the button (1) and simultaneously push the top cover of the support leg
to the last position. (picture 13)
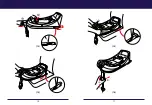
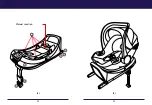
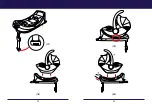
5. Push the base to connect the car ISOFIX anchors firmly. The indicator color of
the ISOFIX connector turns into green from orange. (picture 14/15)
6. Push the base to make it be as close to the car chair’s backrest as possible.
7. Push the button (1) out and move the support leg of underside simultaneously
to make the end of the support leg to touch the floor of the car compartment
firmly. The color of the indicator in the support leg end cover turn into green
from orange. (picture 16/17)
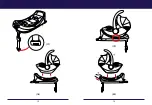
8. Put the carrier with baby onto the base as (picture 18)The indicator color turn
into green from orange (picture 19)
Uninstallation of the carrier and base
1. Pull the button(1) in and pull up the carrier from the base simultaneously to
release the carrier from the base. (picture 20)
2. Pull the button up (picture 21), and then pull in the two orange buttons on the
ISOFIX tube to release the base from the car anchors. (picture 22)
Cleaning
The cover and the belt can be cleaned with a clean cloth and some lukewarm soapy
water. The plastic parts can be cleaned with a mild detergent and warm water.
IMPORTANT
KEEP FOR FUTURE REFERENCE
Adjustment:
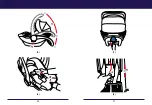
1. To adjust the carrying handle, simultaneously press the left and right buttons(1)
of picture5 you can lock the carrying hand in place in 3 positions:
A: Vehicle position in the car or carry position outside of the car;
B: Cradle position in the desk or lock position attached with stroller;
C: Rest position in the desk or the position to put the baby into carrier;
2. Loosen shoulder belts by pressing the adjustment button on central adjuster
and simultaneously pulling both shoulder belts up upon picture 6
3. Press the button under the central belt guide to open the manual box, (picture 7)
pull the button up (1) simultaneously and move down and up to adjust the
headrest and shoulder rest to desired position. (picture 8) that headrest at the
same lever of the baby shoulder (as picture 9)
Summary of Contents for York
Page 2: ...2 3 12 11 10 9 9 8 7 6 5 4 3 3 2 1 14 13 1 2...
Page 3: ...4 5 15 16 17 21 18 20 23 24 19 22 Manual Location Miejsce na instrukcj 3 4...
Page 4: ...6 7 2 A B C 1 1 2 1 2 5 6 7 8...
Page 5: ...8 9 9 10 11 12...
Page 6: ...10 11 1 2 1 2 13 14 15 16...
Page 7: ...12 13 1 2 17 18 19 20...
Page 12: ...22 23 12 11 10 9 9 8 7 6 5 4 3 3 2 1 14 13 1 2...
Page 13: ...24 25 15 16 17 21 18 20 23 24 19 22 Manual Location Manual Location 3 4...
Page 14: ...26 27 2 A B C 1 1 2 1 2 5 6 7 8...
Page 15: ...28 29 9 10 11 12...
Page 16: ...30 31 1 2 1 2 13 14 15 16...
Page 17: ...32 33 1 2 17 18 19 20...

