background image


WARNING

16

 Copyright © 2022, Baby Trend Inc., All Rights Reserved. Todos los derechos reservados. 

15

ASSEMBLY  MONTAJE

Copyright © 2022, Baby Trend Inc., All Rights Reserved. Todos los derechos reservados. 

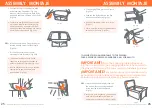
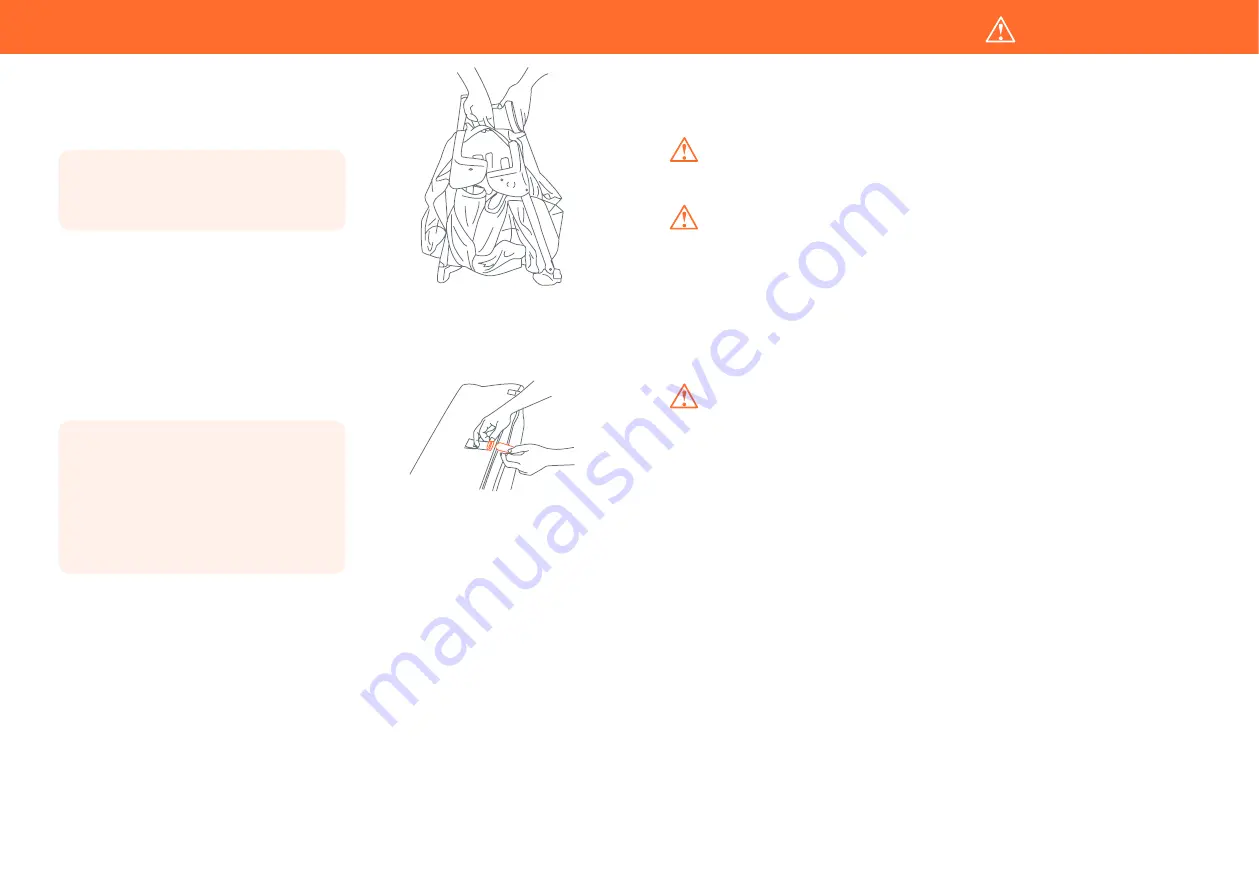
Fig. 9

9)

  • Gather four (4) corners and center all 

together tightly (Fig. 9). Wrap Mattress 

around Playard frame with padded side 

facing inward.


 • Junte las cuatro (4) esquinas y el centro 

con firmeza (Fig. 9). Envuelva el colchón 

alrededor de la estructura del corralito de 

juegos con el lado acolchado hacia adentro. 

10) 

• Secure the hooks and loop fasteners by 

feeding them through the loops on the end 

of the Mattress and folding them back onto 

themselves (Fig. 10).

• Place folded Playard into carry bag so that 

the handle comes through the opening 

between each side of the zipper.

• Asegure gancho y pase las correas 

pasándolas por las presillas en el extremo 

del colchón y plegándolas sobre sí (Fig. 10).

• Coloque el corralito plegado en la bolsa 

de transporte de modo tal que la manija 

sobresalga de la abertura entre cada lado 

de la cremallera.

Fig. 10

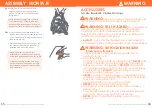
ACCESSORIES

Full-Size Bassinet & Cradles Warnings:


WARNING:


Failure to follow these warnings and

the instructions could result in serious injury or death. 


WARNING: FALL HAZARD:

 To help prevent

falls, do not use this product when the infant begins

to push up on hands and knees or has reached the

height of 25 in. (635 mm), weight of 15 lbs. (6.80 kgs) or 3

months old, whichever comes first.


• ALWAYS check that the bassinet is securely locked on 

the base/stand by pulling upwards on the bassinet bed.


WARNING: 

SUFFOCATION HAZARD


Infants have suffocated:

• In gaps between extra padding and side of the

   bassinet/cradle, and

• On soft bedding 

Use only the pad provided by Baby Trend

®

NEVER add 

a pillow, comforter, or another mattress for padding.

• Strings can cause strangulation! DO NOT place items 

with a string around a child's neck such as hood strings 

or pacifier cords. DO NOT suspend strings over the 

bassinet or attach strings to toys.

•  NEVER use plastic shipping bags or other plastic film as 

mattress covers not sold and intended for that purpose. 

They can cause suffocation.

•  Use bassinet with only one child at a time.

•  NEVER place a child under the bassinet.

•  The bassinet must be fully assembled and installed  

before using.

•  The playard, including side rails, must be fully erected 

prior to use. Make sure each latch is secure.

•  NEVER leave the bassinet in place when child is in 

playard.

Summary of Contents for Lil Snooze Deluxe II Nursery

Page 1: ...strucciones ANTES de armar y USAR el producto CONSERVE LAS INSTRUCCIONES PARA USO FUTURO Lil Snooze Deluxe II Nursery Center Playard 1 800 328 7363 8 00 a m 4 30 p m PST www babytrend com Baby Trend I...

Page 2: ...Trend Please visit http babytrend com pages limited warranty for complete warranty details GARANTIA NO DEVUELVA SU PRODUCTO A LA TIENDA POR FAVOR CONTACTE A BABY TREND PARA PIEZAS DE REPUESTO SERVICIO...

Page 3: ...s not sold and intended for that purpose They can cause suffocation purpose They can cause suffocation NEVER NEVER use a water mattress with this product use a water mattress with this product WARNING...

Page 4: ...tre acolchado adicional y el lado de la cuna y la cuna y En colchones blandos En colchones blandos Utilice S LO la almohadilla suministrada de Utilice S LO la almohadilla suministrada de BabyTrend Bab...

Page 5: ...ncia advertencia El corralito junto con las barandas laterales deber n El corralito junto con las barandas laterales deber n estar totalmente erguidos antes de usar estar totalmente erguidos antes de...

Page 6: ...ncionamiento seguro de su producto siga estas funcionamiento seguro de su producto siga estas instrucciones c uidadosamente Por favor conserve instrucciones c uidadosamente Por favor conserve estas in...

Page 7: ...vante fuertemente No jale del medio donde se ubica el mecanismo de liberaci n del sujetador central Aseg rese de que ambos tubos est n asegurados en su lugar y que todas las barandillas est n r gidas...

Page 8: ...ja ubicada en el centro del piso del corralito DEBE permanecer levantada aprox 45 7 cm o 18 pulg mientras se traban en su lugar las barandas laterales Si el centro no est levantado las barandas NO se...

Page 9: ...os en sentido antihorario y levante el centro a la altura de las barandillas superiores Fig 7 Junte las patas y las ruedas hacia el centro tan cerca como sea posible de manera que pr cticamente se toq...

Page 10: ...llow these warnings and the instructions could result in serious injury or death WARNING FALL HAZARD To help prevent falls do not use this product when the infant begins to push up on hands and knees...

Page 11: ...ms to confine child in playard ACCESSORIOS Advertencias de mois s y la cuna de tama o completo ADVERTENCIA La inobservancia de las advertencias e instrucciones podr a causar lesiones graves o la muert...

Page 12: ...liza una s bana con el colch n colchoneta utilice solamente la proporcionada por Baby Trend o una dise ada espec ficamente para adaptarse a la dimensi n del colch n de la cuna corralito ATTENTION Play...

Page 13: ...e padded side facing upward Fig 13 Coloque el colch n dentro de la cuna con el lado acolchado hacia arriba Fig 13 Fig 13 Fig 12 ACCESSORIES Changing Table WARNING FALL HAZARD Children have suffered se...

Page 14: ...levantarse apoy ndose en sus manos y rodillas o alcance una altura de 22 pulgadas 558 8 mm un peso de 15 libras 6 80 kg o tenga 3 meses de edad lo que ocurra primero No utilice la mesa para cambiar a...

Page 15: ...Connector Knob Prongs into holes located on both corners of the Playard Fig 15a Turn the Connector Knobs counter clockwise to lock into place Fig 15b Introduzca los Dientes de la Perilla conectora en...

Page 16: ...g 18 TO USE THE CHANGING TABLE RESTRAINT SYSTEM PARA USAR EL SISTEMA DE RESTRICCI N DEL CAMBIADOR 19 Place child on the changing table make sure hands and arms are clear of the restraint Bring the res...

Page 17: ...0b y desconecte las Barras cortas de la Barra curvada oprimiendo los botones a presi n y desmont ndolas Retire la Barra curvada de la manga del Cambiador Fig 20a Fig 20b 21 The Side Pocket Organizer i...

Page 18: ...e pad provided by the manufacturer NEVER add a pillow comforter or another mattress for padding NEVER place extra padding under or beside infant when trapped between product and adjacent surfaces ONLY...

Page 19: ...a reducir el riesgo de SMIS los pediatras recomiendan acostar a los ni os sanos boca arriba para dormir a menos que el m dico indique lo contrario SIEMPRE coloque al ni o de espaldas para dormir Coloq...

Page 20: ...derecha en cada uno de la derecha y de extremo izquierdo del tubo de soporte napper y desl celas hacia dentro hasta que se traben Fig 23a NOTA Aseg rese de que los soportes de la barra del armaz n es...

Page 21: ...ayard push both pins on the napper support tubes to release from the playard Pull both bars out simultaneously Fig 26 Para quitar la camita del corralito presione el bot n de liberaci n del tubo de so...

Page 22: ...eve a la boca y deben ser colocados claramente fuera del alcance de la cara y la boca del beb Coloque SIEMPRE todos los sujetadores proporcionados cuerdas correas abrazaderas etc atados fuertemente al...

Page 23: ...O Utilice s lo jab n suave y agua tibia NO USE BLANQUEADOR NO LAVE A M QUINA BABY TREND CUSTOMER SERVICE The Customer Service Department can be contacted at 1 800 328 7363 Monday through Friday betwee...

Reviews: