17
18
ASSEMBLY
ASSEMBLY
Copyright © 2022, Baby Trend Inc., All Rights Reserved. Todos los derechos reservados.
Copyright © 2022, Baby Trend Inc., All Rights Reserved. Todos los derechos reservados.
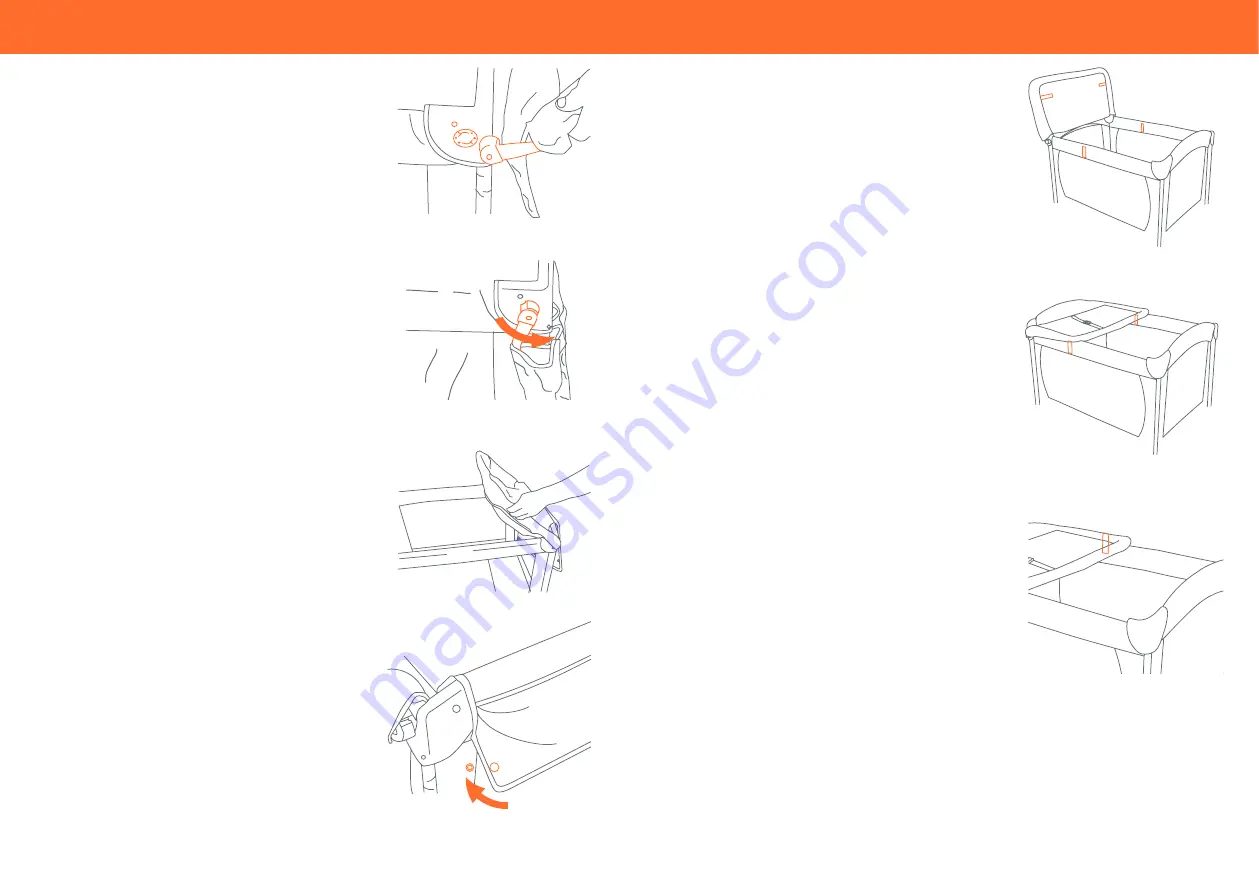
15)
• Insert Connector Knob Prongs into holes
located on both corners of the Playard (Fig.
15a).
• Turn the Connector Knobs counter clockwise
to lock into place (Fig. 15b).
• Flip Changing Table over onto Playard (Fig.
15c).
• Snap the two (2) buttons on the flap down
onto the Playard (Fig. 15d).
TO SECURE THE CHANGING TABLE TO THE
PLAYARD
IMPORTANT!
When the
changing table is flipped up into the
upper position the changing table
must be secured to the playard
frame using the hook and loop
fasteners provided.
Fig. 15b
Fig. 15d
Fig. 15c
Fig. 15a
16)
• Locate the hook and loop fasteners on the
bottom of the changing table and inside the
side rails of the playard (Fig. 16).
17)
• Flip the changing table into its upper
position (Fig. 17).
18)
• Secure the changing table to the playard
frame by fastening the hook and loop
fasteners on the underside of the changing
table to the side rails of the playard frame
(Fig. 18).
Fig. 16
Fig. 17
Fig. 18


