MAINTENANCE MANTENIMIENTO
MAINTENANCE MANTENIMIENTO
37
38
Copyright © 2022, Baby Trend Inc., All Rights Reserved. Todos los derechos reservados.
Copyright © 2022 Baby Trend Inc., All Rights Reserved. Todos los derechos reservados.
16)
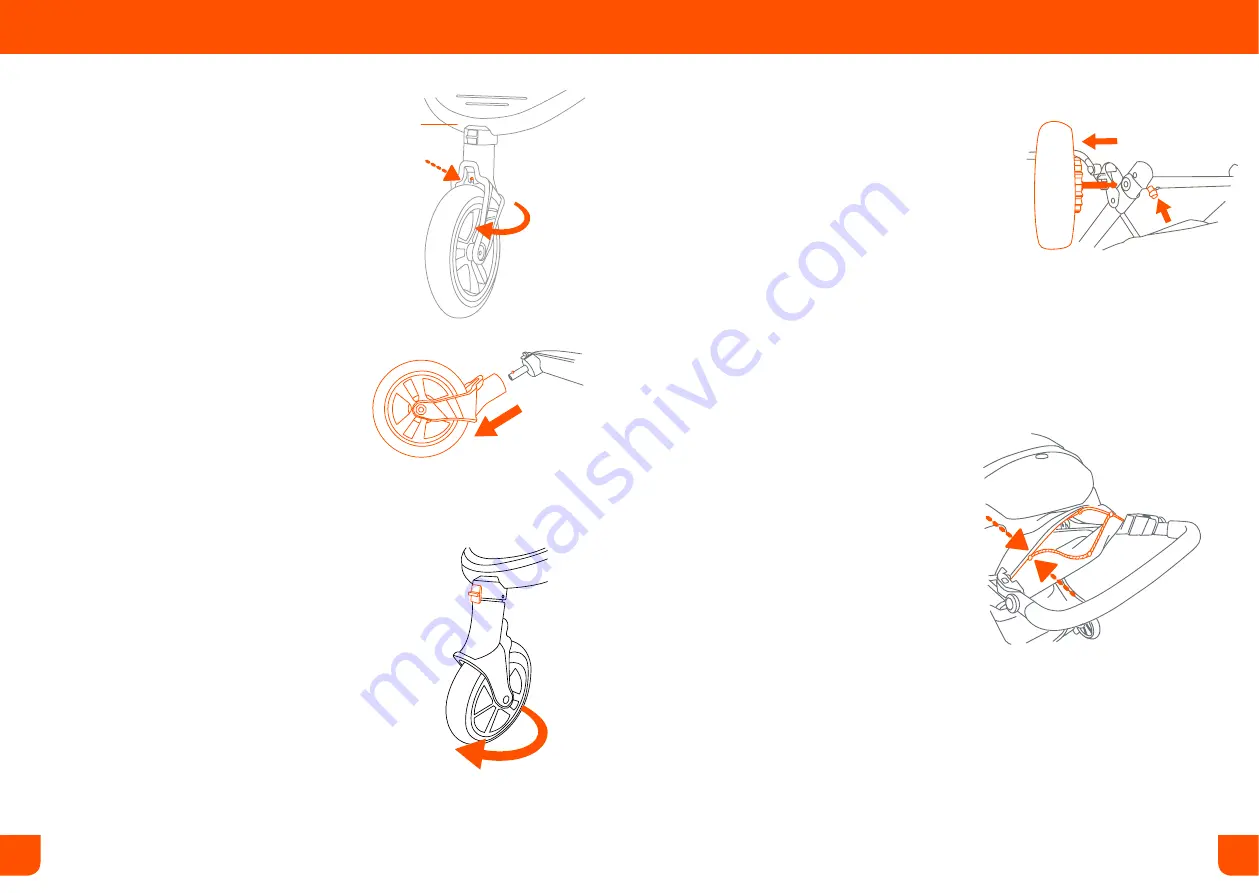
• If replacing the front wheel: Turn
the wheel vertically to face the open
side of the fender upward. Locate
the release pin on the front of the
wheel hub. Push in the release pin
and pull the wheel out (Fig. 16a).
NOTE:
use the latch in front of the
stroller to engage and disengage the
front wheel swivel (Fig. 16b).
• Si reemplaza la rueda delantera:
Gire la rueda verticalmente de
modo tal que mire hacia la parte
abierta del guardabarros. Ubique
el perno de liberación sobre el
frente del cubo de la rueda. Oprima
el perno de liberación y tire de la
rueda hacia afuera (Fig. 16a).
NOTA:
utilice el pestillo delante
del cochecito para enganchar y
desconectar el giro de la rueda
delantera (Fig. 16b).
Fig. 16a
FRONT AND REAR WHEEL RELEASE
LIBERACIÓN DE LAS RUEDAS
Front
Frente
Fig. 16b
CANOPY REPLACEMENT
REEMPLAZO DE LA CUBIERTA
17)
•
If assembly or replacement needed:
locate the snap buttons along with
the hook and loop fasteners on the
underside of the canopy. Join all
fasteners to the stroller frame fabric
(Fig. 17).
•
Si es necesario montar o
reemplazar:
localice los botones
de ajuste junto con los cierres de
gancho y lazo en la parte inferior de
la cubierta. Une todos los sujetadores
a la tela del marco del cochecito (Fig.
•
If replacing the rear wheel:
Press the
release lever and pull the wheel out
(Fig. 16c).
•
Si se sustituye la rueda trasera:
Apretar la palanca y sacar la rueda
(Fig. 16c).
Fig. 17
Fig. 16c


