background image

7

 Copyright © 2022, Baby Trend Inc., All Rights Reserved. Todos los derechos reservados.

 Copyright © 2022, Baby Trend Inc., All Rights Reserved. Todos los derechos reservados.

ASSEMBLY  ASAMBLEA

ASSEMBLY  ASAMBLEA

7

8

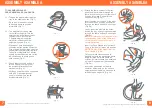
TO ASSEMBLE WALKER
PARA ENSAMBLAR EL ANDADOR

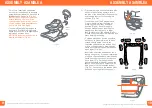
1)  

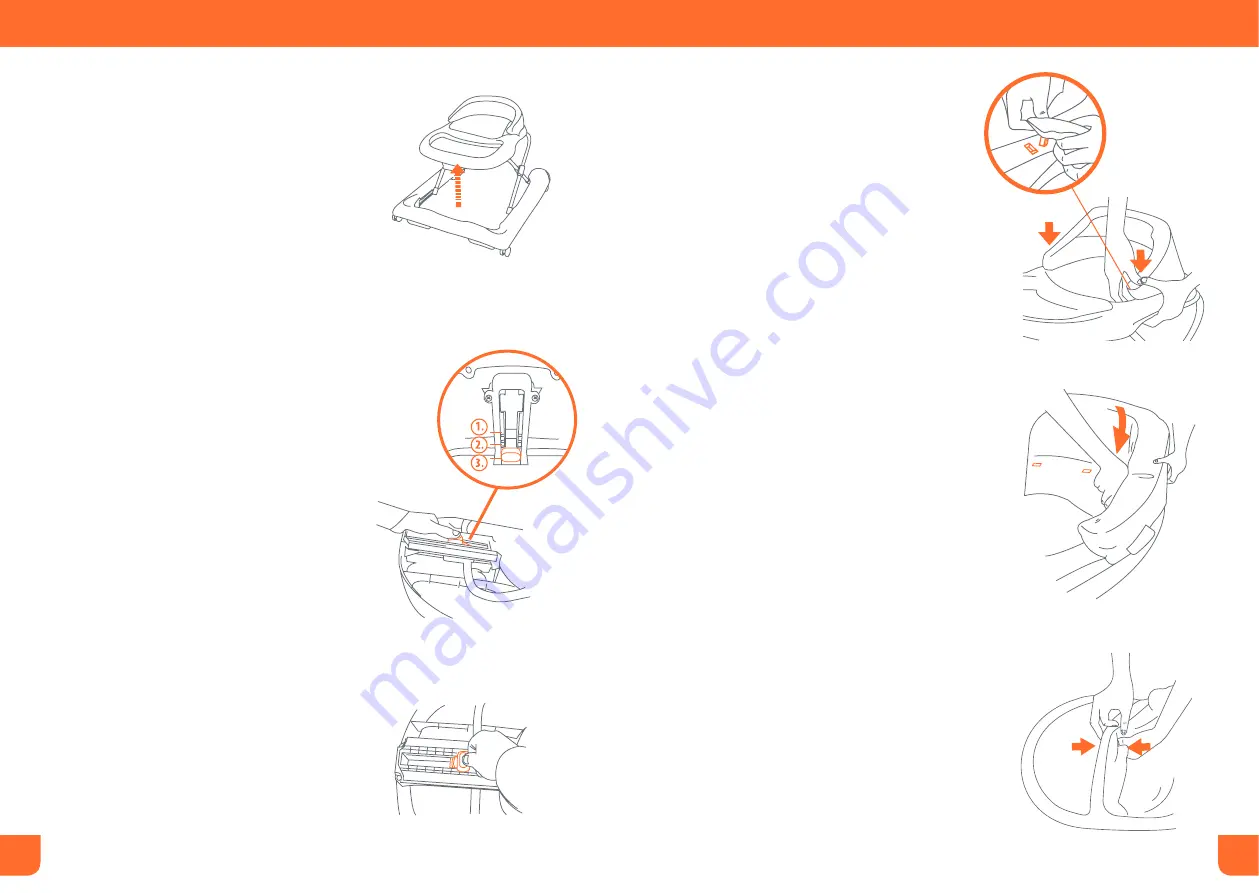
• To open the baby walker raise the 

tray to the middle position (Fig. 1).

• Para abrir el andador, levante 

la bandeja hasta la posición 

intermedia (Fig. 1). 

2)  

• The baby walker can be used 

for 3 different heights. Turn the 

safety button and slide vertically 

to adjust the height. See the 

3 heights diagram under the 

walker for indications of the 

height being used (Fig. 2).

• El andador para bebés puede 

utilizarse en tres alturas diferentes. 

Gire el botón de seguridad y deslice 

verticalmente para ajustar la altura. 

Consulte el diagrama de 3 alturas 

debajo de la andadora para ver las 

indicaciones de la altura que se 

esta usando (Fig. 2). 

3)  

• Check that the safety button is 

turned 90 degrees to prevent 

the accidental release of the 

mechanism (Fig. 3).

• Verifique que el botón de seguridad 

esté a 90 grados para evitar 

que el mecanismo se suelte 

accidentalmente (Fig. 3).

Fig. 1

Fig. 2

Fig. 3

X

X

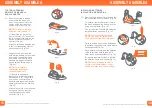
4)  

• Attach the fabric nearest to the tray, 

push the pin downward through the 

fabric into to the hole of the frame until 

it snaps into place. Repeat for the 

opposite side (Fig. 4a).

•  Insert the pins on the back of the seat, 

into the holes by pushing downwards 

through the fabric until each one clicks 

(Fig. 4b).

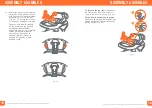
•  Lastly, insert the pins into the holes 

behind the tray, by pushing downwards 

through the fabric until each one clicks 

(Fig. 4c). 

NOTE: 

All pins should be aligned to the 

corresponding holes of the frame and 

click into place to ensure the fabric is 

securely attached.

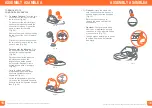
•  Insert the Push Handle into the frame. 

Push in firmly until it clicks into position. 

NOTE:

 Do Not lift the walker from the 

Push Handle (Fig. 4d).

•  Coloque la tela más cercana a la 

bandeja, empuje los pasadores hacia 

abajo a través de la tela hasta los 

orificios del marco hasta que encaje en 

su lugar. Repita para el lado opuesto 

(Fig. 4a).

•  Inserte los pasadores en la parte 

posterior del asiento, en los orificios 

empujando hacia abajo a través de la 

tela hasta que haga clic (Fig. 4b).

Fig. 4a

Fig. 4b

Fig. 4c

Summary of Contents for WK14 F Series

Page 1: ...tomer Service Department can be contacted at 1 800 328 7363 Monday through Friday between 8 00 a m and 4 30 p m PST Return Authorizations are required prior to returning product s to Baby Trend Please...

Page 2: ...at check that both feet of the child touch the floor Never carry walker with the child in it as the child may get hurt or slip out WARNING To avoid burns keep the child away from hot liquids ranges ra...

Page 3: ...educir las posibilidades de que el ni o se resbale y se caiga del asiento verifique que ambos pies toquen el suelo Nunca acarree el andador con el ni o en l ya que este se podr a lastimar o deslizarse...

Page 4: ...fore assembling the baby walker IMPORTANTE Para garantizar que el producto funcione de manera segura siga estas instrucciones cuidadosamente Guarde estas instrucciones para referencia futura IMPORTANT...

Page 5: ...fique que el bot n de seguridad est a 90 grados para evitar que el mecanismo se suelte accidentalmente Fig 3 Fig 1 Fig 2 Fig 3 X X 4 Attach the fabric nearest to the tray push the pin downward through...

Page 6: ...to their housing by pressing them until they snap into position Fig 5a Insert the pins of the 6 stoppers and 2 rear wheels into their housing by pressing them until they snap into position Fig 5b Ensu...

Page 7: ...sulte la p gina 12 1 Inserte la barra para juguetes en la parte delantera de la bandeja 2 Luego colo que los dos conectores en la bandeja para juguetes y g relos hasta que encajen con firmeza Fig 6b A...

Page 8: ...to the tray Fig 8a Do not use the toy tray if it has been damaged or broken Despu s de alinear la bandeja para juguetes con las perillas de la bandeja del andador aseg rese de girar por completo ambas...

Page 9: ...g 9d Para separar los juguetes Gire los dos conectores de la bandeja para quitar los dos juguetes Fig 9a Para desconectar los juguetes individuales presione las leng etas que est n debajo del conector...

Page 10: ...de que el ni o se resbale y se caiga del asiento verifique que ambos pies toquen el suelo Nunca acarree el andador con el ni o en l ya que este se podria lastimar o deslizarse y caerse Always check th...

Page 11: ...he baby walker if the button is not in the sideways position Important Never change the height when the baby is in the walker Cuando haya seleccionado la posici n verifique que el bot n de seguridad e...

Page 12: ...modifi caciones realizados a esta unidad sin la aprobaci n expresa de la parte responsable del cumplimiento podr an invalidar la autorizaci n del usuario para operar el equipo NOTA este equipo ha sido...

Reviews: