background image


BAC Document Number: Easybond MKII Manual V03


28/08/13


Page 

8

 of 

32


4.  PIN BRAZING  

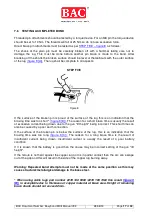
4.1  THE PIN BRAZING PROCESS  

The Easybond MKII is powered by a 36V battery pack capable of delivering 240A (ampere) for 
use with BAC fused brazing pins, ceramic ferrules and cable lugs.  

The pin brazing process is initiated by depressing a trigger on the pin brazing gun. The circuit is 
completed  via  the  magnet  attachment to  the  substrate  through  which  a  DC  current  is  passed. 
The brazing pin tip is the point of highest resistance at which point an arc is drawn, melting the 
solder  whilst  simultaneously  heating  the  cable  lug  material  and  the  surface  of  the  structure  to 
the required soldering temperature. 

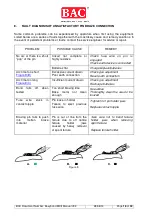
After approximately 1.5 seconds the circuit is mechanically broken as the fuse wire breaks, the 
solenoid is de-energised and the brazing pin is held into the molten pool of brazing alloy. The 
brazing pin tip, alloy, flux and cable lug (if used) rapidly cool into a homogenous unit achieving a 
very strong connection onto the substrate. 

4.2  WET WEATHER USE 

 
Pin  brazing  attachments  can  be  successfully  made  to  wet  metal  and  in  mildly  inclement 
weather, i.e. light rain, drizzle or snow. 

However, heavy rain may cause the pin fuse wire to burn out prematurely resulting in no bond 
being made. 

4.3  COLD WEATHER USE 


It  is  possible  to  undertake  pin  brazing  attachments  to  metals  at  sub-zero  temperatures. 
However,  the  efficiency  of  the  batteries  will  be  reduced  in  colder  weather.  Therefore,  where 
practicable, shield the battery pack from extreme cold. 

4.4  PIN BRAZING CONSUMABLES (Brazing Pins, Ceramic Ferrules and Cable Lugs) 

The Easybond MKII Pin Brazing unit uses BAC fused pins to make the electrical connections. 
Each  brazing  pin  is  tipped  with  low  temperature  brazing  alloy  and  the  correct  amount  of  flux, 
and has attached a copper fuse wire at the other end, which acts as a timed circuit breaker to 
control the duration of the braze. Refer to 

section 6

4.5  STORAGE OF UNIT 

 
The unit is to be stored in any dry room or cabinet where a constant power supply to the battery 
charger can be made available. 
There must be adequate ventilation at all times to prevent possible build up of gas evolved from 
the batteries during charging. 
         
It is recommended that the batteries be stored at an ambient temperature of 25°C (77°F)  

4.6  TRANSPORT TO/FROM SITE 

 
The unit can be transported safely in the rear of a vehicle when secured to prevent movement. 
The  unit  can  also  be  supplied  with  an  optional  trolley  that  can  be  used  to  transport  the  pin 
brazing unit around site. 

Summary of Contents for EASYBOND MK2

Page 1: ...5660 03 28 08 2013 LG SJ SFG For Issue 02 13 11 2012 LG SJ SFG For Issue 01 28 09 2011 SFG GL APG For Issue 00 27 05 2008 GS GS APG For Issue Rev Date Prepared By Checked By Approved By Status Remark...

Page 2: ...EASYBOND 9 5 2 CONNECTION OF BATTERY PACK 10 5 3 ENERGY BRAZE CHARGE MONITOR 10 6 PIN BRAZING CONSUMABLES 11 7 OPERATION OF EASYBOND PIN BRAZING UNIT 13 7 1 PREPARATION OF THE SURFACE 13 7 2 LOADING...

Page 3: ...Document Number Easybond MKII Manual V03 28 08 13 Page 3 of 32 13 WEEE 29 14 INSPECTION AND ACCEPTANCE OF PIN BRAZING EQUIPMENT GOODS 29 15 WARRANTY 29 15 1 WARRANTY FOR PIN BRAZING BATTERIES 30 NOTES...

Page 4: ...able rugged and easily maintained machine to make electrical connections onto metallic structures It is important that you carefully read and understand this manual and take time to watch the training...

Page 5: ...ver operate the AC battery charger outside and in wet conditions Keep bystanders away whilst operating the equipment Do not abuse the cables and connectors and never use the cables for carrying or pul...

Page 6: ...comprised of components detailed in figure 1 When you receive your Easybond MKII unit check that you have the following Figure 1 1 Power control unit with battery pack Part 273 199 5610 6 Tool kit Pa...

Page 7: ...kg Pin brazing enclosure 273 199 5690 5 7 kg Re chargable battery pack with charge adaptor 273 199 5640 15 8 kg Battery kit web and 3 x batteries 273 199 5630 15 3 kg Charge adaptor 273 199 5620 0 5...

Page 8: ...owever heavy rain may cause the pin fuse wire to burn out prematurely resulting in no bond being made 4 3 COLD WEATHER USE It is possible to undertake pin brazing attachments to metals at sub zero tem...

Page 9: ...tem Charge LED red low battery warning 4 DC socket for 42V grinder or battery charger 5 Energy monitor system Braze LED blue OK to braze indicator 6 Socket for earth device 7 Brazing gun Part 273 199...

Page 10: ...condition and is able to assess whether there is sufficient power available for optimum braze results and safe use of the equipment Recovery mode The red LED flashes when the voltage drops below 36 3...

Page 11: ...to ensure adequate contact CERAMIC FERRULES A new ferrule must always be employed in pin brazing the ferrule must be changed after each brazing operation The purpose of the ferrule is to prevent splat...

Page 12: ...ded brazing pin 12 x 34 mm 40 includes nuts and washer 4 270 077 3680 Ceramic ferrule for threaded pin 12 mm 50 5 278 100 7360 M2 Cable lug 10 mm2 cable 6 x 9 mm 100 5 278 100 9000 M2 Cable lug 16 mm2...

Page 13: ...trated in STEP ONE figure 4 The metal surface must then be prepared to a bright clean finish to ensure a sound electrical connection between the earth device and the substrate Never continuously work...

Page 14: ...USTMENT OF BRAZING GUN Before connecting the earth device to the steel adjust the brazing pin Lift Height as follows Hold the cable lug or stinger flat on the steel surface for direct pin connection I...

Page 15: ...5 PIN BRAZING STEP FOUR Figure 7 1 The magnetic earth device must be applied to the cleaned surface to ensure a sound electrical circuit 2 The brazing gun must be correctly adjusted with the correct...

Page 16: ...e work keeping the trigger depressed 9 After the fuse has ruptured the gun must be held in place for a further 3 seconds to allow the braze to set 10 Remove the gun by pulling straight off the pipe or...

Page 17: ...time is usually the result of excessive current being drawn due to the gun lift height being incorrect This short time can also be caused by a poor earth connection If the surface of the broken pin is...

Page 18: ...t Charge replace batteries Arc time too short Figure 9 B Excessive current drawn Poor earth connection Check gun adjustment Reset earth connection Arc time too long Figure 9 C Insufficient current dra...

Page 19: ...also be allocated to the general servicing of equipment on a routine basis Refer to the maintenance manual in section 12 for more information If the servicing procedures set out in this instruction ma...

Page 20: ...y do not expose to rain or moisture Disconnect the AC mains supply before connecting or disconnecting the charger from the battery If the AC power lead is damaged this appliance should not be used If...

Page 21: ...d There are no user serviceable parts in this charger 10 2 INSTRUCTIONS FOR USE 1 Ensure that the voltage input selector switch is correctly set to the mains supply 2 Connect the output lead to the ba...

Page 22: ...wice per second charger will not start to charge 4 Stage four Deeply Discharged Battery Recovery Mode Battery in recovery mode soft start Red Charge Yellow flash alternate 5 Stage five Main Bulk Charg...

Page 23: ...leads to the charger for any damage Switch the charger back off connect the charger to the battery switch back on the lights should now flash in sequence again The yellow charging light should now ill...

Page 24: ...are tight Loose terminals could result in defective and or swollen batteries 11 1 QUICKCHANGE RE CHARGEABLE BATTERY PACK The battery pack is accessible by undoing the safety latch on the side of the...

Page 25: ...Item No Part No Description Item No Part No Description 273 199 0780 Standard brazing gun BB1 Easybond MKII 7 273 190 0570 Contact nipple and washer 5 pack 1 270 074 8150 Ferrule holder for 8mm direc...

Page 26: ...Open the gun handle plate using the provided allen key 31 to remove screws 1 Unscrew the flat contact with the spanner 30 and remove the gun cable 27 ensure the spring washer is removed 2 Unscrew the...

Page 27: ...place the centre piece to allow removal of the pin holder 5 3 Unscrew by the pin holder 5 4 Remove plastic spark shield 6 5 Remove ceramic washer 8 6 Using the peg spanner 29 remove and replace the n...

Page 28: ...d leaf spring Replace contact arm 25 2 Defective trigger spring 22 Replace spring Contacts remain closed after pressure is released from centrepiece 1 Misaligned contact arm 25 Check position of tufno...

Page 29: ...e deemed to have accepted the Goods and that they conform with the Contract 15 WARRANTY 1 The following warranty will apply to the pin brazing equipment Goods The pin brazing equipment excluding pin b...

Page 30: ...United Kingdom or in the case of exports FOB UK port or airport at the cost and discretion of BAC Corrosion Control Ltd BAC Corrosion Control Ltd will reimburse the Customer the reasonable carriage c...

Page 31: ...BAC Document Number Easybond MKII Manual V03 28 08 13 Page 31 of 32 NOTES...

Page 32: ...g Charge adaptor 273 199 5620 0 5 kg Optional accessories Grinder with 18V battery 273 199 0685 5 8 kg Grinding burr 273 190 1370 0 04 kg In car battery charger VEPAC 273 199 5040 1 5 kg Extension cab...

Reviews: