background image

Tru Pointe

Refrigerant Leak Detector

Instruction 0019-9328

Operation & Maintenance

Rev. 3 – May 2010

Product Leadership • Training • Service • Reliability

Summary of Contents for Tru Pointe

Page 1: ...Tru Pointe Refrigerant Leak Detector Instruction 0019 9328 Operation Maintenance Rev 3 May 2010 Product Leadership Training Service Reliability ...

Page 2: ...TUAL OR IMPLIED The remedies of the Buyer shall be limited to those provided herein to the exclusion of any and all other remedies including without limitation incidental or consequential damages No agreement varying or extending the foregoing warranties remedies or this limita tion will be binding upon Bacharach Inc unless in writing signed by a duly authorized officer of Bacharach Notice Product...

Page 3: ...trument ON OFF 7 Low Battery Indication 8 Selecting High Low Sensitivity Mode 8 Procedure for Locating a Refrigerant Leak 8 Sensor Failure Indication 9 False Refrigerant Indication 10 SAE Leak Detection Tips 10 Maintenance 12 Routine Maintenance 12 Sensor Replacement 13 Troubleshooting Guide 14 Parts Service 16 Replacement Parts 16 Sales Service Centers 16 ...

Page 4: ...y responsive to all refrigerants even when high background levels of refrigerant vapors are present No manual sensitivity adjustments are necessary during the inspection process The instrument is suitable for HVAC Service Technicians Refrigerant Service Technicians Plant Maintenance Departments Automotive Service Facilities and Refrigerant Environmental Chamber Manufactures who are in need of a sm...

Page 5: ...ctable Automatic zero and background compensation that allows a leak to be quickly found in contaminated atmospheres with out requiring manual sensitivity adjustments Flexible probe 14 inches 356 mm in length for locating leaks in hard to reach areas One handed operation No user calibration required Long life DC brushless fan provides positive airflow past sensor resulting in a faster response tim...

Page 6: ...antaneous Sensitivity The instrument will detect a leak of at least 0 5 oz year 14 g yr as detected by moving probe tip at 2 50 mm per sec ond 0 2 5 mm above leak source A leak rate of less than 0 1 oz year 3 g yr can be detected when probe tip is held steady over leak source for at least 5 seconds Sensitivity Adjustment Automatic Weight 1 16 lb 0 53 kg w batteries Size excluding probe 2 12W x 9 5...

Page 7: ...u Pointe Instruction 0019 9328 Operating Environment Position Any Temperature 32 to 122 F 0 to 50 C Humidity 10 to 90 RH non condensing Approvals UL certified to SAE J1627 CE Mark Technical Characteristics ...

Page 8: ...cover tab and then sliding the cover off the instrument See Figure 2 2 Install two D alkaline batteries into the battery compartment observ ing the polarity markings that are molded inside of the case 3 Slide the battery cover back onto the instrument until its tab clicks into place Operation Figure 2 Battery Installation ...

Page 9: ...han 1 or 2 flashes ticks per second Note that during the warm up period the instrument has zeroed out any background concentration of refrigerant vapors that may have been present in the area After the instrument is turned ON and allowed to warm up it is ready to perform leak testing as described in Section Procedure for Locating a Refrigerant Leak Operation Figure 3 Indicators and Controls Green ...

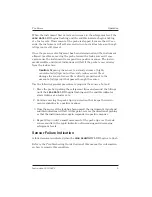
Page 10: ...low sensitivity mode by pressing the HIGH LOW SENSITIVITY button until the HIGH SENSITIVITY LED turns OFF Procedure for Locating a Refrigerant Leak After the instrument is turned ON and allowed to warm up observe that both the LEAK RATE LED and the audible indicator should be flashing tick ing at no more than 1 or 2 times a second indicating that the instrument is in its idle state and currently n...

Page 11: ...is directly proportional to the amount of refrigerant that passes through the sensor Use the following general procedure to pinpoint the source of a leak 1 Move the probe tip along the refrigerant lines and around the fittings until the LEAK RATE LED begins flashing and the audible indicator starts ticking at a faster rate 2 Continue moving the probe tip in a direction that keeps the instru ment r...

Page 12: ...eration The air conditioning system shall be charged with sufficient refrigerant to have a gauge pressure of at least 340 kPa 49 psi when not in opera tion At temperatures below 15 C 59 F leaks may not be measurable since this pressure may not be reached Take care not to contaminate the detector probe tip if the part being tested is contaminated If the part is particularly dirty it should be wiped...

Page 13: ... out the area with shop air often helps locate the exact position of the leak Leak testing of the evaporator core while in the air conditioning module shall be accomplished by turning the air conditioning blower on high for a period of 15 seconds minimum shutting it off then waiting an addi tional 15 seconds minimum for the refrigerant to accumulate in the case then inserting the leak detector pro...

Page 14: ...sing it to a source of refrigerant gas DO NOT check sensitivity by cracking open a bottle of refrigerant or Schrader valve and exposing the sensor to a stream of pure refrigerant This will severely reduce sensor life or damage the sensor Keep the instrument case and probe clean by wiping them with a shop towel If necessary moisten the towel with a mild detergent solution Avoid using any type of so...

Page 15: ...4 Material Required Sensor refer to Section Replacement Parts Procedure 1 Turn OFF instrument 2 Grasp nose cone of probe assembly and pull probe away from case using a slight twisting motion 3 Sensor may be hot Pull spent sensor from its socket and discard 4 Plug in new sensor 5 Push probe assembly back into case 6 Turn ON the instrument and check that it responds in a positive man ner to a source...

Page 16: ...place batteries per Section Battery Installation The HIGH SENSITIVITY LED is flashing in clean air a Sensor depleted or faulty Replace sensor per Section Sensor Replacement b Batteries are nearly depleted Replace per Section Battery Installation The LEAK RATE LED is turned on steady and the audible indicator is produc ing a steady tone a This is normal during warm up After warm up the flash tick r...

Page 17: ...surrounding fans protect probe tip from wind switch to low sensitivity mode per Section High Low Sensitivity Mode b Probe assembly loose Push nose cone of probe assembly back into instrument c Low batteries Replace batteries per Sec tion Battery Installation d Loose sensor Remove probe and ensure that the sensor is being held firmly in its socket see Figure 4 e Sensor faulty Replace sensor per Sec...

Page 18: ...019 0501 Probe Assembly 0019 0553 Screw Case 4 20 x 1 Self Tapping 0102 1982 Sensor 0019 0559 Sales Service Centers Parts Service United States Pennsylvania 621 Hunt Valley Circle New Kensington PA 15068 Phone 1 800 736 4666 Fax 724 334 5723 Email help mybacharach com Canada Bacharach of Canada Inc 20 Amber St Unit 7 Markham Ontario L3R SP4 Canada Phone 905 470 8985 Fax 905 470 8963 Email bachcan ...

Page 19: ...hased Purchased From 1 What can Bacharach do to better serve you ___________________________ __________________________________________________________________ 2 My Application Combustion Analysis Leak Detection Emission Monitoring Appliance Service Indoor Air Quality Other Please Specify _____________________________________________ 3 Future Applications May Include Please Send More Information A...

Page 20: ...World Headquarters 621 Hunt Valley Circle New Kensington PA 15068 7074 Ph 724 334 5000 Fax 724 334 5001 Toll Free 1 800 736 4666 Web site www mybacharach com E mail help mybacharach com Printed in U S A ...

Reviews: