8.
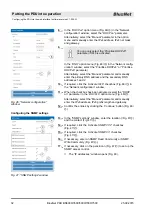
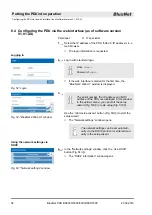
In the
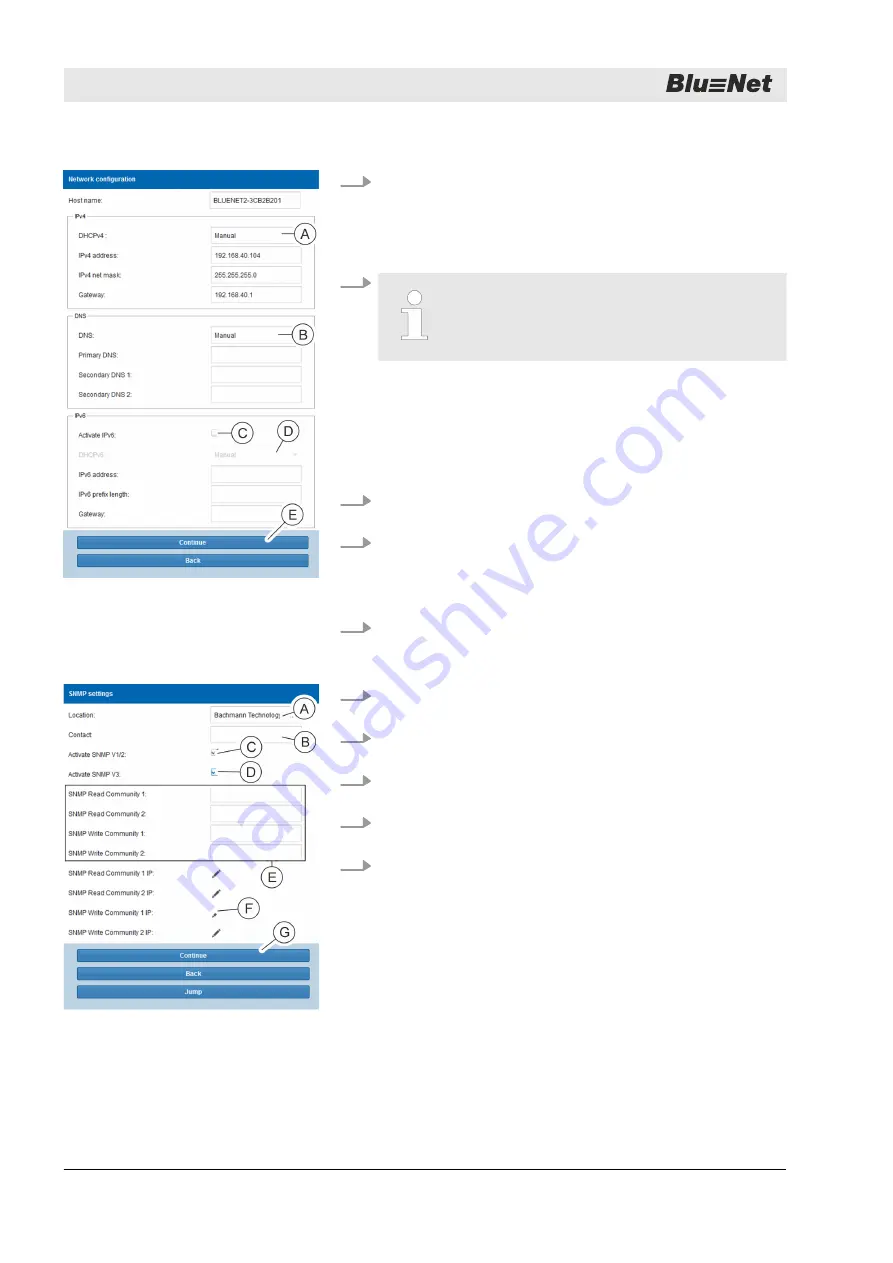
‘DHCPv4’
Ⓐ
) in the “Network
configuration” window, select the “DHCP on” parameter.
Alternatively, select the “Manual” parameter in the option
menu and manually enter the IPv4 address, IPv4 net mask
and gateway.
9.
You can only select the “Prioritise DHCPv6”
parameter if IPv6 is activated.
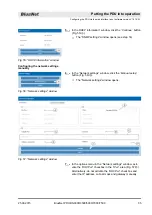
In the
‘DNS’
Ⓑ
) in the “Network config-
uration” window, select the “Prioritise DHCPv4” or “Prioritise
DHCPv6” parameter.
Alternatively, select the “Manual” parameter and manually
enter the primary DNS address and the secondary DNS
addresses 1 and 2.
10.
If required, click the
‘Activate IPv6’
Ⓒ
) in
the “Network configuration” window.
11.
When the checkbox has been activated, select the “DHCP
on” parameter in the
‘DHCPv6’
Ⓓ
).
Alternatively, select the “Manual” parameter and manually
enter the IPv6 address, IPv6 prefix length and gateway.
12.
Confirm the entries by clicking the
‘Continue’
Ⓔ
).
13.
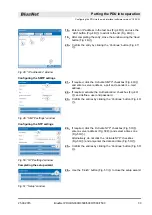
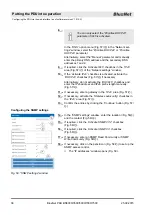
In the “SNMP settings” window, enter the location (/Fig. 47
Ⓐ
)
Ⓑ
).
14.
If required, click the
‘Activate SNMP V1/2’
checkbox
Ⓒ
).
15.
If required, click the
‘Activate SNMP V3’
checkbox
Ⓓ
).
16.
If necessary, enter an SNMP Read Community or SNMP
Ⓔ
).
17.
If necessary, click on the pencil icon (Fig. 47/
Ⓕ
) to set up the
SNMP access control.
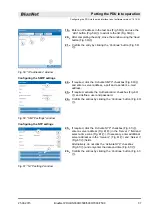
ð
The “IP addresses” window opens (Fig. 48).
Fig. 46: “Network configuration”
window
Configuring the SNMP settings
Fig. 47: “SNMP settings” window
Putting the PDU into operation
Configuring the PDU via the web interface (software version V1.00.XX)
25.09.2015
BlueNet PDU BN3000/3500/5000/7000/7500
32

