J
M
Page 2
IMPORTANT!! PLEASE READ ENTIRE INSTRUCTION SHEET BEFORE ASSEMBLY!!
TO EXPEDITE ANY FUTURE WARRANTY CLAIMS, PLEASE KEEP INSTRUCTION SHEET, WARRANTY CARD AND RECEIPT
Step 1:
Do not attempt assembly if any parts are missing or damaged.
Do not over tighten
Remove all protective materials and set parts on a flat, non-abrasive surface. Identify parts packed in carton against the parts list. If you are missing any parts or are unsure how to proceed
with assembly, call our Customer Service Center at 1-800-416-3511.
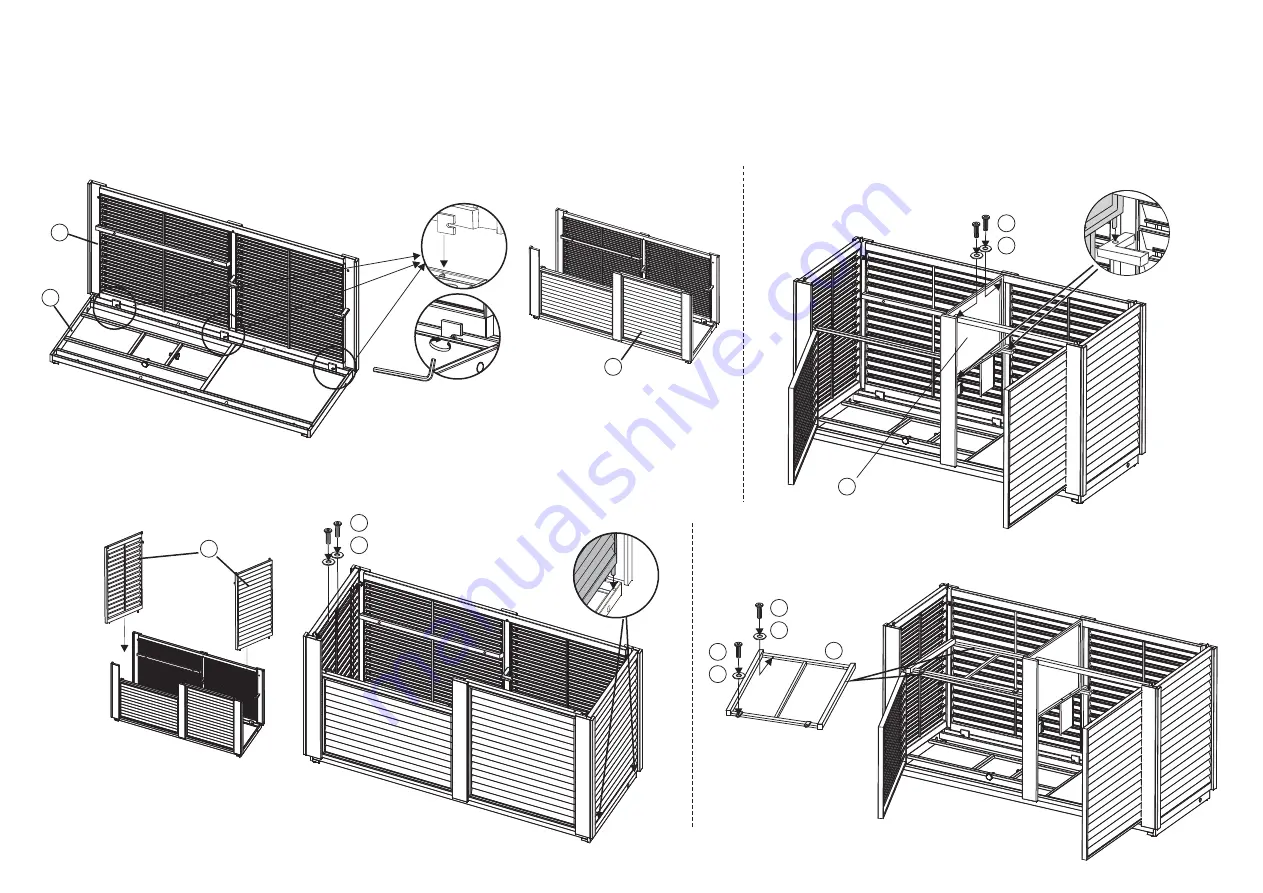
the back frame to the bottom frame as shown in
.
.
as shown in
.
F
1a
F
1b
Repeat for the
door frame
Step 2:
Assemble
igure
igure
Step 3:
Attach the side frames to the bottom as shown in
. Attach the side frames to the back frame by
using the 1/4"x20 mm bolts and washers as shown in
. Guide the bolts through the holes in the
side frame into the pre-drilled holes in the back frame.
.
.
F
2a
F
2b
Do not over tighten
Repeat for the door frame
igure
igure
C
E
Figure 1A
B
Figure 1B
Figure 3
D
Figure 2a
Figure 2b
Step 4:
Attach the middle panel-2 to the door frame and back frame by
using two 1/4"x30 mm bolts and washers as shown in
.
.
F
3
Do not over tighten
igure
Step 5:
3
and
5
Attach the middle panel- to the door frame
back frame by using
two 1/4"x3 mm bolts and 1/4"x20 mm as shown in
. Add
a washer to each bolts.
.
F
4
Do not over tighten
igure
Figure 4
H
K
M
G
J
M
L
M


