background image

15

OPERATION INSTRUCTIONS

CLEANING AND MAINTENANCE:

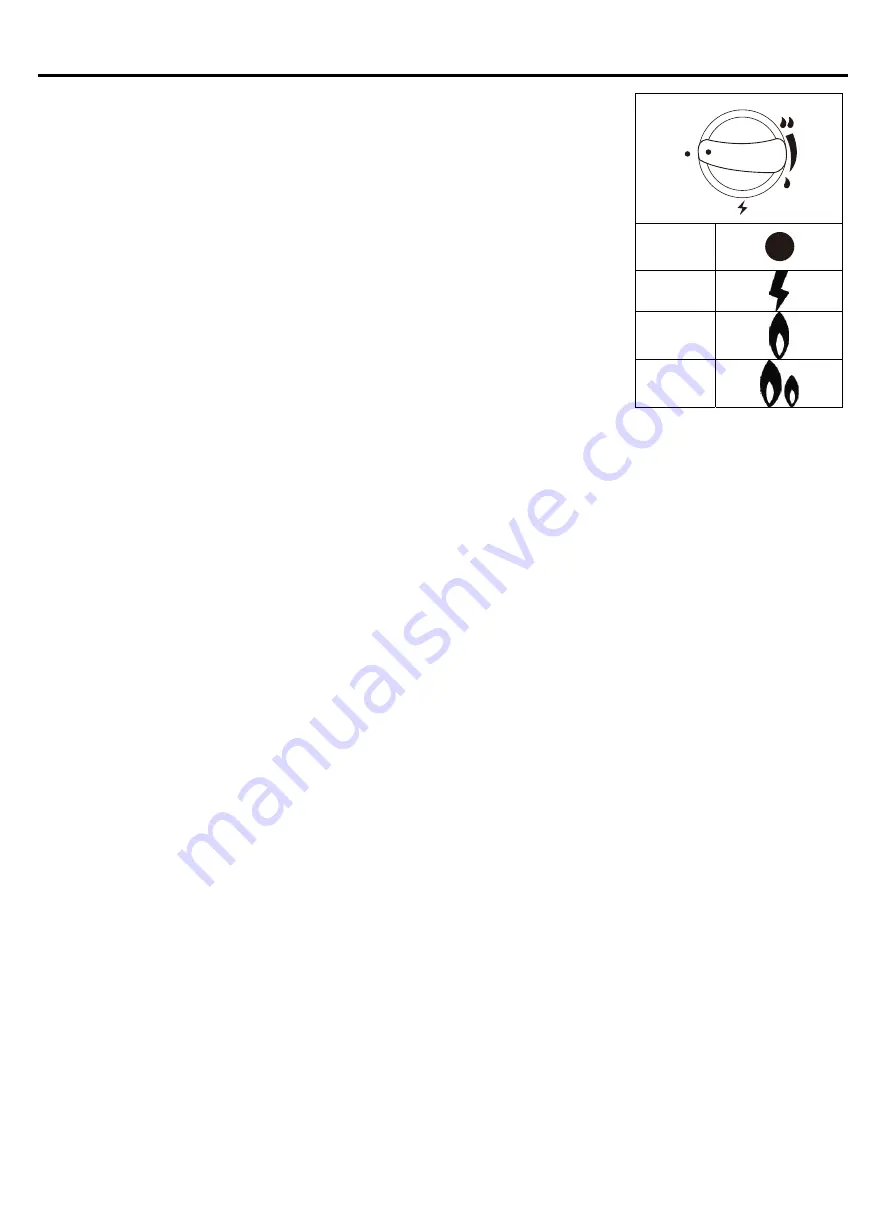
5.For maximum heat turn control knob to ‘HIGH’.

6.To turn heater off, turn control knob to ‘OFF’.

7.Close the vlave of the gas cylinder or the regulator after use.


OFF

LIGHT


LOW


HIGH


OFF

LO

HI

To enjoy outstanding performance of your heater for years make sure 

to perform the following maintenance activities on a regular basis:

● Keep exterior surfaces  clean.

- Use warm soapy water for cleaning. Never use flammable, 

corrosive or abrasive cleaners.

- While washing your unit, be sure to keep the area around the burner 

and pilot assembly dry at all time. If the gas control is exposed to water

in any way, do NOT try to use it. It must be replaced.

● After a long break from operation, the unit should be inspected for 

spiders, spider webs or other insects.

● Air flow must be unobstructed. Keep controls. Burner and circulating air passageways clean.

Signs of possible blockage include:

- Gas odour with extreme yellow tipping of flame.

- Heater does NOT reach the desired temperature.

- Heater glow is excessively uneven.

- Heater makes popping noises.

● Spider and insects can nest in burner or orifices.

This dangerous condition can damage heater and render it unsafe for use. Clean burner holes by 

using a heavy-duty pipe cleaner.

Compressed air may help clear away smaller particles.

● Carbon deposits may create a fire hazard. Clean reflector and glass tube inside with soapy water 

if any carbon deposits develop. Always be careful when cleaning the glass tube.

STORAGE:

Between uses:

Turn the control knob to “OFF” position.

● Turn LPG cylinder to “OFF” position.

● Store heater upright in an area sheltered away from weather conditions 

  (such as rain, sleet, hail, snow).

● If desired, cover heater to protect exterior surfaces and to help prevent dust and debris collecting 

in air passages.

During periods of extended inactivity or when transporting:

● Turn the control knob to “OFF” position.

● Disconnect LPG Cylinder and move to a secure, well-ventilated location outdoors.

DO NOT store in a location that will exceed 50 degrees C.

● Store heater upright in an area sheltered away from weather conditions 

  (such as rain, sleet, hail, snow).

● If desired, cover heater to protect exterior surfaces and to help prevent dust and debris collecting 

in air passages.

Summary of Contents for PH08-SB

Page 1: ...FLAME HEATER FOR OUTDOOR USE ONLY KEEP THESE INSTRUCTIONS FOR FUTURE REFERENCE MODEL NUMBER PH08 SB PH08 SSB WARNING Cancer and Reproductive Harm www P65Warnings ca gov...

Page 2: ...Reflector Damper Upper Support Wireguard 1 C Upper Support D Wireguard E Glass Tube F Middle plate 4 4 1 1 G 3 H 4 I Front Panel Base Side Panel Lower Support 1 J Control box K 1 1 A B C D Glass Tube...

Page 3: ...hen using storing and servicing Using this equipment with the respect and caution demanded will reduce the possibilities of personal injury or property damage The following symbols shown below are use...

Page 4: ...heat producing products for specific uses Your local authorities can advise you about these If no local codes exist follow National Fuel Gas Code ANSI Z223 1 In Canada installation must conform to loc...

Page 5: ...igniting clothing Carefully supervise young children when in the vicinity of the heater Do not hang clothing or any other flammable materials from the heater or place on or near the heater Replace an...

Page 6: ...6 ASSEMBLY INSTRUCTIONS 1 2 1 Attach 1 set wheels FF to the base J if needed 2 Attach the stability ring DD to the base J if avalable J FF DD...

Page 7: ...supports H to the base J and middle plate F using the M3 16 screws AA 4 Unsrew any pre installed M3 16 screws AA first Assemble the four upper supports C to the lower supports H using the M3 16 screw...

Page 8: ...e control box Assemble the control box K onto the bottom of middle plate using the M3 16 screws Note The control knob is to face to the front of the heater where the magnet is installed in the middle...

Page 9: ...middle plate 8 Attach the wire guards D onto the heater by inserting the hooks into the holes on the frame ensure that all of the hooks engage Unscrew 4pcs screws from damper Using the M3 16 screws s...

Page 10: ...over the front side where the control knob is 10 Screw the knob CC onto the front panel I Attach the panel to the heater by inserting the two tabs into the slots on the base J Hook the chain which is...

Page 11: ...oors is permissible only if the cylinder is disconnected and removed from the appliance A cylinder must be stored outdoors in a well ventilated area out of the reach of children A disconnected cylinde...

Page 12: ...ve a listed overfilling prevention device The cylinder must have a connection device compatible with the connection for the appliance The cylinder used must include a collar to protect the cylinder va...

Page 13: ...continue appearing the hose should be returned to the place of purchase 3 If leak is at regulator cylinder valve connection disconnect reconnect and perform another leak check If you continue to see...

Page 14: ...ally If relighting a hot heater always wait at least 5 minutes 2 Inspect the hose assembly for evidence of excessive abrasion cuts or wear Suspected areas should be leak tested If the hose leaks it mu...

Page 15: ...is excessively uneven Heater makes popping noises Spider and insects can nest in burner or orifices This dangerous condition can damage heater and render it unsafe for use Clean burner holes by using...

Page 16: ...re is low Control knob fully ON Dirt or film on reflector and burner screen Blockage in burner Remove blockage and clean burner inside and outside Check burner and orifices for blockage Clean reflecto...

Reviews: