background image

5

-

36

BAD BOY TRACTOR

ADJUSTING WHEEL TREAD

Adjust the wheel tread depending on 

the type and condition of the work. 

Also, increase the wheel tread when 

working on a slope or towing.
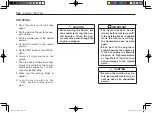
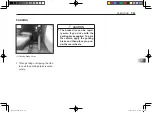
1. Pull the parking brake, block

the front wheels, and raise the

body with a jack to make the rear

wheels separate from the ground.

2. Be sure to make adjustments al-

ternatively between the left and

right wheels.

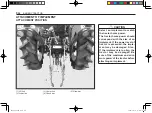
DESCRIPTION

TIGHTENING TORQUE

FRONTWHEEL

Bolts on wheels and axle

130 (18 kgf.m)~ 152 lb-ft (21 kgf.m)

REAR WHEEL

Bolts on wheels and axle

130 (18 kgf.m)~ 152 lb-ft (21 kgf.m)

Bolts on rim and disk of wheels 188 (26 kgf.m)~ 224 lb-ft (31 kgf.m)

TIGHTENING TORQUE

When changing tires, please

use a hoist or strong sup-

port and make sure the tractor

does not move.

[Otherwise]

There is a risk of death or injury.

WARNING

2024h_3026h.indb   36

2024h_3026h.indb   36

2020-09-18   오후 6:17:28

2020-09-18   오후 6:17:28

Summary of Contents for 3026H 2021

Page 1: ......

Page 2: ...e contact your local authorized dealer for a copy Some parts of this product may have been changed for the improvement of quality or for safety reasons in which case the photographs or drawings of the...

Page 3: ...S 2024h_3026h indb 2 2024h_3026h indb 2 2020 09 18 6 17 07 2020 09 18 6 17 07...

Page 4: ...DESCRIPTION OF OPERATING SYSTEM CONTROLS AND COMPONENTS PERIODIC CHECKS AND MAINTENANCE DIAGNOSIS AND TROUBLE SHOOTINGS STORAGE AND DISPOSAL 1 2 3 4 5 6 7 8 SECTION TABLE OF CONTENTS 2024h_3026h indb...

Page 5: ...ractor after you have read it IMPORTANT The instructions given with the following marks are very important for your safety WARNING Failure to observe the instruction given with this mark may expose yo...

Page 6: ...rability and mainte nance These meanings are as below so carefully read it for a proper function SYMBOL MARKS OF CONTROLLER Left side indicator High Beam Preheat Right side indicator Battery Engine oi...

Page 7: ...rting companies We introduce the Use and Disposal policy concerned with environment preservation as follows 1 Please read the operator s manual thoroughly for global environment protection Overload on...

Page 8: ...2 BEFORE WORKING 1 11 WHILE WORKING 1 16 AFTER USING THE MACHINE 1 17 PRECAUTION FOR PROLONGED STORAGE 1 21 OTHER 1 23 DECAL MOUNTING LOCATION 1 31 DECAL 1 33 CAUTIONS FOR DECAL MAINTENANCE 1 36 2024...

Page 9: ...rning of the trac tor WARNING Please understand that some of the figures or contents in this manual may not match with your own machine due to the product variation This tractor is not designed for ro...

Page 10: ...struction is ignored an unexpected accident may occur possibly fire or explosion WARNING Clean and arranged place Do not mess the place by dust mud oil or parts If this instruction is ignored an unexp...

Page 11: ...e recommend ed by manufacturer If this instruction is ignored an unexpected accident may occur or tractor may not perform prop erly WARNING Wear properly for the job Hair band loose clothing is not al...

Page 12: ...n a road Make sure to interlock the brake pedals left and right when driving on a road If this instruction is ignored there is a risk of abrupt turning or overturning due to one sided braking Start th...

Page 13: ...ing and excessive speed Start and stop the tractor slowly Reduce engine speed when making a turn and driv ing on hilly or curved roads If this instruction is ignored there is a risk of overturning or...

Page 14: ...d the tractor while in operation This tractor is designed to al low only one operator The driver must not allow anyone else to get on the tractor Especially never allow chil dren on the machine while...

Page 15: ...als efficient ly and safely Then it may pre vent injury or accident WARNING Properly train anyone operating Explain the handling tips in detail and make sure the driv er reads the Manual before drivin...

Page 16: ...moke or use match or lighter while refueling If this instruction is ignored fuel can catch fire and lead to explo sion or fatal injury with burn WARNING Observe all relevant regulations for disposal C...

Page 17: ...the tractor engine switched off and the parking brake en gaged The loading ramps must be non slip and have sufficient strength length and width for the tractor If this instruction is ignored the trac...

Page 18: ...he proper shift gear before ap proaching the loading ramps and then do not shift the gear on the loading ramps If this instruction is ignored there is a risk of slipping roll ing or overturning WARNIN...

Page 19: ...ry No fire or spark near to the battery while checking and charging the battery If this instruction is ignored the battery can cause a blaze or ex plosion and lead to a fatal injury or death DANGER Re...

Page 20: ...d wire harness Check before work if the wire harnesses are burned or stuck on any other component if the cord cover is peeled off or if the wire connectors are loose If this instruction is ignored the...

Page 21: ...ng the covers for checking or maintenance make sure to put them back in their place If this instruction is ignored there is a risk that you may get entangled in the tractor or get injured CAUTION Obse...

Page 22: ...e to check the machine before and after using Espe cially inspect and repair con trols such as clutch brake le ver etc If this instruction is ignored the machine can be broken or lead to an accident o...

Page 23: ...ignored there is a risk of accident that the tractor may slip or turn over WARNING Properly ventilate when working in a green house Ventilate the green house to let out the exhaust gas If this instru...

Page 24: ...he cultivator and lock the flow control valve not to lower the implement If this instruction is ignored there is a risk that you will get entangled in the cultivator or sustain a serious injury due to...

Page 25: ...AUTION Carry out maintenance after the parts have cooled down Carry out the maintenance work after the heated area such as the muffler or the en gine is fully cooled down If this instruction is ignore...

Page 26: ...gh pressure inside the hydraulic system by moving the control lever while engine is stopped If this instruction is ignored the oil under high pressure may cause skin injury CAUTION Make sure that you...

Page 27: ...diator cap when the radiator is hot Never open the radiator cap when the radiator is heated If this instruction is ignored hot water may spurt causing burns or damage WARNING Remove dirt and debris fr...

Page 28: ...r a long time When storing the tractor for a long period of time make sure to put the clutch pedal in the disengaging position If this instruction is ignored the clutch disc can be stuck to the fly wh...

Page 29: ...l be failed WARNING Observe correct procedures when installing or removing the battery Connect the terminal first when installing the battery and disconnect the terminal first when removing it If this...

Page 30: ...ing of the engine fuel injection pump Correction and repair of hy draulic system safety valve hydraulic pump brake valve PST cylinder SCV valve There is a risk of accident or in jury or machinery bre...

Page 31: ...or a collision of the implement WARNING Use caution sign when towing a trailer Link the brake of the trailer with the brake of the tractor Do not shift gears when driv ing on a hill If this instructi...

Page 32: ...loader op eration During the front end load er operation apply weights or implement to avoid loosing balance between the front and the rear side of tractor If this instruction is ignored there is a r...

Page 33: ...ny thing else in place of the bal ance weight Use only genuine balance weight If this instruction is ignored there is a risk of accident or in jury WARNING Be careful of unexpected move ment when usin...

Page 34: ...oth sides when loading or un loading the tractor It is necessary to interlock the brake pedals for both sides when loading or unloading the tractor If this instruction is ignored the tractor may overt...

Page 35: ...drawbar when towing Never tow any thing with the top link or the lower links If this instruction is ignored the tractor may turn over WARNING Be careful when driving on a hill Be careful when driving...

Page 36: ...y move and cause an accident WARNING 6015O179A Remove spilled excess fuel after closing the fuel cap After filling the fuel tank close the fuel filler cap complete ly and wipe off the excess fuel thor...

Page 37: ...or may move and cause an accident or injury Only engage or disengage im plements on flat level area Engage or disengage the im plement on a flat and safe place Supply proper light ing at all times and...

Page 38: ...1 31 FOR SAFE OPERATION 1 DECAL MOUNTING LOCATION 7 8 2 3 1 5 6 4 2024h_3026h indb 31 2024h_3026h indb 31 2020 09 18 6 17 17 2020 09 18 6 17 17...

Page 39: ...1 32 BAD BOY TRACTOR 12 11 10 9 2024h_3026h indb 32 2024h_3026h indb 32 2020 09 18 6 17 17 2020 09 18 6 17 17...

Page 40: ...nrnia to casues cancer and birth defects or other reproductive harm TA00059067A ZDUQLQJ Alwasys start and operate th engine in a well ventilated area If in an enclosed area vent the exhaust to the out...

Page 41: ...ts 7 Lock the two brake pedals together before driving on the road 8 Slow down for turns or rough roads or when applying individual brakes 9 On public roads use SMV emblem and hazard lights if require...

Page 42: ...cture must be replaced NTE5220000C4 ZDUQLQJ WARNING TO AVOID PERSONAL INJURY 1 Keep PTO shield in place at all times 2 Do not operate the PTO at speeds faster than the speed recommended by the impleme...

Page 43: ...uch a thin ner or acetone since it can ruin the decals Do not spray high pressure wa ter directly onto the decal The decal may fall off the tractor IMPORTANT If a decal is damaged or lost contact your...

Page 44: ...ANTY CERTIFICATE 2 2 REGARDING AFTER SALES SERVICE 2 2 VEHICLE IDENTIFICATION NUMBER VIN 2 2 REGARDING SUPPLYING SERVICE PARTS 2 3 REGARDING GENUINE PARTS AND FLUID 2 3 2024h_3026h indb 1 2024h_3026h...

Page 45: ...ered under warranty WARNING ENGINE SERIAL NUMBER The engine number is stamped on the cylinder block and is specified on the decal which is attached to the cylinder block on the left side of the engine...

Page 46: ...job and how fast Run hour of machine Describe the problem in detail as possible REGARDING GENUINE PARTS AND FLUID The BAD BOY genuine parts and flu id are passed severe durability and performance test...

Page 47: ...MEMO 2024h_3026h indb 4 2024h_3026h indb 4 2020 09 18 6 17 19 2020 09 18 6 17 19...

Page 48: ...3 3 SPECIFICATION MAJOR SPECIFICATIONS 3 2 DRIVING SPEED 3 5 2024h_3026h indb 1 2024h_3026h indb 1 2020 09 18 6 17 19 2020 09 18 6 17 19...

Page 49: ...Overall Width in mm 44 3 1 124 53 9 1 369 Overall Height in mm 87 2 2 216 91 4 2 321 Wheel Base in mm 59 1 1 502 65 7 1 670 Tread Front in mm 33 6 853 45 1 142 Rear in mm 34 6 880 43 2 1 097 Ground Cl...

Page 50: ...600 Number of Cylinders 3 Bore x Stroke in mm 3 07 x 3 23 78 x 82 Displacement cu in cc 70 7 1 175 Compression Ratio 21 5 1 Fuel Consumption gal hp hr 0 067 210 g hp hr Type of Air Cleaner Dry Elemen...

Page 51: ...PTO Type Live P T O 6 Spline shaft Speed rpm 540 960 Option 2 500 Mid 2 600 10 Hydraulic System Type Position control 3 Point Hitch Telescopic lower link Telescopic stabilizers Category Category I Li...

Page 52: ...H 12 1 19 5 Rated Engine rpm 2 600 rpm Tire agri 9 5 16 423mm This specification will be changed without prior notice for improvement of quality Theory speeds figured by rated engine rpm mile hr DRIVI...

Page 53: ...3 7 0 M 8 1 13 0 H 14 9 23 9 Rated Engine rpm 2 600 rpm Tire agri 11 2 20 476mm This specification will be changed without prior notice for improvement of quality Theory speeds figured by rated engin...

Page 54: ...PARKING BRAKE BRAKE INDICATOR 4 10 ENGINE OIL PRESSURE WARNING LAMP 4 10 BATTERY CHARGE WARNING LAMP 4 10 PREHEAT INDICATOR 4 11 FUEL GAUGE 4 11 TACHOMETER HOUR METER 4 11 COOLANT TEMPERATURE GAUGE 4...

Page 55: ...RACTOR EXTERIOR VIEW 1 Steering Wheel 2 Fuel Tank 3 Hood 4 Head Lamp 5 Front Tire 6 ROPS 7 Seat 8 Rear Tire 9 Brake Lights 10 Lower Link 2024h_3026h indb 2 2024h_3026h indb 2 2020 09 18 6 17 20 2020 0...

Page 56: ...gnal Lamp switch 4 Instrument Cluster 5 Hazard Warning Flasher Switch 6 Cruise Control Switch 7 Hand Throttle Lever Refer to the relevant content for further de tailed information SWITCHES AND LEVERS...

Page 57: ...itch A OFF B ON C START CAUTION To start the engine put the shuttle shift lever to the Neu tral position to release the safety start system CAUTION When the tractor is not in use take out the key and...

Page 58: ...signal lamp and press down the knob to turn on the left turn signal lamp To sound the horn press the horn button in center of the switch 1 Lamp Switch 2 Turn Signal Lamp Knob 3 Horn Button CAUTION Pr...

Page 59: ...pedals are released At that point the machine will contin ue at the previous setting 4 To reset the desired speed you should turn off the cruise con trol switch then increase machine speed to reach t...

Page 60: ...le working on a field with the constant engine rpm Increasing engine RPM Decreasing engine RPM HAND THROTTLE LEVER Use the foot throttle pedal during driving for travel not the hand throttle lever NOT...

Page 61: ...4 Parking Brake Brake Indicator 5 Engine Hydraulic Pressure Indicator 6 Charge Warning Lamp 7 Preheat Indicator 8 PTO Rotating Position 9 Tachometer 10 Fuel Gauge 11 Hour Meter 12 Coolant Temperature...

Page 62: ...ition when op erating one of the turn signal lamps for the desired turning direction HIGH BEAM INDICATOR It indicates the high beam Select the low beam for driving on a road 1 PTO Indicator 1 Left Tur...

Page 63: ...when the engine is started If this lamp comes on while the engine is running it indicates a problem in the engine oil system Stop the engine im mediately and check for problems 1 Engine Oil Pressure W...

Page 64: ...or 1 Tachometer 2 Hour Meter PREHEAT INDICATOR The 4WD indicator comes on when the 4WD lever is placed in ON position 1 Preheat Indicator FUEL GAUGE This indicates the remaining fuel level Immediately...

Page 65: ...fter the ignition switch is turned to the ON position If the needle reads the red area immediately stop work ing and then inspect the tractor 1 Coolant Temperature Gauge Coolant temperature over 5 1 s...

Page 66: ...N 4 CONTROLS 1 PEDALS 1 Brake Pedal 2 Clutch Pedal 3 Forward Pedal 4 Backward Pedal Refer to the relevant content for further de tailed information 2024h_3026h indb 13 2024h_3026h indb 13 2020 09 18 6...

Page 67: ...and can be used for mak ing a small turn on the pavement Depressing the brake pedal on the side to which to make a turn the rear wheel on that side is stopped and the tractor can make a small turn 1 B...

Page 68: ...s at neutral machine should be stopped 1 HST Pedal Forward 2 HST Pedal Reverse WARNING For safety do not shift quickly from forward to reverse or from reverse to forward Engage Brake pedals when stopp...

Page 69: ...R 1 Range Shift Lever 2 PTO Shift Lever 3 MFWD Lever 4 Position Control Lever 5 Parking Brake Refer to the relevant content for further de tailed information 2024h_3026h indb 16 2024h_3026h indb 16 20...

Page 70: ...revolution of the PTO shaft can be shifted in two stages 1st Rear 540 rpm 2nd Rear 960 rpm Mid 2500 rpm When shifting level press clutch pedal deeply 1 PTO Shift Lever CAUTION Do not shift while drivi...

Page 71: ...ix the position control lever in the up position while driving on a road When lowering the implement set the position control lever and the imple ment will go down to the set position 1 Position Contr...

Page 72: ...lso if you wind the valve fully to the right the hydraulic pres sure to the device raising the imple ment is stopped 1 Flow Control Valve WARNING Do not work under or put a foot under the implement Ot...

Page 73: ...MEMO 2024h_3026h indb 20 2024h_3026h indb 20 2020 09 18 6 17 22 2020 09 18 6 17 22...

Page 74: ...5 23 TO RAISE OR LOWER THE IMPLEMENT 5 24 ADJUSTING THE LOWERING SPEED OF THE IMPLEMENT 5 24 TRACTOR LOADING UNLOADING 5 25 ATTACHMENT OF IMPLEMENT 5 26 ATTACHMENT POSITION 5 26 CENTER LINK ADJUSTMEN...

Page 75: ...ICATIONS PRECAUTIONS 5 38 LOADER OPERATION 5 39 CARRYING THE LOAD 5 40 HANDLING LARGE HEAVY OBJECTS 5 41 ROPS FOLDING METHOD 5 42 HOW TO FOLD DOWN THE ROPS 5 42 HOW TO STAND UP THE ROPS 5 42 2024h_302...

Page 76: ...ing rail PRE OPERATION CHECK Do not provide illumination with a lit cigarette or a lighter when fueling Never fill the fuel tank while the engine is running or hot After filling the fuel tank close th...

Page 77: ...mfortable operation please carry out the rou tine check up everyday before start ing work Correct any problem imme diately and also check for problems after work This checking should be done in the fo...

Page 78: ...3 Open the engine hood Engine oil level contamination or leakage Engine coolant level leakage or damage to the hose Battery solution level 2024h_3026h indb 5 2024h_3026h indb 5 2020 09 18 6 17 23 202...

Page 79: ...5 6 BAD BOY TRACTOR Air cleaner Fan belt tension damage Dust or straw on the radiator grill or the engine 2024h_3026h indb 6 2024h_3026h indb 6 2020 09 18 6 17 23 2020 09 18 6 17 23...

Page 80: ...PTO shaft Condition of pins in each part Loosening of the bolts holding the blade Quantity of oil in each part For more details please refer to the implement manufacturer s in structions 5 Check on t...

Page 81: ...A Free play 0 8 2 0 in A A Operational condition and free play of the clutch pedal Manual trans mission only 6 Start the engine Abnormal noise from the engine A Free play 1 0 1 4 in A A 2024h_3026h i...

Page 82: ...ectly 1 Prevent falls by facing the ma chine when getting on and off Maintain 3 point contact with steps and handrails Never use machine controls as hand holds 2 Use extra care when mud snow or moistu...

Page 83: ...ator and fan belt tension as well as air inlet Tighten the cooling system s hose and clamp Perform the scheduled 50 hour maintenance IMPORTANT Always keep wheel bolts tightened to prevent any accident...

Page 84: ...Engage the parking brake during warm ing up Otherwise the tractor may move and cause an acci dent Don t crank engine unless hitch control lever is in the lowest position Otherwise Implement might ris...

Page 85: ...mplement down onto the ground Don t crank engine unless po sition control lever is in the lowest position Otherwise Implement might rise quick ly and there is a risk of injury or machinery breakdown C...

Page 86: ...to the START position When the en gine is started take your hand off the key 6 Increase the engine to about 1 500 rpm and warm it up for about five minutes without a load IMPORTANT Do not operate the...

Page 87: ...shuttle lever main gearshift lever and PTO shift lever to N put PTO ON OFF switch in to the OFF position and 4WD lever po sition on disengage 3 Put the hitch control lever on DOWN STOPPING ENGINE Whe...

Page 88: ...e or lighter than the tractor maintain the maximum speed of 16 mph 26 km h 2 If the trailed weight is twice the tractor or less maintain the maxi mum speed of 8 mph 13 km h 3 If the trailed weight is...

Page 89: ...physical condi tion CAUTION If the tractor is out of control it can cause a personal injury or even death Keep the following instructions on a road Interlock the both brake ped als Use the foot throt...

Page 90: ...implement 4 Control the hand throttle lever In crease the engine rpm from low to high speed gradually 1 Position Control Lever A Lowering B Lifting 1 Hand Throttle Lever Faster Engine RPM A Slower Eng...

Page 91: ...positions as the operator s intention 1 Range shift lever CAUTION The range shift lever should be operated while the vehicle is stationary If not there is a risk of machinery damage 7 Operate the HST...

Page 92: ...one sided braking Observe the traffic regulations when driving on the road Oth erwise you may be involved in an accident WARNING This tractor is designed to ac commodate only one person Do not allow...

Page 93: ...ith low engine rpm Otherwise the front of the tractor may be lifted and cause a very dangerous situa tion You may shift the gear when you are no longer on the slope If you stop on a slope apply the pa...

Page 94: ...e the implement NOTE TURNING ON THE PAVEMENT When making a turn reduce the en gine rpm and make a slow turn When making a turn on the pave ment remove the connector of the brake pedals Depress the bra...

Page 95: ...sition to stop the en gine CAUTION When leaving the tractor put the shuttle lever into the neu tral position If not the trac tor may move even though the engine is stopped IMPORTANT The tractor needs...

Page 96: ...e parking brake applied To park the vehicle apply the parking brake and then place prop un der the rear wheels 1 When parking or stopping the trac tor pull the parking brake lever se curely 1 Parking...

Page 97: ...NG THE LOWERING SPEED OF THE IMPLEMENT Do not work under or put a foot under the implement Otherwise The implement may fall and cause an injury WARNING For adjusting the lowering speed turn valve A to...

Page 98: ...done on a flat and safe place with the engine turned off and the parking brake en gaged The loading lamp must be non slippery and have suffi cient strength length and width for the tractor To avoid sl...

Page 99: ...rse power The tractor horse power should correspond with the size of an implement If the power level of tractor is exceeded the imple ment may be damaged Also if the implement is too big the tractor m...

Page 100: ...er 1 Center link A Low traction B Mid traction C High traction ATTACHING IMPLEMENT 1 Implement 2 Lower link C If the center link is attached to the bottom position the draft system will be activated w...

Page 101: ...and lower link if required 1 Center link 2 Fixing bracket IMPORTANT Do not extend the center link excessively out of the lim it The center link s body or thread can be damaged ADJUSTMENT OF CHECK BAR...

Page 102: ...ck the PTO shaft and its guards Repair or lubricate if required 9 The PTO shaft should not be inter fered by any surrounding parts 8 Check if the safety shields are in place and working environment is...

Page 103: ...enter Be sure to clean the connector and assemble it in a clean state CAUTION High pressure oil leaking un der pressure can penetrate the skin and cause severe wounds Avoid danger by reducing pressur...

Page 104: ...the balance of the tractor 4 When adjusting the implement apply the parking brake switch off the engine and confirm that the PTO lever is on the OFF posi tion 5 When towing something make sure to use...

Page 105: ...ent thoroughly before work To avoid an injury due to mis handling of an implement read the user s manual of the implement thoroughly and work safely and precisely with caution Installation of an impro...

Page 106: ...ending point Plow in a sequential pattern from 1 to 6 and in a circular pattern from 7 to 18 When driving forward to plow have the bank on the right side B e c a r e f u l n o t t o p r e s s a l read...

Page 107: ...r the sections 1 to 7 perform plowing in an alternating pattern For the sections 8 to 19 plow in a circular pattern Refer to the sequential returning pattern for other details Moving direction Moving...

Page 108: ...so that the trace of plowing cannot be seen The border shown in the figure should be set a little narrower than two times of one plowing width Refer to the alternating returning pattern for other det...

Page 109: ...ents al ternatively between the left and right wheels DESCRIPTION TIGHTENING TORQUE FRONTWHEEL Bolts on wheels and axle 130 18 kgf m 152 lb ft 21 kgf m REAR WHEEL Bolts on wheels and axle 130 18 kgf m...

Page 110: ...operate the tractor with a loose rim wheel hub or axle When operating a new tractor or when removing the wheel follow the procedures above NOTE POWER STEERING Pay attention to the steering wheels whi...

Page 111: ...7 Towing should be in short dis tance 8 Traction speed is restricted to less 8 km h 9 If possible start the engine in or der to make the power steering lu bricated 10 Place the main gearshift and sub...

Page 112: ...Avoid contact with electrical power lines by loader or at tachments Do not lift or carry anyone in the bucket or on any other po sition of loader attachment Inadvertent movement of the loader or atta...

Page 113: ...he bucket just below the level of the tractor hood for maxi mum stability and visibility wheth er the bucket is loaded or empty 2 Use extreme caution when oper ating the loader on a slope keep the buc...

Page 114: ...ops in a rut This will avoid tipping and possible injury CAUTION Do not use front end loaders for handling large heavy ob jects such as large round or rectangular bales logs and oil drums Handling lar...

Page 115: ...folding up ROPS When working with the tractor don t fold down ROPS Don t change ROPS without authority Before using tractor check your ROPS support and other parts If there is damage to the ROPS chang...

Page 116: ...COOLANT REPLACEMENT 6 9 ENGINE OIL FILTER 6 9 TRANSMISSION OIL FILTER 6 10 FUEL FILTER 6 10 DRAINING AIR IN FUEL LINE 6 11 COOLANT 6 12 ANTI FREEZE 6 13 OTHERS 6 14 RADIATOR SCREEN AIR CLEANER ELEMEN...

Page 117: ...cleaning At the time the coolant is replaced 7 Fuel oil filter and element 8 Coolant Check before every work Replace every year 9 Air cleaner element 10 Fan and radiator cleaning 11 Battery solution R...

Page 118: ...lt 23 Clutch 24 Brake 25 Engine breed pipe 26 Engine crankcase cleaning 27 Intake exhaust gas valves 28 Fuel injection valve 29 Generator motor 30 Hydraulic system Meanings of symbols Replace Check Ad...

Page 119: ...ne oil SAE 10W 40 CG Above 3 Grease Arctic Grease Below 14 F 10 C SAE NLGI 0 1 32 22 F 0 30 C SAE NLGI 2 32 122 F 0 50 C 4 Coolant Anti Freeze ASTM D4985 Extended Lift antifreeze 5 Transmission Steeri...

Page 120: ...gal 3 0 L 3 Coolant 1 21 gal 4 6 L 1 21 gal 4 6 L 4 Transmission Hyd oil 2 64 gal 13 L 2 90 gal 13 L 5 Front axle 0 79 gal 3 0 L 0 79 gal 3 0 L Above listed fuel oil and coolant table is only for ini...

Page 121: ...1 The hood can be unlocked by pull ingthe opening lever 2 Slightly lift the hood with both hands and the hood is automati cally lifted by the gas spring 3 To close the hood press its front down slight...

Page 122: ...ndow at the rear side of the transmission compartment The level should be within sight through the inspection gauge If the fluid level is below proper level add fluid Drain the oil when oil is warm bu...

Page 123: ...BAD BOY transmission fluid 1 Drain Plug Drain the oil when oil is warm but be careful If oil is hot there is a risk of getting burnt CAUTION FRONT AXLE FLIUD CHECKING OIL Open the fluid filler cap on...

Page 124: ...b ber ring on the bottom of the new cartridge and attach the new filter securely 3 After changing the engine oil start the engine and run it until the en gine oil pressure warning lamp is turned off 4...

Page 125: ...changing the transmission fluid start the engine to circulate the fluid and then stop the engine Check the fluid level at dipstick on left axle housing and add fluid as necessary FUEL FILTER 1 Fuel F...

Page 126: ...valve to OPEN 3 Put the throttle lever to MAX and the key switch to START to run the starting motor for about 10 sec onds That completes the proce dure If air is not removed then there will be air in...

Page 127: ...r with tap water 4 Assemble the radiator cap and run the engine to mix the anti freeze and water Do not open the radiator cap while the engine is run ning or right after the engine is stopped Open the...

Page 128: ...freeze reservoir tank A FULL B LOW CAUTION When changing with new cool ant add anti rust agent and idle the engine for 5 minutes for mixing As the coolant level is re duced naturally fill with clean a...

Page 129: ...ition When working in dusty environments clean the air fil ter every 50 hours and replace it ev ery 400 hours In normal working environments clean the air filter every 100 hours and replace it every 1...

Page 130: ...the battery dealer for prop er disposal 1 Battery Avoid heat when checking or charging the battery Otherwise The battery may explode and cause burns or other injury DANGER When connecting the battery...

Page 131: ...ink R 1 Lift Link L 1 1 1 1 1 1 STEERING WHEEL When the steering wheel is turned lightly there should be free play 0 8 2 0 in If the extent of the free play exceeds this range the steer ing wheel may...

Page 132: ...isk of accident If the extent of free play is dif ferent between the two brakes pedals one sided braking will occur Make sure that the free play of both brake pedals is the same WARNING BRAKE 1 Brake...

Page 133: ...a new one New belts must be inspected after 50 hours of use 1 Fan Belt Carry out inspection or main tenance after the engine is ful ly cooled down Otherwise There is a risk of getting burnt CAUTION B...

Page 134: ...fuse box cover and check the fuses Replace any burnt out fuses with new ones of required capacity A fusible link is a type of fuse which burns and disconnects the current in the event of excessive cu...

Page 135: ...just air pressure in front and rear tires to standard pressure Also check if there are any cracks on the tires When front wheels are put un der a load of the front weights or a front loader air pressu...

Page 136: ...NG TROUBLESHOOTING ENGINE 7 2 TROUBLESHOOTING CLUTCH AND BRAKE 7 5 TROUBLESHOOTING HYDRAULIC SYSTEM 7 6 TROUBLESHOOTING ELECTRICAL SYSTEM 7 7 2024h_3026h indb 1 2024h_3026h indb 1 2020 09 18 6 17 33 2...

Page 137: ...ch broken Contact the dealer for repair or replacement Is the starter motor damaged Contact the dealer for repair or replacement 2 The starter motor runs but the engine does not start Is the fuel tank...

Page 138: ...l Is the engine running under overload Reduce the load 5 The engine power is too weak Is the air cleaner clogged Inspect the air cleaner and replace the element Is the nozzle damaged Contact the deale...

Page 139: ...p to required level Is the viscosity of the engine oil low Replace the engine oil with proper viscosity Is the pressure switch defective Replace the switch Is the oil pump defective Contact the dealer...

Page 140: ...n one side Is the free play of the brake pedals proper Adjust the free play of the pedals 3 The brake pedal does not return to its original position properly and it makes a noise Is the brake pedal re...

Page 141: ...de tent position Put the Selective control valve lever in the neutral position Is the hydraulic pump defective Contact the dealer for repair Is the cylinder damaged Contact the dealer for repair 2 The...

Page 142: ...s the bulb blown Replace the bulb Is the fuse blown Replace the fuse Is the cable connector separated from the sock et Inspect it Is the contact in a poor condition Inspect and clean the grounding and...

Page 143: ...MEMO 2024h_3026h indb 8 2024h_3026h indb 8 2020 09 18 6 17 33 2020 09 18 6 17 33...

Page 144: ...AND DISPOSAL TRACTOR STORAGE 8 2 DAILY STORAGE 8 2 LONG TERM STORAGE 8 3 USING TRACTOR AFTER LONG TERM STORAGE 8 6 USE AND DISPOSAL 8 7 2024h_3026h indb 1 2024h_3026h indb 1 2020 09 18 6 17 33 2020 09...

Page 145: ...the vehicle make sure to disconnect the negative bat tery cable The wiring can be gnawed by rodents leading to a fire Don t forget to dry off and grease the tractor after After work clean the tractor...

Page 146: ...TERM STORAGE If you carry out maintenance during the off season you can ensure opti mum condition of the tractor as well as safe and comfortable working conditions during the busy season Also in orde...

Page 147: ...11 Inflate the tires to a pressure a little higher than usual 12 Detach the weights and detach or lower the attached implement on the ground 13 Place chocks behind and in front of the rear wheels 14...

Page 148: ...on system in order to prevent poisoning by exhaust gas When storing the tractor re move the key from the switch and store it separately in or der to prevent an unautho rized person from operating the...

Page 149: ...to release exhaust gas to the outside Exhaust gas is colorless and not visible but is harmful WARNING USING TRACTOR AFTER LONG TERM STORAGE Keep the following instructions when using the tractor after...

Page 150: ...st gas which causes air pollution due to the incomplete combustion 2 When changing the fluid engine oil transmission hydraulic oil and engine coolant by yourself be careful not to spill it and dispose...

Page 151: ...MEMO 2024h_3026h indb 8 2024h_3026h indb 8 2020 09 18 6 17 34 2020 09 18 6 17 34...

Page 152: ......

Reviews: