background image

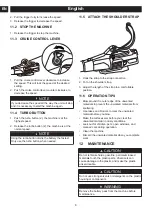
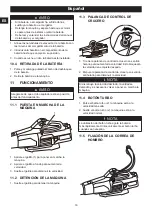
2. Pull the trigger fully to increase the speed.
3. Release the trigger to decrease the speed.

11.2 STOP THE MACHINE

1. Release the trigger to stop the machine.

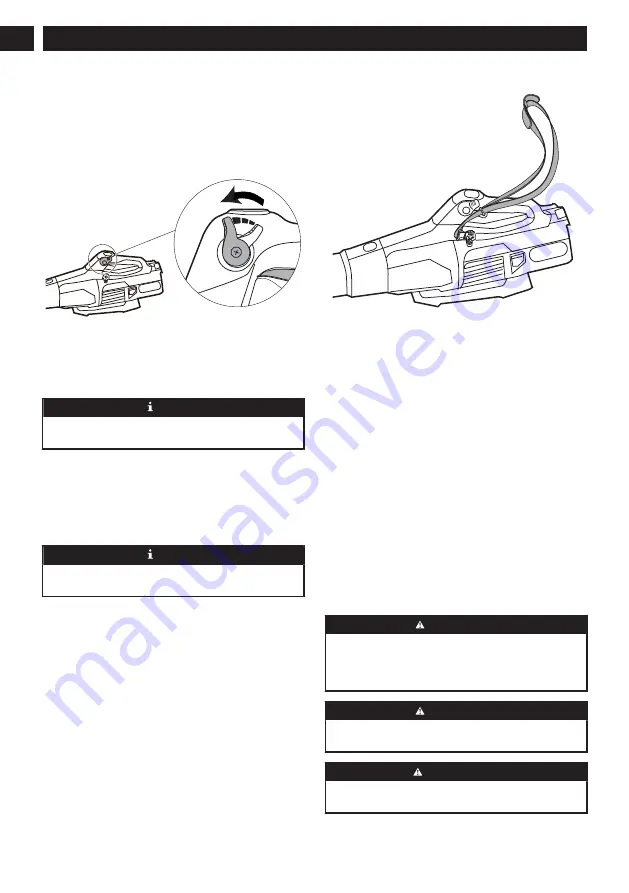
11.3 CRUISE CONTROL LEVER

1. Pull the cruise control lever clockwise to increase

the speed. This will lock the speed at the desired
setting.

2. Push the cruise control lever counter clockwise to

decrease the speed.


NOTE

If you decrease the speed all the way, the unit will stop
and it is necessary to start the machine again.

11.4 TURBO BUTTON

1. Push the turbo button (2), the machine is at the

highest speed.

2. Release the turbo button (2), the machine is at the

normal speed.


NOTE

Using the turbo button drains the battery the fastest.
Only use the turbo button when needed.

11.5 ATTACH THE SHOULDER STRAP

1. Hook the strap to the strap connection.
2. Put on the shoulder strap.
3. Adjust the length of the strap to a comfortable

position.

11.6 OPERATION TIPS

Blow around the outer edge of the unwanted
materials to prevent the unwanted materials from
scattering.

Use rakes and brooms to clear the unwanted
material before you blow.

Make the surfaces wet before you clear the
unwanted material in dusty conditions.

Look out for children, pets, open windows, and
cleaned cars during operation.

Clean the machine.

Discard the unwanted material when you complete
work.

12

MAINTENANCE


CAUTION

Do not let brake fluids, gasoline, petroleum-based
materials touch the plastic parts. Chemicals can
cause damage to the plastic, and make the plastic
unserviceable.


CAUTION

Do not use strong solvents or detergents on the plastic
housing or components.


WARNING

Remove the battery pack from the machine before
maintenance.

8

English

EN

Summary of Contents for BH80B000A

Page 1: ...088 7575 00 PART NO N PIEZA 088 7520 00 MODEL NO N MODELO BH80B000A BH80B125A badboymowers com EN OPERATOR MANUAL BLOWER ES MANUAL DEL OPERADOR SOPLADOR...

Page 2: ......

Page 3: ...e machine 6 10 2 Install the blower tube 7 10 3 Install the battery pack 7 10 4 Remove the battery pack 7 11 Operation 7 11 1 Start the machine 7 11 2 Stop the machine 8 11 3 Cruise control lever 8 11...

Page 4: ...ving parts of the machine or its motor Do not force tool Use the correct tool for your application The correct tool will do the job better and safer at the rate for which it is designed Keep firm foot...

Page 5: ...damage the battery and increase the risk of fire 4 CHILD SAFETY Tragic accidents can occur if the operator is not aware of the presence of children Keep children out of the working area and under the...

Page 6: ...and corrosive materials below are in the batteries used in this machine Lithium ion a toxic material WARNING Discard all toxic materials in a specified manner to prevent contamination of the environme...

Page 7: ...airflow in tight areas 10 3 INSTALL THE BATTERY PACK WARNING If the battery pack or charger is damaged replace the battery pack or the charger Stop the machine and wait until the motor stops before y...

Page 8: ...ATTACH THE SHOULDER STRAP 1 Hook the strap to the strap connection 2 Put on the shoulder strap 3 Adjust the length of the strap to a comfortable position 11 6 OPERATION TIPS Blow around the outer edge...
Page 9: ...when you pull the trig ger The battery pack is not installed tightly Make sure that you tighlty install the battery pack in the machine The battery pack is out of power Charge the bat tery pack PROBL...

Page 10: ...oper maintenance or alteration or 2 The unit if it has not been operated and or maintained in accordance with the owner s manual or 3 Normal wear 4 Routine maintenance items such as lubricants blade s...

Page 11: ...2 Instalaci n del tubo soplador 15 10 3 Instalaci n de la bater a 15 10 4 Retirada de la bater a 16 11 Funcionamiento 16 11 1 Puesta en marcha de la m quina 16 11 2 Detenci n de la m quina 16 11 3 Pa...

Page 12: ...inflamarse Las herramientas el ctricas generan chispas que pueden encender el polvo o los gases Nunca permita que los ni os utilicen el equipo Nunca permita que utilicen el equipo adultos sin la debi...

Page 13: ...tareas de servicio de la unidad utilizando exclusivamente piezas de repuesto id nticas de BAD BOY Esto prolongar la vida til de la unidad y mantendr la seguridad del producto No modifique ni intente...

Page 14: ...as palas giratorias del rotor pueden producir lesiones graves 8 NIVELES DE RIESGO Las siguientes indicaciones y los significados explican los niveles de riesgo asociados a este producto S MBO LO INDIC...

Page 15: ...uos s lidos urbanos Ll velas a un centro de reciclaje o eliminaci n certificado 10 INSTALACI N 10 1 DESEMBALAJE DE LA M QUINA AVISO Aseg rese de montar correctamente la m quina antes del uso AVISO Si...

Page 16: ...DE LA M QUINA 1 1 Apriete el gatillo 1 para poner en marcha la m quina 2 Apriete el gatillo a fondo para aumentar la velocidad 3 Suelte el gatillo para disminuir la velocidad 11 2 DETENCI N DE LA M Q...

Page 17: ...spiradero ni lo introduzca en disolventes Limpie la carcasa y los componentes de pl stico con un pa o h medo y suave 13 TRANSPORTE Y ALMACENAMIENTO AVISO Retire la bater a de la m quina antes del tran...

Page 18: ...e hayan utilizado para uso personal que no han sido arrendadas o alquiladas para uso industrial comercial y cuyo mantenimiento se ha realizado de acuerdo con las instrucciones del manual del propietar...

Page 19: ...N N pieza Ca nt Descripci n 2 R0201797 0 0 1 Tubo 3 R0201798 0 0 1 Boquilla 19 Espa ol ES...

Page 20: ...badboymowers com P0804437 00 Rev B...

Reviews: