background image

O

PERATION

31

ACCELERATING

1.

Release the brake pedal completely.

2.

Press the accelerator pedal with gradual and steady pressure until the vehicle reaches the desired speed.

BRAKING

When carrying cargo or towing a trailer, the weight of the load will increase the braking 

distance required to slow or stop the vehicle. Not allowing for increased braking dis-

tance under load can cause an accident or injury.

1.

Release the accelerator pedal completely.

2.

Press the brake pedal firmly.

3.

Practice starting and stopping using the brake until you are familiar with the controls.

DRIVING PROCEDURE 

1.

Perform the pre-ride inspection. See page 29.

2.

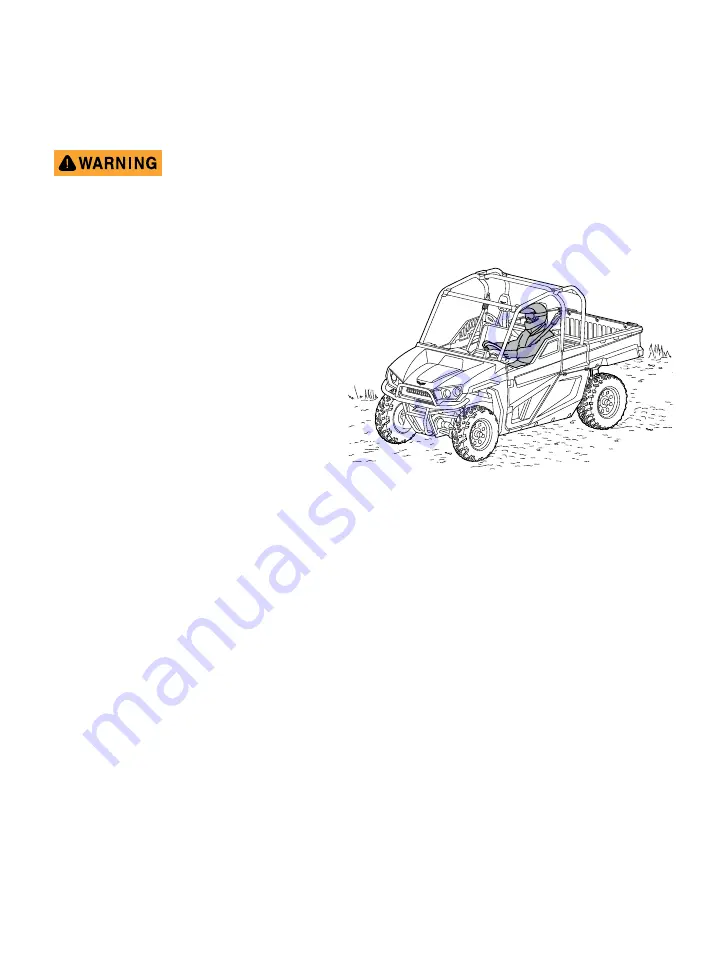
Wear protective riding gear:
• helmet
• eye protection
• gloves
• long-sleeve shirt
• long pants
• over-the-ankle boots

3.

Sit in the driver’s seat and fasten the seat belt. 
Close the door.

4.

Start the engine and allow it to warm up.

5.

Check surroundings and determine the path of 
travel.

6.

Press the brake pedal and shift the transmis-
sion into L (low) or H (high) gear.

7.

With both hands on the steering wheel, release the brake pedal and immediately start to apply gradual and 
steady pressure to the accelerator pedal.

8.

Practice maneuvering the vehicle using the accelerator and brake pedals. Drive slowly and cautiously until you 
are comfortable with the controls.

9.

Do not drive with a passenger until you have at least two hours of experience driving this vehicle.

DRIVING WITH A PASSENGER

• All passengers must be at least 12 years old.
• All passengers must be able to sit with their back against the seat, both feet on the floor and both hands on the pas-

senger hand hold.

• Do not allow more than one passenger in the vehicle.
• Do not allow a passenger to ride anywhere on the vehicle except the passenger seat. 
• Travel at speeds appropriate for your skills, your passenger’s skills and the operating conditions. Avoid unexpected 

or aggressive maneuvers that could cause discomfort or injury to the passenger.

• The handling characteristics can change with the added weight of a passenger. Allow more time and distance for 

braking.

• Follow all operating guidelines as described on the safety labels on the vehicle and in this manual.

1.

Perform the pre-ride inspection. See page 29.

2.

Make sure you and your passenger are wearing protective riding gear:
• helmet

• long-sleeve shirt

• eye protection

• long pants

• gloves

• over-the-ankle boots

3.

Make sure you and your passenger have seat belts correctly fastened.

4.

Close both cab doors.

Summary of Contents for Stampede 4x4

Page 1: ...Owner s Manaul 2017...

Page 2: ...m NOTICE Your BAD BOY OFF ROAD STAMPEDE 900 is equipped with sophisticated exhaust and evaporative emission control systems BAD BOY OFF ROAD has engineered the entire vehicle for optimum per formance...

Page 3: ...out major repairs can be found in the BAD BOY OFF ROAD repair manual Your BAD BOY OFF ROAD dealer has thorough knowledge of your vehicle and wants your total satisfaction with your purchase We recomme...

Page 4: ...e discrepancies may be found between your vehicle and the information presented in this publication The content in this publication is intended for reference use only The manufacturer is not liable fo...

Page 5: ...or Warning P N 642599 13 Passenger Safety Warning P N 645330 13 ROPS Warning P N 643597 13 Clutch Cover Warning P N 643600 13 Shifting Transmission Warning P N 643602 14 Hitch Warning P N 645329 14 SE...

Page 6: ...LL WHEEL DRIVE AWD SWITCH 20 DRIVER INFORMATION CENTER 20 Display Control Pad 20 Adjust Backlight 20 Indicator Lights 21 SELECTABLE DISPLAYS 22 Display 3 MAINT 22 Display 4 SETUP 23 Display 5 CLOCK 24...

Page 7: ...LOADS 36 DUMPING THE TRUCK BED 36 DIFFERENTIAL OPERATION MODES 37 Rear Differential Locking Switch If Equipped 37 All Wheel Drive AWD 37 Two Wheel Drive 2WD 37 WINCH WINCH SAFETY 39 WINCH OPERATION 4...

Page 8: ...l Replacement Lower Chamber 54 SPARK PLUGS 55 Spark Plug Inspection and Replacement 55 COOLING SYSTEM 56 Coolant 56 Reservoir Coolant Level 56 Radiator and Cooling Fan 57 Radiator Coolant Level 57 CON...

Page 9: ...Fog the Engine 67 Storage Area 67 REMOVE FROM STORAGE 67 TRANSPORTING THE STAMPEDE 900 68 SPECIFICATIONS SPECIFICATIONS CHART 69 FAULT TESTING DIAGNOSTICS 71 Display 1 FAULTS Engine 72 Display 2 FAULT...

Page 10: ...Use on public streets roads or highways is illegal in most areas and increases the risk of an accident involving other vehicles and people This vehicle does not meet FMVSS Federal Motor Vehicle Safety...

Page 11: ...tion switch must be replaced The information below is required when ordering parts from BAD BOY OFF ROAD Vehicle Model Number _________________________________________________________________ Frame PI...

Page 12: ...10 INTRODUCTION REPAIR AND PARTS MANUALS The following manuals can be purchased through a BAD BOY OFFROAD dealer repair manual parts manual engine manual...

Page 13: ...ECE 22 05 label attached The ECE mark consists of a circle around the letter E followed by the distin guishing number of the country that has permitted approval The approval number and serial number...

Page 14: ...ntact your BAD BOY OFF ROAD dealer to get a replacement Replace ment safety labels are available at no charge to you The part number is provided in this manual printed on the label or can be provided...

Page 15: ...P N 643600 Located on the clutch cover This ROPS was tested in accordance with the requirements of ISO 3471 per ANSI ROHVA 1 Textron Specialized Vehicles 1451 Marvin Griffin Rd Augusta GA 30906 USA T...

Page 16: ...load weight Do not exceed the maximum weight capacity includes weight of operator passenger cargo and accessories Do not exceed 35 mph 56 kph if the maximum weight load is greater than 600 lbs 272 kg...

Page 17: ...s section of the owner s manual See the OPERATION section of the owner s manual for operating procedures and additional safety information Unauthorized Use This vehicle is for adult use only Any perso...

Page 18: ...e 14 of this manual and also on the label affixed to the truck bed As passenger weight increases cargo weight needs to be adjusted to ensure the maximum vehicle weight capacity is not exceeded Tire pr...

Page 19: ...ost areas prohibit the operation of this vehicle on public streets roads or highways and can result in traffic violations and fines Turning Improper or careless turning can cause loss of traction loss...

Page 20: ...entire route Operators assume all risk associated with frozen bodies of water HOT EXHAUST SYSTEMS Exhaust system components are very hot during and after use To avoid burn injuries do not touch hot e...

Page 21: ...is momentary turn the key until the engine starts then release Engage the starter for no more than five seconds HEADLIGHT SWITCH The headlight switch is a two position or three position switch Two pos...

Page 22: ...ht after service is completed see Diagnostics on page 71 adjust the brightness of the LCD display screen Adjust Backlight Press the up and down buttons on the control pad to brighten and dim the backl...

Page 23: ...cator Bars indicate level of fuel in the tank Last bar flashes when fuel is low 2 Gear Indicator Park Reverse Neutral Low High 15 EPAS Electronic Power Assisted Steering Enabled Indicator Illuminates...

Page 24: ...l pad to scroll through the top level displays Display 3 MAINT NOTICE All options in this menu are editable 1 With MAINT displayed press the RIGHT arrow to enter the mainte nance menu 2 The first disp...

Page 25: ...op level display Display 4 SETUP NOTICE All options in this menu are editable 1 With SETUP displayed press the RIGHT arrow to enter the setup menu 2 Press the UP and DOWN arrows to scroll through the...

Page 26: ...ter edit mode LEFT and RIGHT arrows for input values 00 23 Press OK to select preference Display C allows the minute value to be set Press OK to enter edit mode LEFT and RIGHT arrows for input values...

Page 27: ...ess when the driver s seat belt is not fastened Falling from a moving vehicle could cause serious injury or death All occupants must fasten their seat belts prior to vehicle operation Use the followin...

Page 28: ...up holder that will accommodate two beverage containers PASSENGER HAND HOLD The passenger hand hold is adjustable Remove the pins from the hand hold and slide the hand hold in or out to achieve the mo...

Page 29: ...on the ROPS ROPS Warning P N 643597 on page 13 STORAGE COMPARTMENTS The STAMPEDE 900 has several open storage compartments and a lockable glove box in the dash panel There is also a storage area behi...

Page 30: ...ure the fuel cap is reinstalled after filling the tank Do not operate the vehicle with out the fuel cap correctly installed and tightened The fuel cap is located on the passenger side of the vehicle S...

Page 31: ...erating times at the same engine speed Avoid long operating times with a full load Vary the engine speed during operation Apply quick bursts of acceleration after the engine has warmed up Item Check P...

Page 32: ...or pedal pressed 5 Insert the key and turn it past the ON position to the START position until the engine starts then release Engage the starter for no more than five seconds 6 If the engine does not...

Page 33: ...he accelerator pedal 8 Practice maneuvering the vehicle using the accelerator and brake pedals Drive slowly and cautiously until you are comfortable with the controls 9 Do not drive with a passenger u...

Page 34: ...DRIVE PATH When driving in an area with obstacles such as logs and rocks in the travel path follow these guidelines Check for obstacles before driving in an unfamiliar area Stay alert and continuously...

Page 35: ...nding the hill at an angle that could cause the vehicle to lean sharply to one side Apply light and constant pressure to the brakes to main tain slow speed and control of the vehicle STALLING ON A HIL...

Page 36: ...r ential and all grease fittings DRIVING IN REVERSE When driving in reverse follow these guidelines Check that the area behind the vehicle is clear of obstacles and people Check left and right fields...

Page 37: ...te the vehicle with extra caution Always attach a tow load to the rear hitch of the vehicle Reduce speed and allow greater distances for braking when hauling cargo Heavy loads affect braking and handl...

Page 38: ...15 To extend the CVT belt life use the L low gear to haul or tow heavy cargo DUMPING THE TRUCK BED If the bulk of the cargo weight is at the rear of the bed the bed may unexpectedly dump when the rele...

Page 39: ...ges any time the rear wheels lose traction When the rear wheels regain traction the front differential automatically disengages There is no limit to the length of time the vehicle may remain in AWD On...

Page 40: ...38 OPERATION...

Page 41: ...e winch cable at an angle to the vehicle s centerline whenever possible If winching at an angle is unavoidable follow these precautions Be observant of the winch drum Do not allow the winch cable to s...

Page 42: ...ers into the hook Doing so could lead to severe injury a Attach the hook onto the load or use a tow strap or chain to secure the load to the winch cable Do not use a recovery strap as a tow strap Reco...

Page 43: ...the winch e Slowly winch in cable slack f Shift the stuck vehicle to the lowest gear available g Slowly and carefully press the accelerator pedal and winch together to free the vehicle h Stop winchin...

Page 44: ...winch cable loads that may exceed the strength of the cable Never use the winching vehicle to take up slack in the winch cable by moving the vehicle Never use the winching vehicle to move the object...

Page 45: ...ltered in any way An electronic fuel injection EFI system controls fuel delivery The engine and EFI components are set at the factory for optimal performance and are not adjustable Separate inserts su...

Page 46: ...MY ATVbs IT IS CERTIFIED TO EPA 1 5 g km HC NOx AND 35 0 g km CO PER 1051 107 AND TO CALIFORNIA 1 2 g km HC AND 15 0 g km CO PER 13CCR 2412 EXHAUST EMISSIONS STANDARDS AND MEETS U S EPA AND CALIFORNIA...

Page 47: ...in the MAINTENANCE LOG beginning on page 79 NOTICE Service and adjustments are important for safe and reliable vehicle operation If not familiar with safe service and adjustment procedures have your d...

Page 48: ...ration Replace bulbs as needed 63 Engine oil and filter Initial Service Replace oil and filter between first 12 and 25 hours or 250 miles 402 km 52 D E Valve Lash Initial Service Check and adjust betw...

Page 49: ...See repair manual for replacement Exhaust muffler 100 Yearly Inspect See repair manual for replacement S Front differential oil Replacement Yearly Replace at interval and also after immersion 53 S Rea...

Page 50: ...ble for aluminum engines See page 56 Mixing ratio 50 water 50 coolant Approved coolants Chevron Havoline Coolant Valvoline Zerex Fuel 9 gal 34 L Unleaded 87 octane min 91 92 or 93 octane recommended 1...

Page 51: ...cle from roll ing backward 2 Put a jack under the center of the vehicle frame at the differential mounting plate 3 Raise the vehicle with the jack 4 Install a jack stand under each side of the vehicle...

Page 52: ...ng from the underside of the truck bed requires two people One person needs to hold the bed to keep it from falling while the second person removes the cotter and clevis pins The truck bed unexpectedl...

Page 53: ...oil level when the engine is warm 1 Start the engine and let it to run until it is warm 2 Turn off the engine Wear protective gloves to prevent scalding from hot engine oil 3 Remove the dipstick from...

Page 54: ...Removing this fuse will interrupt the power supply circuit to the ignition coil injectors and O2 sensor so that the engine will turn over without start ing e Turn the key to activate the starter and l...

Page 55: ...page 71 7 Clear the trouble codes See Diagnostics on page 71 8 Test drive the vehicle and check for oil leaks FRONT DIFFERENTIAL Check and replace the front differential oil at the intervals indi cate...

Page 56: ...or until the oil level is 3 8 1 2 in 10 to 13 mm below the bottom of the fill hole See RECOMMENDED LUBRICANTS AND FLUIDS on page 48 for type and capacity 5 Install the fill plug Rear Differential Oil...

Page 57: ...ment Remove the spark plugs when the engine is cold 1 Disconnect the engine from the power supply 2 Disconnect the wire harness connectors from the ignition coils 3 Remove the bolts 4 Pull straight up...

Page 58: ...tighten to 5 9 7 4 ft lb 8 10 Nm 12 Reconnect the wire harness to the ignition coils 13 Reconnect the power supply to the engine 14 Clear the service counter for the service light See Diagnostics on...

Page 59: ...EDULED MAINTENANCE CHART on page 46 NOTICE Do not use a high pressure hose to wash the vehicle Water from a high pressure hose could dam age the radiator fins and impair radiator function Radiator Coo...

Page 60: ...more than five seconds at a time 8 Allow the engine to settle to idle speed 9 Apply the brakes 10 Move the gear shifter to L low range 11 Test for belt slippage If the belt slips repeat the process 1...

Page 61: ...the air filter housing that is located below the driver s seat 2 Unlatch the cover to access the air filter cartridge 3 Remove the filter from the housing 4 Inspect and replace if needed NOTICE A ligh...

Page 62: ...or brake fluid replace ment or refer to the STAMPEDE 900 repair manual 1 Park the vehicle on a level surface 2 Check the brake fluid level at the reservoir The fluid level should be between the upper...

Page 63: ...pre load to the left to decrease spring pre load TIRES Follow the tire maintenance procedures as instructed in this manual and on the labels on the vehicle Always use approved size and type of replace...

Page 64: ...WHEELS Worn improperly inflated improper sized or incorrectly installed tires will affect vehicle handling and could cause an accident resulting in severe injury or death Check lug nuts for tightness...

Page 65: ...ke sure the headlights are adjusted properly Do not operate this vehicle at night or in low light if any bulbs are burned out Poor light ing reduces visibility that could cause an accident resulting i...

Page 66: ...adjusted Brake Light Pressing the brake pedal activates the brake light Check the function of brake light before each operation 1 Turn the key to the ON position 2 Press the brake pedal to activate t...

Page 67: ...sories can drain the battery and leave insufficient charge to start the vehicle The sealed battery is a 12 V starter battery that supplies power to the starter and accessories A starter starts the eng...

Page 68: ...commend the use of a pressure washer High pressure water can damage compo nents chip paint and remove labels If the use of a pressure washer cannot be avoided avoid directing the water stream at the f...

Page 69: ...6 Add 1 oz 25 ml of engine oil to each cylinder through the spark plug hole 7 Reinstall the spark plugs Recommended spark plug Champion RC7PYCBX 8 Leave the ignition coils disconnected and disconnect...

Page 70: ...1 Drive the vehicle onto the trailer or truck 2 Press the brake pedal 3 Move the gear shifter to P park 4 Turn the engine off 5 Make sure the fuel cap is tight and the cowl access panel and cargo box...

Page 71: ...cm x 30 cm Ground Clearance no load 11 25 in 28 6 cm Cargo Box Load Capacity 600 lbs 272 kg Extended Cab L x W 17 in x 49 5 in 43 cm x 126 cm Extended Cab Load Capacity 170 lbs 77 cm Towing Capacity r...

Page 72: ...front 26 x 9 14 Off road performance Tire Size standard rear 26 x 11 14 Off road performance Tire Size optional front 27 x 9 14 Off road performance Tire Size optional rear 27 x 11 14 Off road perform...

Page 73: ...codes should be used in conjunction with the STAMPEDE 900 repair manual to identify which systems circuits or components should be tested to fully diagnose the fault NOTICE A complete list of codes c...

Page 74: ...uired Display B indicates a historical HIST on right trouble code Display C indicates an active ACTI on right trouble code 3 Press DOWN to scroll through additional trouble codes if there are any CLEA...

Page 75: ...T on right trouble code Display C indicates an active ACTI on right trouble code Display D indicates vehicle not EPAS equipped or the EPAS is disabled 3 Press DOWN to scroll through additional trouble...

Page 76: ...ssive acceleration can cause loss of control and vehicle rollover Belt slippage from water or snow ingestion into the CVT system Dry out the CVT See Draining the CVT on page 58 Inspect the clutch seal...

Page 77: ...or replace the battery Mechanical failure See your BAD BOY OFF ROAD dealer Defective fuse Check fuses Possible Cause Solution Out of fuel Refuel Low oil pressure Check and add oil Possible Cause Solut...

Page 78: ...connections Check all connections and tighten Water in fuel Replace with fresh recommended fuel Low battery voltage or defective battery Recharge or replace the battery Kinked or plugged fuel tank ven...

Page 79: ...Incorrect fuel Replace with fresh recommended fuel Clogged air filter Inspect and clean or replace Other mechanical failure See your BAD BOY OFF ROAD dealer Overheated engine Allow engine to cool Che...

Page 80: ...78 FAULT TESTING...

Page 81: ...MAINTENANCE LOG 79 MAINTENANCE LOG Record periodic maintenance in the following maintenance log DATE MILES KM AND HOURS TECHNICIAN SERVICE PERFORMED COMMENTS...

Page 82: ...80 MAINTENANCE LOG DATE MILES KM AND HOURS TECHNICIAN SERVICE PERFORMED COMMENTS...

Page 83: ...MAINTENANCE LOG 81 DATE MILES KM AND HOURS TECHNICIAN SERVICE PERFORMED COMMENTS...

Page 84: ...82 MAINTENANCE LOG DATE MILES KM AND HOURS TECHNICIAN SERVICE PERFORMED COMMENTS...

Page 85: ...MAINTENANCE LOG 83 DATE MILES KM AND HOURS TECHNICIAN SERVICE PERFORMED COMMENTS...

Page 86: ...84 MAINTENANCE LOG...

Page 87: ...ity 48 check level 56 recommended 48 cup holder 26 CVT belt break in 30 D dash see console diagnostics engine 72 EPAS 73 differential AWD 37 front 53 operation modes 37 rear 54 two wheel drive 37 disp...

Page 88: ...48 recommended fluids and lubricants 48 scheduled 45 winch 42 maintenance reminder clear 23 reset 22 N noise control 8 O obstacles driving over 32 oil filter 52 oil filter replacement part number 48...

Page 89: ...AWD 20 37 headlight 19 key 19 rear differential lock 20 37 T tires 61 pressure 14 repair 62 replacement 62 tread depth limit 61 towing capacity 36 speeds 36 trailer load capacity 36 transmission shift...

Page 90: ...88 INDEX...

Page 91: ......

Page 92: ...To locate your nearest dealer call 1 888 438 3946 or visit www badboyoffroad com Textron Specialized Vehicles 1451 Marvin Griffin Rd Augusta GA 30906 USA 647693 Printed in USA...

Reviews: