Page 32
4-11
Model M-2000 Mag Meter
Measurements
Low Flow Cutoff
[0.2%]
U
Low flow cutoff defines the threshold at which flow measurement will be forced to zero. The cutoff
value can be set from 0% to 10% of the full scale flow. Increasing this threshold will help prevent false
readings during “no flow” conditions possibly caused by pipe vibration or inherent system noise.
To change the Low Flow Cutoff value, follow these steps from the
Measurements menu
:
1. Select
Low Flow Cutoff
to view the Low Flow Cutoff display.
2. Set the low flow cutoff value to the desired setting.
3. Press
[E]
to save the new low flow cutoff value.
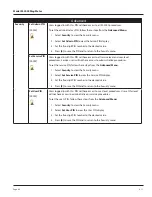
Flow Direction
[Bi-Directional]
U
Flow direction lets you set the meter to measure forward flow only (uni-directional) or both forward and
reverse flow (bi-directional).
Uni-Directional
Flow is totalized in only one direction. The flow direction is indicated by the arrow printed on the
detector label. Uni-directional measurements on the main display screen include:
•
T1: Registers forward flow, resettable by menu or Modbus RTU
•
T2: Registers forward flow, resettable by menu, Modbus RTU, or digital input configured for Remote
Reset
Bi-Directional
Flow is totalized in both directions. Bi-directional measurements on the main display screen include:
•
T+: Registers forward flow, resettable by menu or Modbus RTU
•
T-: Registers reverse flow, resettable by menu or Modbus RTU
•
TN: Registers total flow, T+ - T-, resettable by menu or Modbus RTU
To change the flow direction follow these steps from the
Measurements menu
:
1. Select
Flow Direction
to view the Flow Direction display.
2. Select
Uni-Directional
or
Bi-Directional
.
3. Press
[E]
to save the flow direction and return to the Measurements menu.
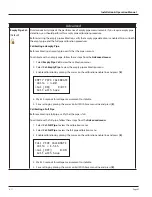
Damping Factor
[No Damping]
U
The damping factor establishes the stability of the measured flow rate. If back and forth oscillations of
the flow rate are observed during normal flow conditions, increase this value incrementally until the
flow rate stabilizes. This parameter has no affect on the totalizers.
To change the Damping Factor value, follow these steps from the
Measurements menu
:
1. Select
Damping Factor
to view the Damping Factor display.
2. Select one of the following damping factors:
1 Second
10 Seconds
2 Seconds
20 Seconds
3 Seconds
30 Seconds
4 Seconds
No Dampening
5 Seconds
3. Press
[E]
to save the damping factor and return to the Measurements menu.


