14
3
Verify Basic Operation
Before
installing the Neutrino eNodeB (eNB), especially if placing it on a ceiling or wall, you
should check that:
•
You have all of the parts on the packing list;
•
You have the standard tools at hand to perform the installation; and
•
The eNB unit will power on successfully.
This section walks you through the steps of verifying that the Neutrino eNB is operational
and ready for installation.
3.1 Connect Power Cable
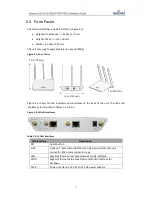
Refer to Figure 3-1 to connect power to the eNB. Connect the power adaptor to the power
(PWR) port on the unit, and plug the other end into an AC power outlet.
Figure 3-1: LEDs & Interfaces
3.2 Power On
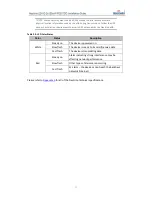
Power on the Neutrino eNB. The PWR LED should light up with a steady white light, as
described in
Table 2-3
above. The other LEDs will not activate or may display alarm status pre-
installation. You will be checking those LEDs later in the process once the installation and basic
configuration steps are completed.
If the eNB does not power on or the PWR LED is not lit up, please verify that the connection
setup is correct. Otherwise, contact your supplier immediately for a replacement.
Summary of Contents for Neutrino-224
Page 1: ...Neutrino 224 Indoor 2x125mW FDD TDD eNodeB Installation Guide December 2018 Version 1 7...
Page 20: ...20 Figure 4 7 FDD eNB GUI Home Page Figure 4 8 TDD eNB GUI Home Page...
Page 47: ...47 Figure 5 24 LTE Neigh Freq Settings 1 of 2 Figure 5 25 LTE Neigh Freq Settings 2 of 2...
Page 64: ...64 Figure 5 38 Cell ReSelection Parameter Figure 5 39 Additional Measurement Parameter...


