39
39
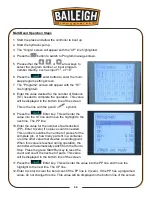
X AXIS TEACH IN
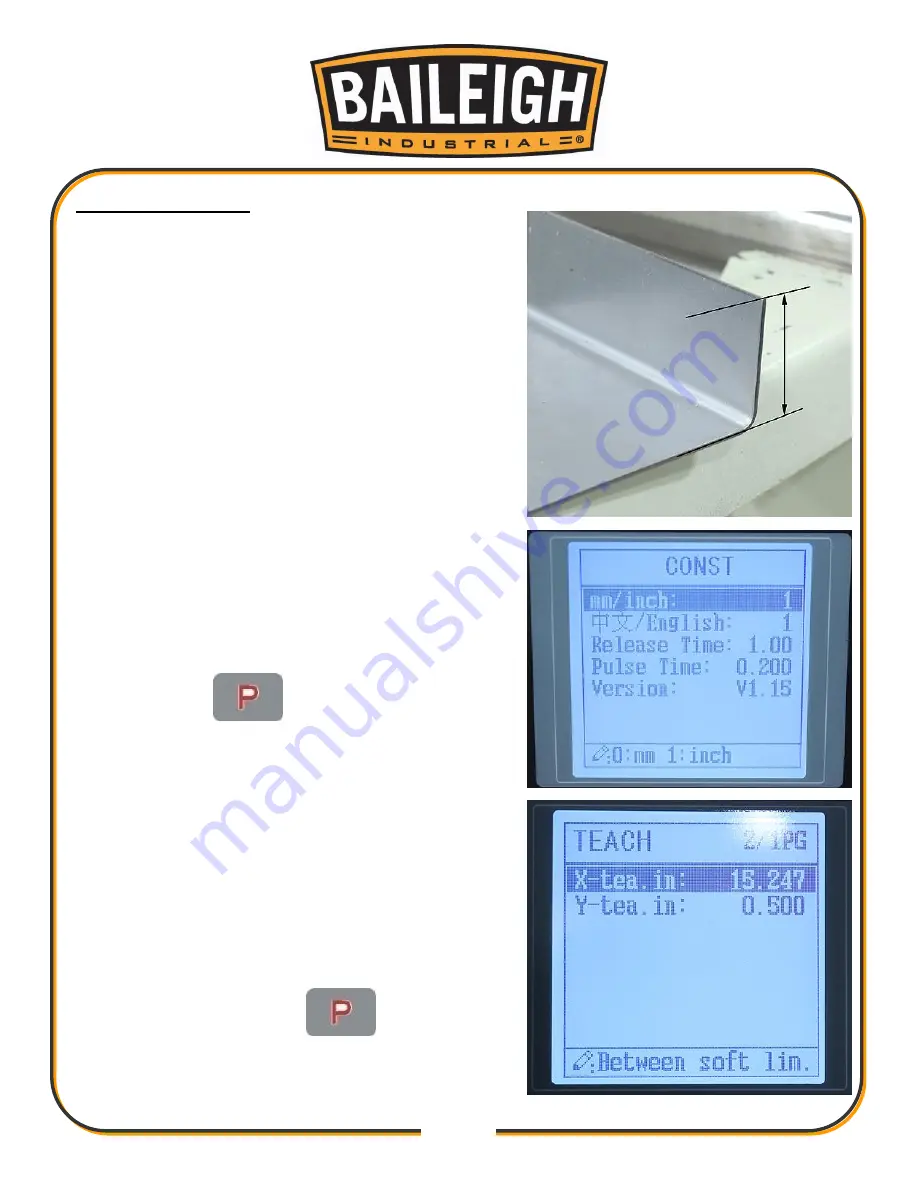
The X axis teach in is used to calibrate the exact
position of the X axis (back gauge) at the specific time
it is being measured. This calibration is done by
bending a piece of material and then measuring the
length of the material from the edge of the material
that contacted the stop fingers to the bend radius. It is
generally easier if the bend is between 85
º
and 95
º
,
24
” wide, and the bend length at least 2”.
1. Adjust the width of the back gauge stop fingers so
that the test material will contact both fingers
evenly.
2. From the Single Parameter screen, set the XP
number to be 2
”.
3. Bend the test piece of material.
4. Measure the length of the bend from the edge of
the material that contacted the stop finger to the
center of the material. This is the Actual X position.
5. Press the Red Stop key on the controller to return
to the programing screen.
6. Pressing the
key to toggle the screen to
the “CONST” programming screens. The “CONST”
screen is a reference screen. DO NOT make
changes on this screen. This is also an access
screen to deeper parameter settings.
7. Key in the access code of 1212 to enter the
“Teach In” screen.
8. Verify that the
“X-tea. In:” line is highlighted.
9. Enter the measured Actual value into the controller
and press enter to set the Teach In value for X.
The smallest value that may be programmed in for
this setting is 0.30.
10. Once entered, press the
key to return to
the Single screen. The X axis is calibrated.
Summary of Contents for BP-3305CNC
Page 3: ...Back Gauge Adjustment 48 BEND TONNAGE CHART 50...
Page 17: ...14 14...
Page 21: ...18 18 GETTING TO KNOW YOUR MACHINE A B M L K D C E F G I H J I G...
Page 22: ...19 19 N S T U X V O Q P R W...
Page 44: ...41 41 INCLUDED LOWER AND UPPER TOOLING Lower Tool Die Upper Tool Punch...
Page 54: ...51 51 NOTES...
Page 55: ...52 52 NOTES...


