43
43
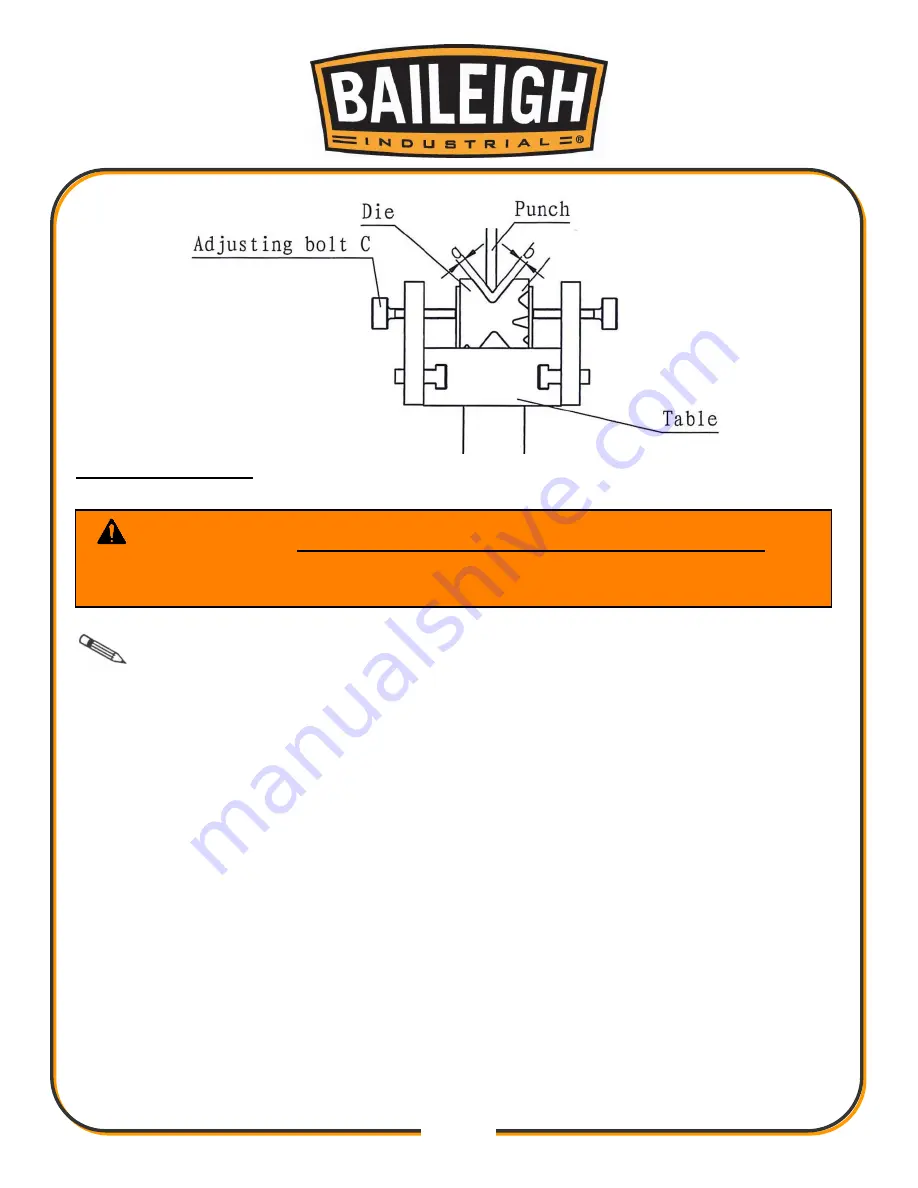
Replacing Lower Die
Note: Never install or use dies that are cracked, chipped, or otherwise damaged.
Make sure dies are the correct size and type to reduce the risk of overload.
1. If the ram is not already in the full up position (TDP); start the machine and place in INCH
mode and raise the ram.
2. Loosen the four adjusting bolts (C) which secure the die to the bolster.
3. Slide the die out. Make sure there is adequate clearance around the machine to safely
remove and replace the die.
4. Carefully slide in the new die.
5. Start the machine in INCH mode and slowly lower the top die gently into the selected V-
groove of the bottom die to position it.
6. When the ram is near the lower die, check if the clearance "a" and "b" is equal within the
whole length. If not, use the adjusting bolt (C) to adjust the lower die. Make the clearance "a"
and "b" is equal within the whole length.
7. When aligned, tighten the clamps (C) EVENLY and securely.
8. Check the adjusting bolts (C) regularly to ensure they are tight.
WARNING:
Always keep hands and fingers from between the dies.
The dies supplied with the press are heavy. Have an assistant and a suitable lifting
device available. DO NOT try and remove by yourself.
Summary of Contents for BP-3305CNC
Page 3: ...Back Gauge Adjustment 48 BEND TONNAGE CHART 50...
Page 17: ...14 14...
Page 21: ...18 18 GETTING TO KNOW YOUR MACHINE A B M L K D C E F G I H J I G...
Page 22: ...19 19 N S T U X V O Q P R W...
Page 44: ...41 41 INCLUDED LOWER AND UPPER TOOLING Lower Tool Die Upper Tool Punch...
Page 54: ...51 51 NOTES...
Page 55: ...52 52 NOTES...


